
$20 MR16 Cree Emitter LED Light for 6V or 12V Dynamo Systems
Written by Steven Scharf, B.L.E.
11 January 2013
Non-Commercial Site. Nothing is Sold on this Site.
Questions, Comments, Complaints, Suggestions? Click Here to Send Mail to Webmaster
I used to be unenthusiastic about both dynamo powered lights and LED bicycle lights. Things change. The development of much higher power LED emitters, the production of higher power LED lamps with integrated heat sinks and electronics, and the increasing availability of hub dynamos changed my view. I am not alone. Until very recently, dynamo powered bicycle lighting was viewed by all the experts as inadequate for use in the type of commuting and night riding typically done in the U.S.. Unlike the Netherlands, where commuting is at low speed, usually in dedicated bicycle lanes (with bicycle-aware drivers), bicycle commuting in other countries (including the U.S.) is done at relatively high speeds and on roads shared with motor vehicles; in this environment, the old 2.4-3W incandescent lamps used with dynamos were woefully inadequate (though at least better than nothing).
There are some 12V/500mA/6W dynamos that provide sufficient power for incandescent commute lights but the only good one, from Germany, sells for about $300! As a result, it's very rare to see a bicycle commuter in the U.S. using anything other than powerful battery powered lights. One U.S. distributor, Peter White Cycles, supplies most of the high-end dynamo systems in the U.S., and because of low volumes these systems are often very expensive. However lately there have been many new entrants into the hub dynamo market and prices are coming down. Complete wheels with a Shimano hub dynamo are available for well under $100. Unfortunately, high-end LED bicycle lights are still pretty costly. This web site shows how to construct a very good LED lamp for use with a dynamo for around $20. Another good source for dynamo systems is Yellow Jersey.
Of course if you're not interested in a dynamo, you can power an MR16 LED lamp with a variety of rechargeable batteries, including a 12 volt sealed lead acid battery, a 10.8V or 14.4V Li-Ion pack, or ten NiMH cells. A 12V 1.3AH 15.6WH SLA battery costs $10, and would power a 4W MR16 lamp for about 3 hours before needing to be recharged and of course larger SLA batteries are available for longer duration.
I have received good feedback to this site, and several respondents stated that they had constructed similar headlights for use with dynamos.
It's also encouraging to see several new hub dynamos that have the ability to uncouple the dynamo mechanism when lights are not in use. The drag losses of a hub dynamo when lights are off are not huge, but they are not insignificant either. Tern, the new folding bicycle company started by Josh Hon, the son of Dahon's founder David Hon, showed a bicycle with one of these new hubs at Interbike in 2011 (see http://www.ternbicycles.com/bikes/eclipse-s11i).
Despite falling prices and increased availability, the fact remains that for most riders a high power 2-4AA LED flashlight with three modes (high, low, strobe) provides excellent visibility with a good beam for cycling for around $20. Until hub dynamos are standard at the bicycle factory, rather than being a pricey add-on, battery powered lights will continue to be the most common lights in the U.S..
Incandescent MR16 and MR11 quartz-halogen lamps were very popular choices for bicycle lights before LED lamps became popular. The exceptionally good optics, wide variety of beam patterns and color temperatures, 12 volt operation, wide-availability, and low cost were the principle reasons for their popularity.
MR series lamps were never able to be used with 6 volt dynamo lights because the lowest wattage available for the incandescent quartz-halogen lamps was 10W (though you could find a 5 watt version if you really tried hard). Since a dynamo puts out about 500mA at around 6VAC (3 watts) you had to use less efficient lamps with separate reflectors (in reality a 3 watt dynamo can put out at least 4 watts at higher speeds before the magnetics saturate). Most commuters in the U.S. have avoided dynamo systems, or supplemented dynamo lights with safer, more powerful lights, because the incandescent dynamo lights did not supply sufficient light for riding at a reasonably fast speed. You'll rarely find a dynamo system for sale in a bicycle shop in the U.S. (though a few commute bicycles such as the Uptown from Joe Breeze are sold with hub dynamo systems). With the present LED emitter technology, it’s possible to move back to a self-contained model in many cases (though dynamo powered lights will never be as powerful as battery powered lights).
Now LED versions of the MR series of lamps are available and it’s possible to operate them from a standard 6VAC dynamo if you’re riding at a reasonable pace.
There are several advantages of MR16 LED lamps for bicycle lighting in general, and dynamo lighting in particular:
There are some disadvantages as well:
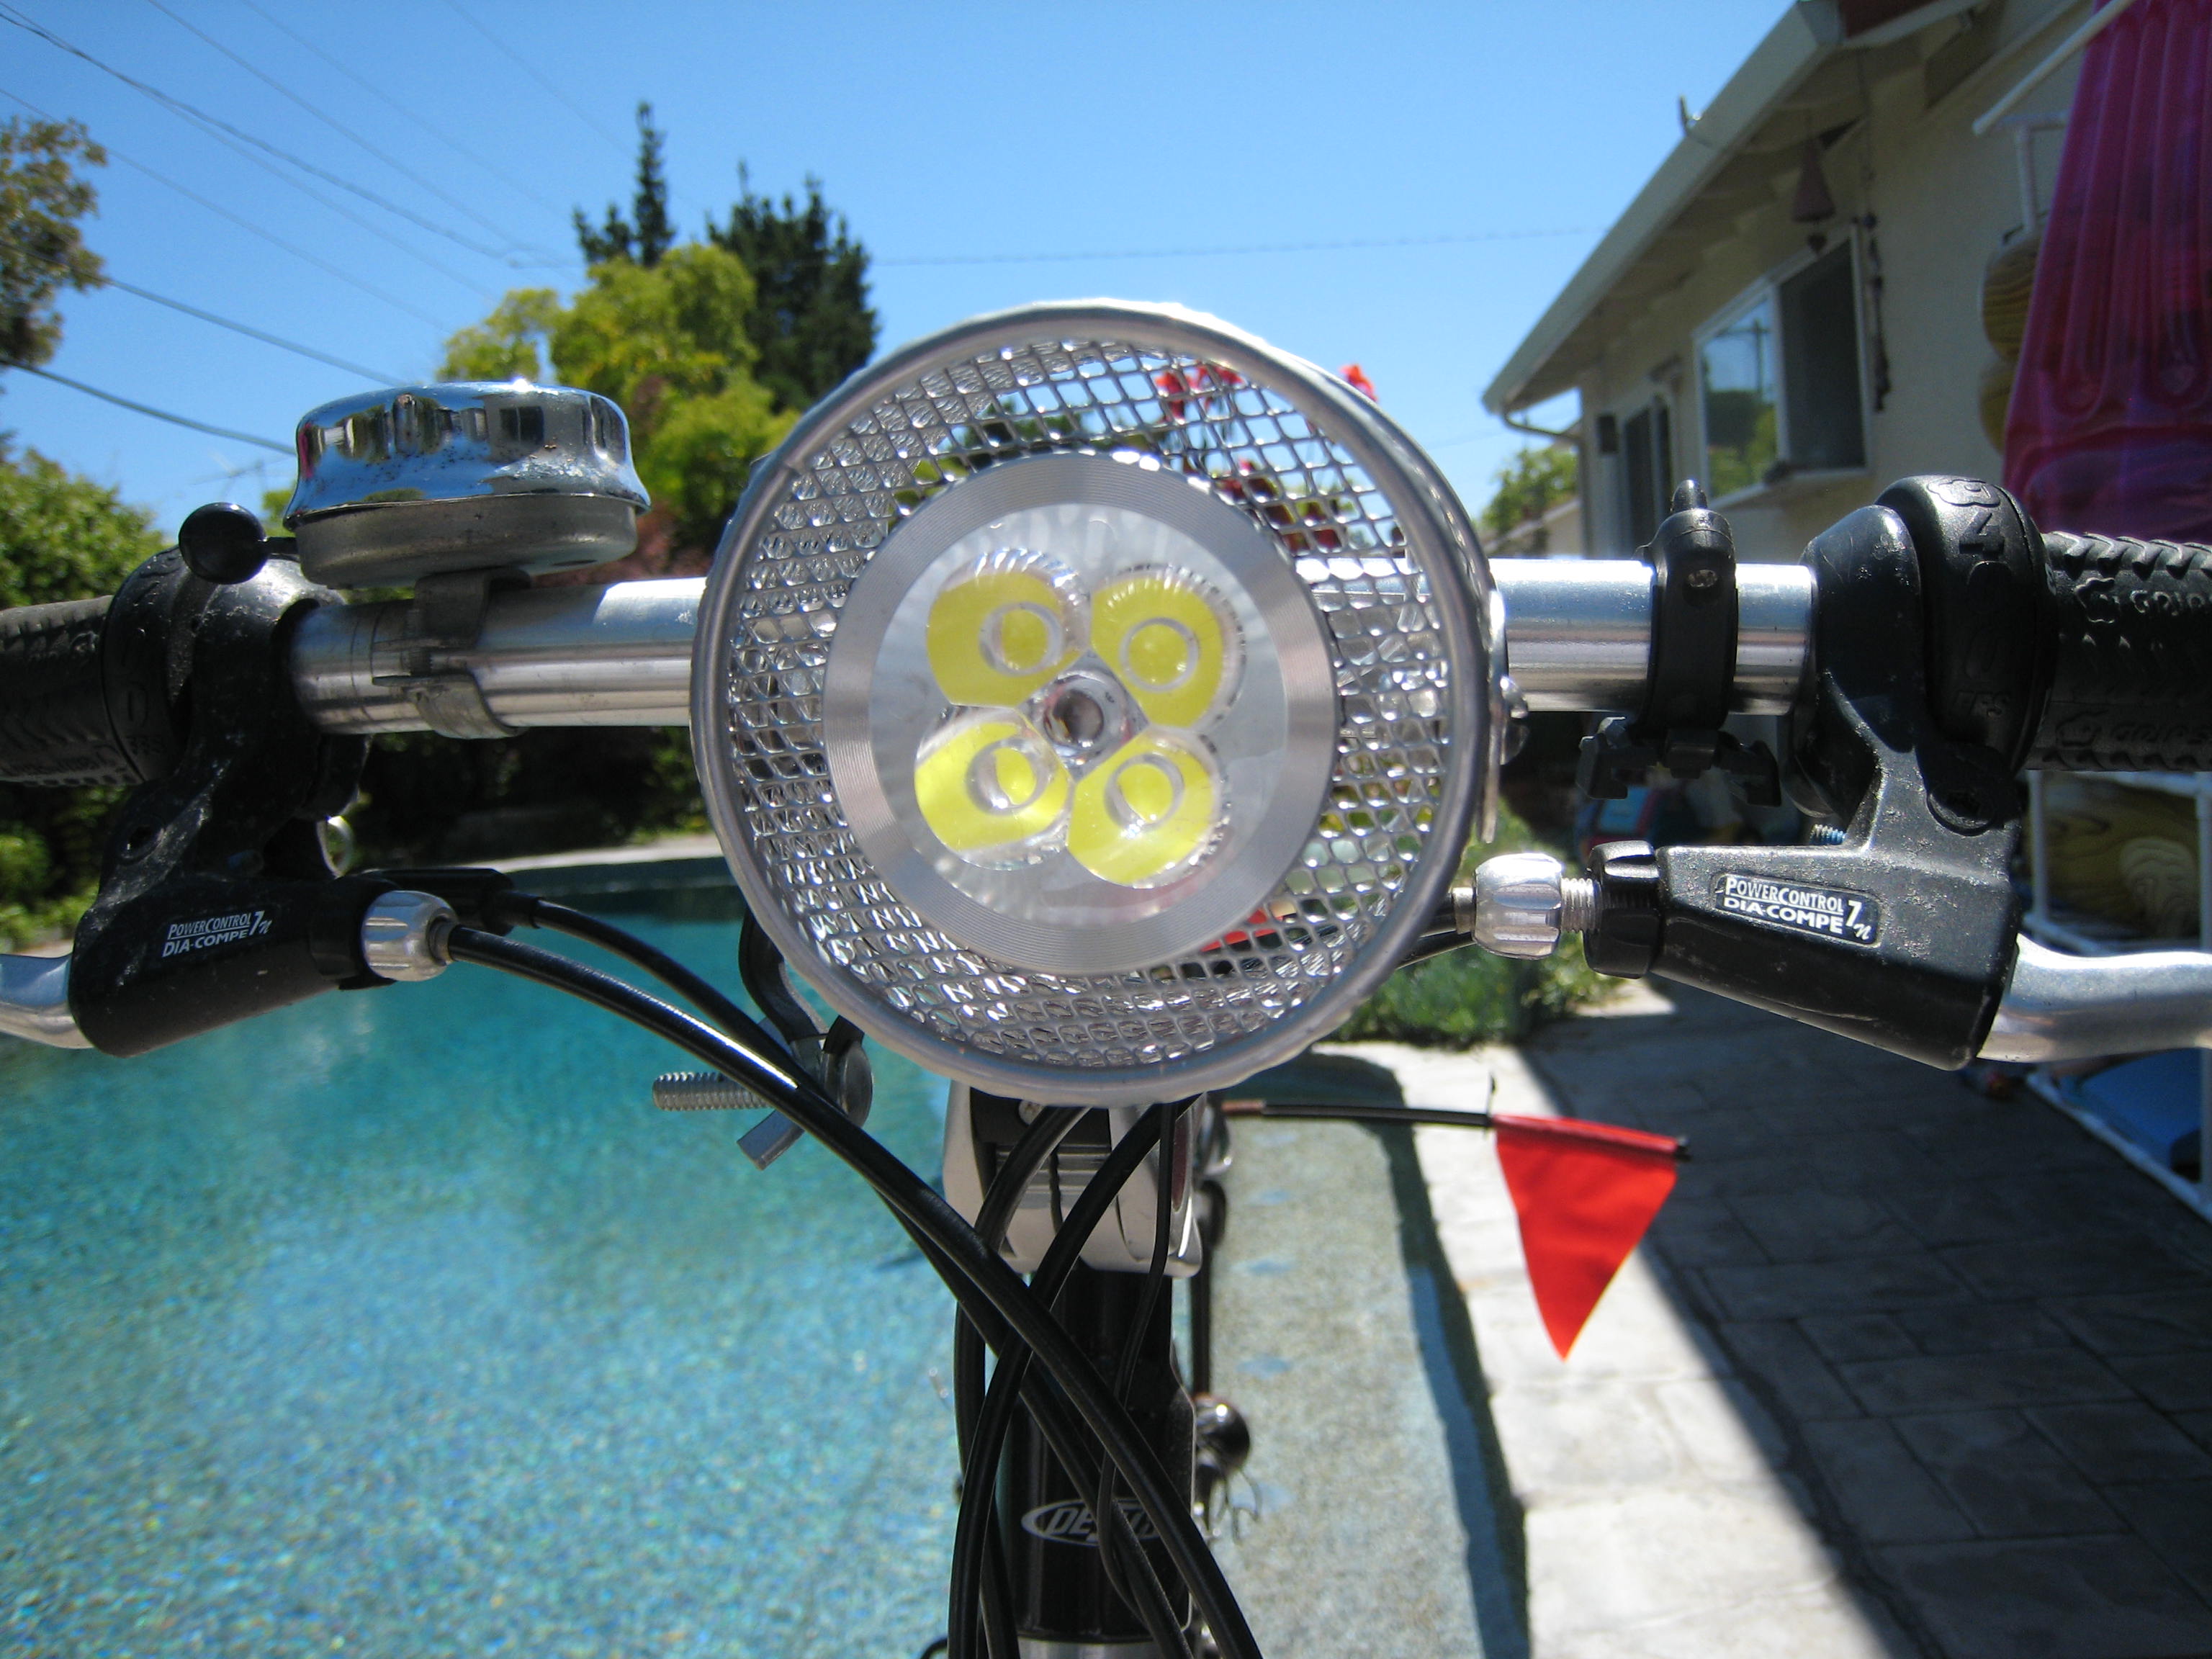
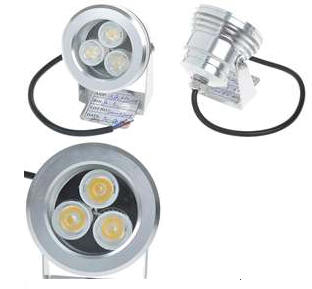
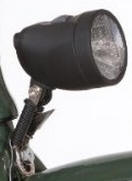
There are many choices in MR16 LED lamps. I first tried a 4 x 1W Cree LED lamp (pictured in the completed system). It worked fine, but it also had some issues. The heat sink was finned and was not solid so light shone out between the fins which was annoying. The beam pattern was a bit too wide. I switched to a 3 x 1W Cree LED lamp with a solid heat sink and a slightly narrower beam pattern.
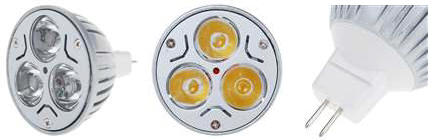
Figure 1: 3 x 1W Cree LED Emitter in an MR16 Lamp with Micro Lenses and Reflectors and Integrated Heat Sink
With an MR16 you have precision matched lenses and reflectors, a proper heat sink connected to the LED semiconductor junction, a sealed waterproof enclosure, and a beam that is as close to ideal as you're going to find. You also have a choice of beam angles to suit your personal preference. Maybe you're a very high speed rider that doesn't want to outrun their lights and you're willing to sacrifice beam spread for beam distance; you can choose a narrow beam MR16. If you're a commuter riding at moderate speeds of 10-20MPH then a wider spread is a better choice.
The problem with many commercial bicycle lights (actually most commercial bicycle lights) is that they lack the proper lenses and reflectors. In the days of low power incandescent bicycle lamps, powered by either a dynamo or batteries, there was a big effort by headlight designers to focus the relatively limited amount of light onto the patch of road directly in front of the bicycle. Unfortunately, many headlight designers failed to get the memo that with high power LEDs they now have sufficient light to properly illuminate not only that patch of road, but off to sides and high enough for the cyclist to be able to perform ridiculous tasks such as reading street signs.
You'll still occasionally see uninformed people insisting that a bicycle light must have a precise beam focused directly on the road down in front of the rider, and that anything else is simply "wasting" light by illuminating the sky above, and the bushes to the side of, the road. This idea may have had some merit in the previous century, but it has no merit now.
The fact is that you're much better off with most high power LED flashlights than you are with a much more expensive battery powered bicycle specific light, and for dynamo lights you're much better off connecting an MR16 to your dynamo than most commercial LED dynamo lamps.
One big advantage of the MR series of LED lamps for use with bicycle lighting is that they will work on AC or DC. This is because the MR lamps need to be able to operate on AC because track lighting fixtures provide only AC. The LED MR series lamps have a built-in bridge rectifier and will operate on the AC current that a dynamo provides (in fact when you operate them on DC there is slight loss in efficiency because of the diode drops of the bridge rectifier).
Some people have connected loose LEDs to a dynamo without a rectifier, but these operate only 50% of the time and the LED is reverse biased the other 50% of the time which is very bad for it (unless you use two LEDs in an inverse parallel configuration as in figure 2a). The other problem with loose LEDs is that they lack the precision reflectors and lenses built into the MR lamps, and when you're dealing with low power lights it's important to have good reflectors and lenses. For a standlight, the four diodes in an inverse parallel configuration would work if the dynamo were disconnected and the array connected to DC, with two of the LEDs turning on.
A bicycle dynamo is rated at 6V RMS, which is about 8.5V peak. If you rectify the 8.5V peak voltage you end up with 8.5VDC. However the faster you go the higher the voltage. It's very possible to have 50% higher voltage than the voltage that the dynamo is rated for.
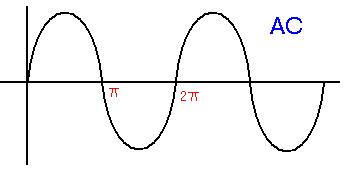
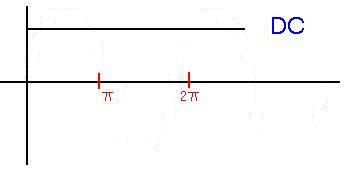
Figure 2a: AC to DC conversion (a capacitor is needed to get pure DC)
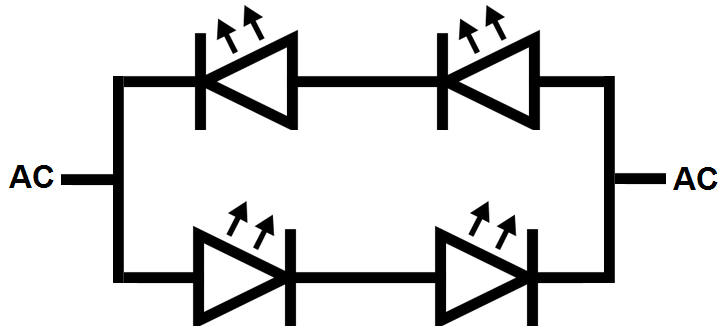
Figure 2b: Inverse Parallel Connection of Four LEDs
A tire driven dynamo, such as a Basta dynamo, will put out 8VAC (rms)/500mA (4 watts) at a reasonable speed. The bridge rectifier inside the MR LED lamp will convert the 8VAC to about 11VDC, enough to power an MR series LED lamp. A hub dynamo is even better. What many people don’t realize is that a bicycle dynamo is essentially a constant current source, with the voltage going well above 6V. This is why 6V incandescent lamps used on unregulated dynamo systems will burn out unless they are protected with a zener diode (which reduces efficiency). There are also 12VAC/500mA dynamos available that will put out about double what the 6VAC/500mA dynamo can put out.
MR16 LED lamps are available in 8-12V and 12-36V models. For maximum illumination choose a 12V dynamo and 12-36V lamp such as SKU 42329 from DealExtreme, and use a 12 volt dynamo. However if you're using a hub dynamo or bottom bracket dynamo, those are only available in 6V/500mA models.
Remember, dynamos put out unregulated AC. The faster you ride, the higher the voltage. With a 6V dynamo you could get up to 9V and with a 12V dynamo you could get up to 18V. While LED lamps are more tolerant of over-voltage than incandescent lamps, you should buy appropriately voltage-rated lamps.
The biggest concern with LED lamps is the large amount of heat that they generate at the semiconductor junction. You’ll notice that high power LED lamps invariably have large finned heat sinks and get very hot. LED flashlights are almost always made out of steel or aluminum, not plastic. You do not want to install an LED lamp in a way that blocks the air-flow over the heat sink. To some people it's counter-intuitive that an LED will generate so much heat because they're used to small indicator lamp type LEDs, not high-power LEDs used for real lighting. I recall one non-technical person "explaining" that LEDs were much better than incandescent lamps because they lack a "white-hot filament." What he didn't understand is that the white hot filament was replaced by a very hot semiconductor junction with a high TJ that needed to be managed (TJ stands for "junction temperature"). On incandescent lamps, most of the heat is radiated out with the light, while on LEDs, the heat is concentrated on the semiconductor junction and needs to be gotten rid of through an aluminum heat sink.
One of the biggest advantages of using MR16 lamps is that they have an integrated high-efficiency heat sink so no crude homebrew thermal management system is necessary. Forget about putting an MR series LED lamp into an enclosure intended for a quartz-halogen MR series lamp, especially sealed enclosures as were used for bicycle lights that used incandescent MR series lamps. Avoid the temptation to stick the MR series lamp into a piece of PVC pipe. You need to allow for plenty of passive cooling. Fortunately, for a dynamo system, the faster you ride the hotter the LEDs get, but the more airflow you get as well. If you look at most homebrew LED lights, you'll notice crudely made thermal solutions made from aluminum with crude connections from the LED emitter to the heat sink. This is not necessary with MR series LED lamps.
Often a 4W LED lamp will be comprised of three or four 1W LEDs. While three or four 1W LEDs provide less light than a single 3W or 4W LED (due to the difficulty of collimating four LEDs into one beam) the advantage is that each LED is generating only 1/3 or 1/4 the heat, and there are three or four connections to the semiconductor junction rather than just one.

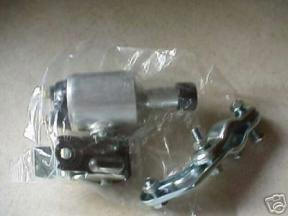
Don’t run down to Home Depot or Lowe’s and pay $25-30 for a single lamp, order an MR16 from DealExtreme.com and order a ceramic socket while you’re at it (total cost about $11, including shipping). There are many choices. You can buy a 4W lamp (quad 1W) , 3W lamp (triple 1W) or a lamp with a single higher power LED. Another source is in Australia, http://www.ledshoponline.com/ledlowvoltagebulbs.htm. DealExtreme does not provide any information as to the beam spread of each lamp they sell, but sometimes users have reported this information in reviews of the lamps. IMVAIO, a 30-40 degree spread is ideal, and a 50 degree spread is good, but avoid narrower or wider beams. Remember that if you're using a 12V dynamo then you want to buy a lamp rated 12-36V.

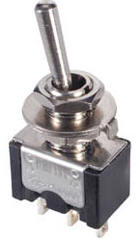
If you want something even simpler, but a bit more expensive, look at http://www.dealextreme.com/details.dx/sku.47572. It's already mounted in a swivel bracket with a wire attached, and it's waterproof. They say it's "Flood" which in MR16 language means 35-40 degrees which would be ideal. No switch, so if used with a hub-dynamo you'll need some sort of in-line switch. You could also drill a small hole in the bracket and mount a sub-miniature toggle switch such as http://www.allelectronics.com/make-a-store/item/SMTS-4/SPDT-ON-ON-SUB-MIN-TOGGLE-SWITCH//1.html but that switch is not waterproof.
Choosing a beam pattern is important. Too narrow a beam and you aren't illuminating anything but a patch of road in front of the bicycle (a common problem with incandescent dynamo lights). Too wide of a beam and you're illuminating buildings far away from the road. Ideally choose a 30 to 40 degree pattern for road riding (Narrow Flood or Flood). Less than 25 degrees is too narrow and you don't want to go beyond 50 degrees. Definitely avoid the 120 degree "very wide flood" patterns. 35 degrees is ideal. The lamp I bought is about 50 degrees and a little too wide of a beam pattern, and next time I order from DealExtreme I'll get something else--or maybe not since it really works just fine. Sometimes MR beam patterns are described with words and acronyms rather than degrees, as follows.
Figure 3: Beam Angles
I built an MR16 enclosure from a wire mesh doo-dad cup that I bought for $1.50 from Daiso, a Japanese dollar store that has stores in some western U.S. areas (similar cups are sold at office supply stores). They are available in silver or black. I used a pair of diagonal cutters (dikes) to trim a hole that the MR16 press fits into, but even though it seems like a tight fit you must either epoxy the lamp to the enclosure or use some sort of clips (the lamp will pop out if you hit a bump or the bicycle falls over). This method allows plenty of air-flow around the lamp and protects the lamp from being banged around. Since the lamp is sealed, water cannot get in. You can use a rubber boot over the lamp socket if you wish, or use some heat-shrink tubing. Do not attempt to support the lamp via bolts through the holes in the ceramic socket because the socket is not designed for the forces that the lamp will be subjected to, and the lamp will not be securely held by just the friction of the pins in the spring-loaded socket. Use dikes to cut two holes on opposite sides for the mounting bracket. Cut them larger than necessary for the bolts so you have some adjustability in terms of the angle, since you may be mounting it on a non-straight part of the handlebars.
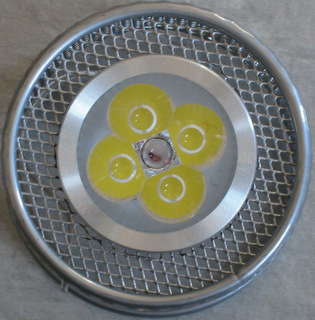
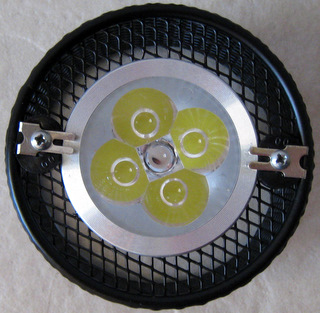
Figure 4: Lamp Mounted in Mesh Enclosure for Proper Air Flow
Glue Lamp to Enclosure (left) with Epoxy or use Retaining Clips (right)
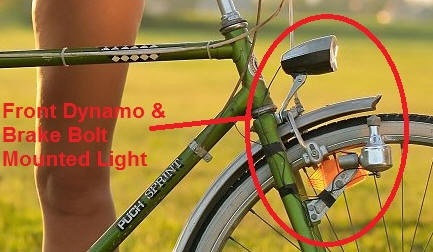
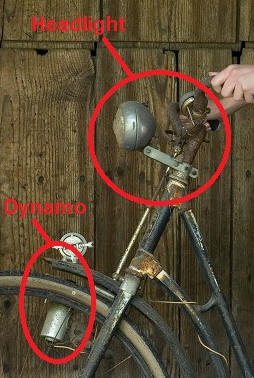
My Union Marwi lamp was mounted on the “brake bolt” hole in the fork. This was a less than optimal location because it cast shadows over the wheel. It's better to mount a headlight higher up, but for incandescent dynamo lights the tradition has always been to mount them as low as possible because with their limited light output you wanted to illuminate the road directly in front of the bicycle and there was not enough light to do much else.
For my LED lamp, I mounted it to the handlebars using a Minoura BH-95X water bottle cage holder. These are widely available, the one I used had a $2.97 price sticker on it from a Nashbar sale. I enlarged one of the existing holes on the steel bracket for the key notch on the BH-95X, then drilled a hole in the center. Probably I should have mounted the steel bracket off center to move the lamp to the center of the bars. There's a small hole to the left of BH-95X that I drilled for the ground wire for the lamp. The BH-95X allows you to swivel the assemble up and down, and it also allows adjustment to any rotation though this is not necessary with a round lamp. This is a very secure and stable mount without resorting to funky hose clamps or cable ties.
It required some delicate maneuvers to assemble all the pieces since the bracket must be mounted to the bicycle prior to attaching the lamp and enclosure. Once the lamp is installed you cannot get to the tightening screw of the BH-95X. Once the bracket is attached to the enclosure with lock nuts, you can't just turn the screws on the sides to remove the cup. This at least gives a tiny bit of security. Be sure to attach the ground wire prior to attaching the lamp holder.
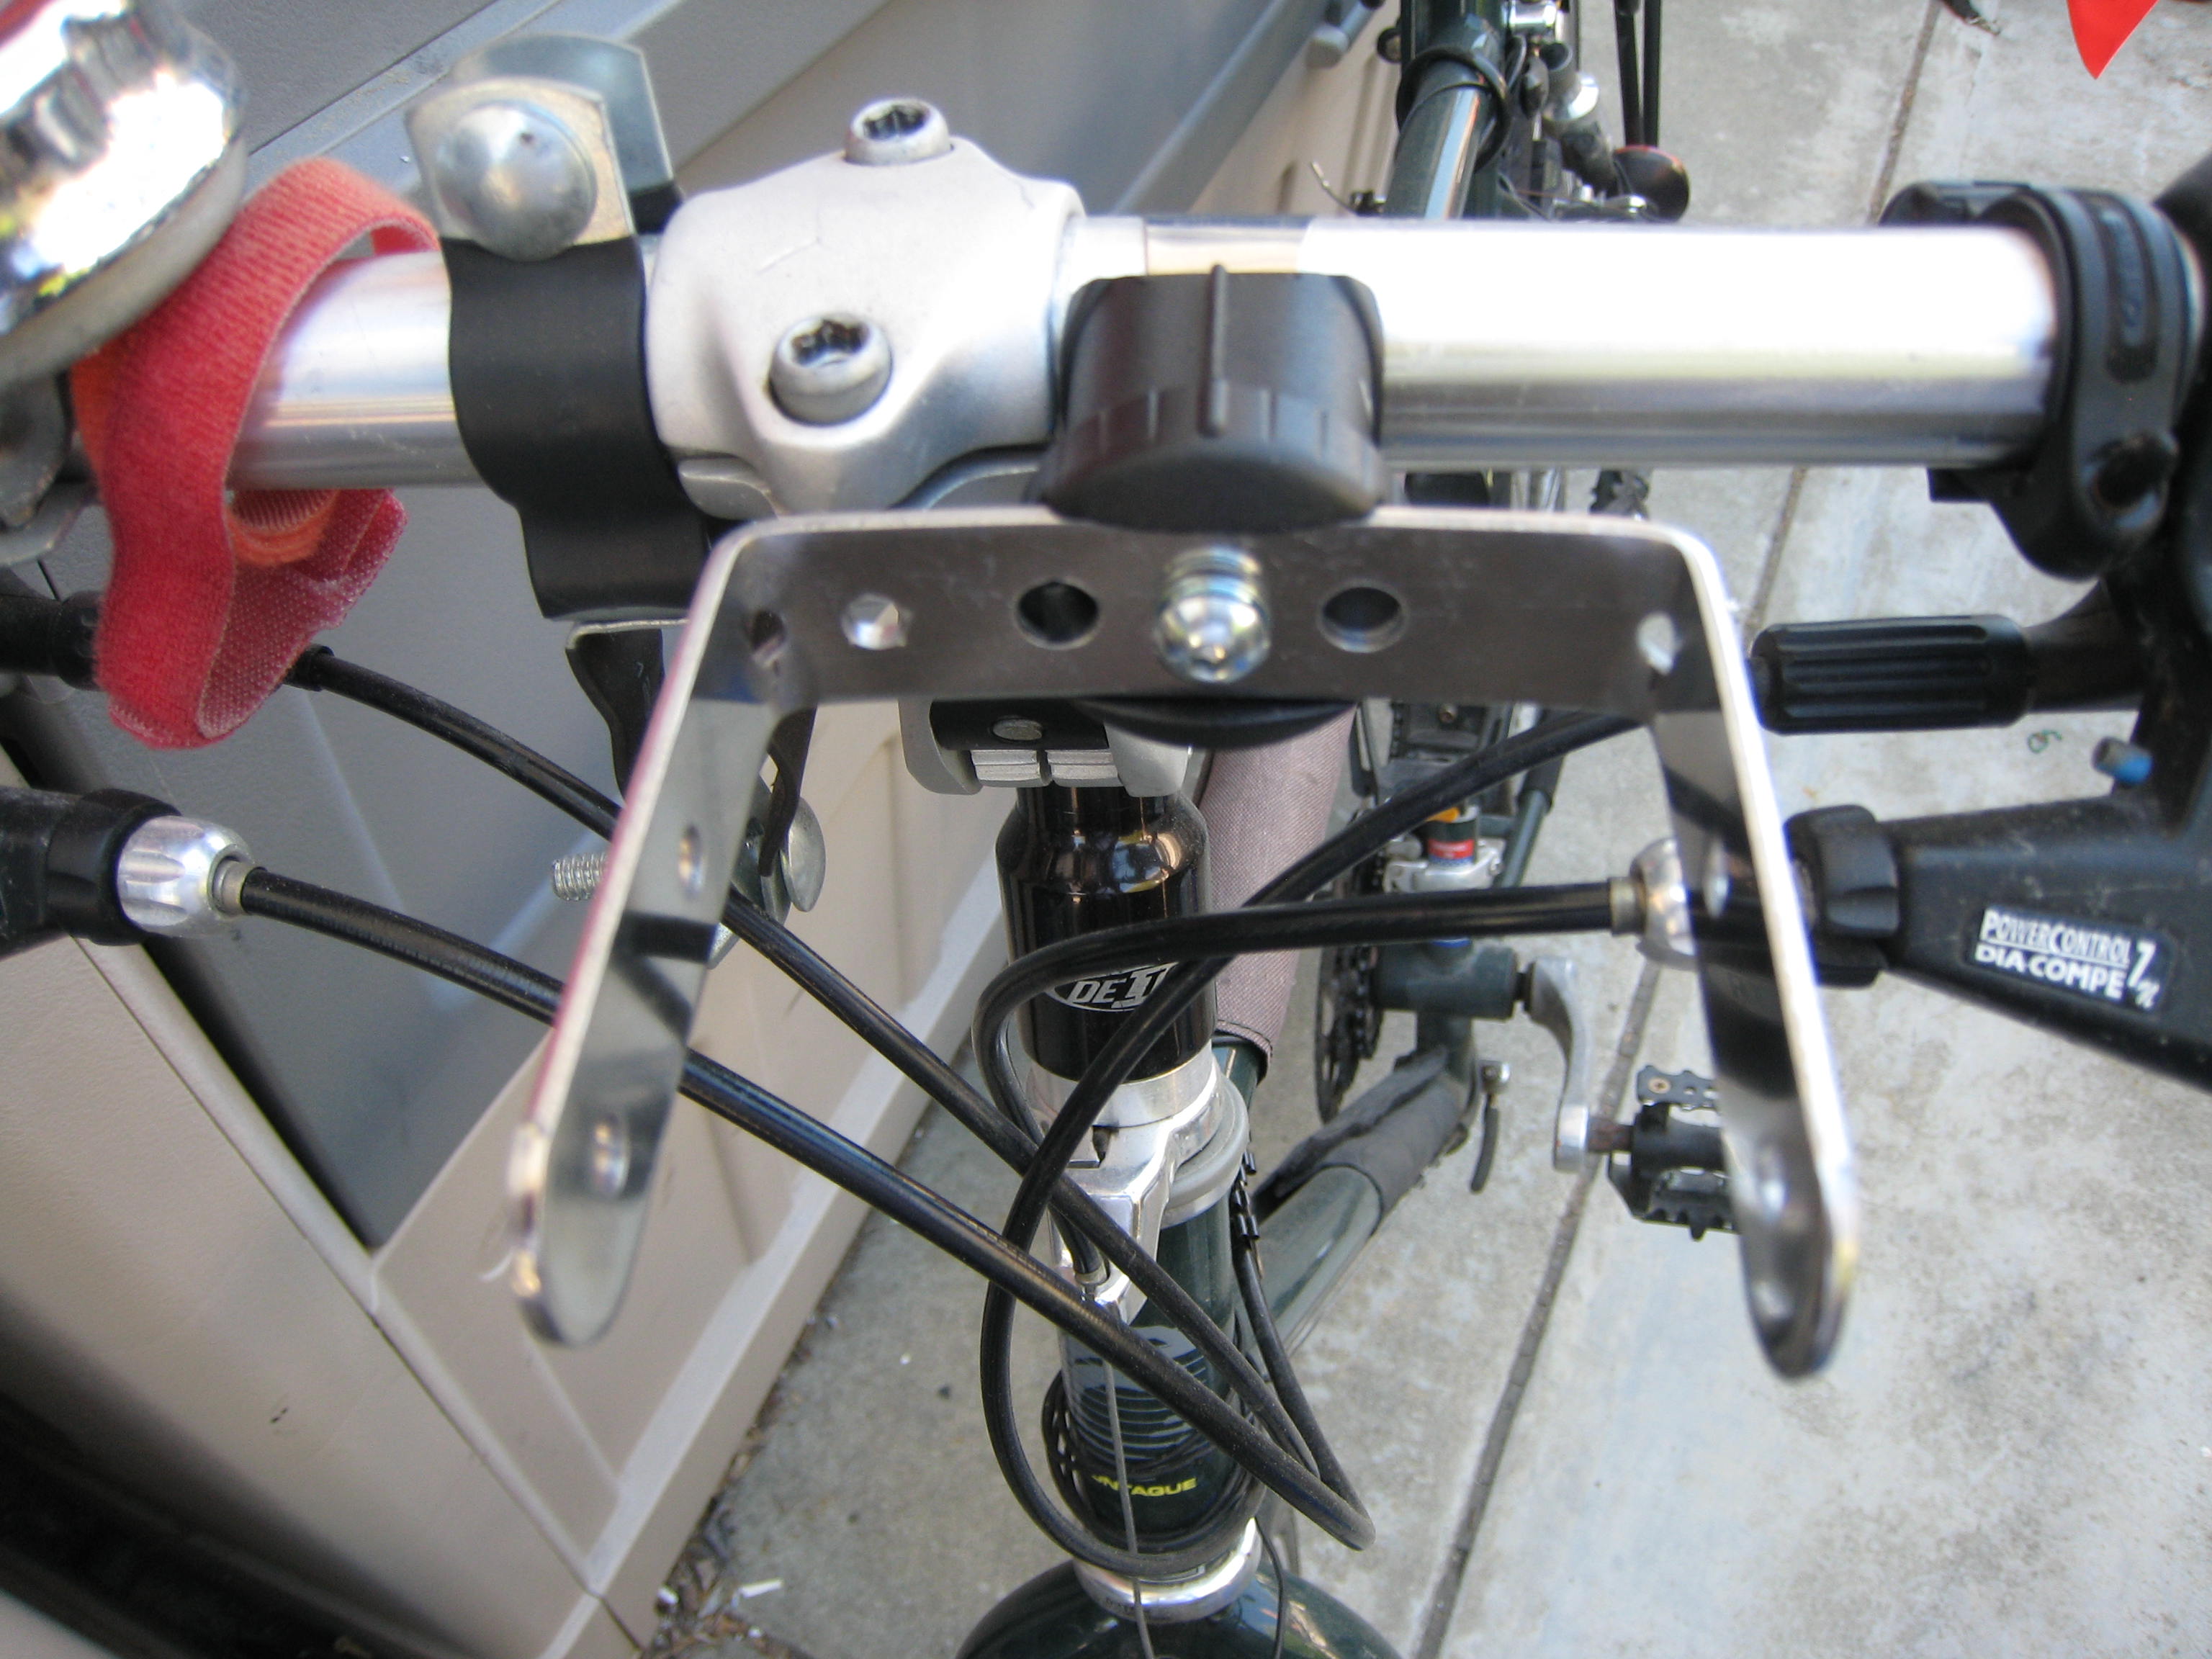
Figure 5: Mounting Bracket Attached to Handlebars with Minoura BH-95X
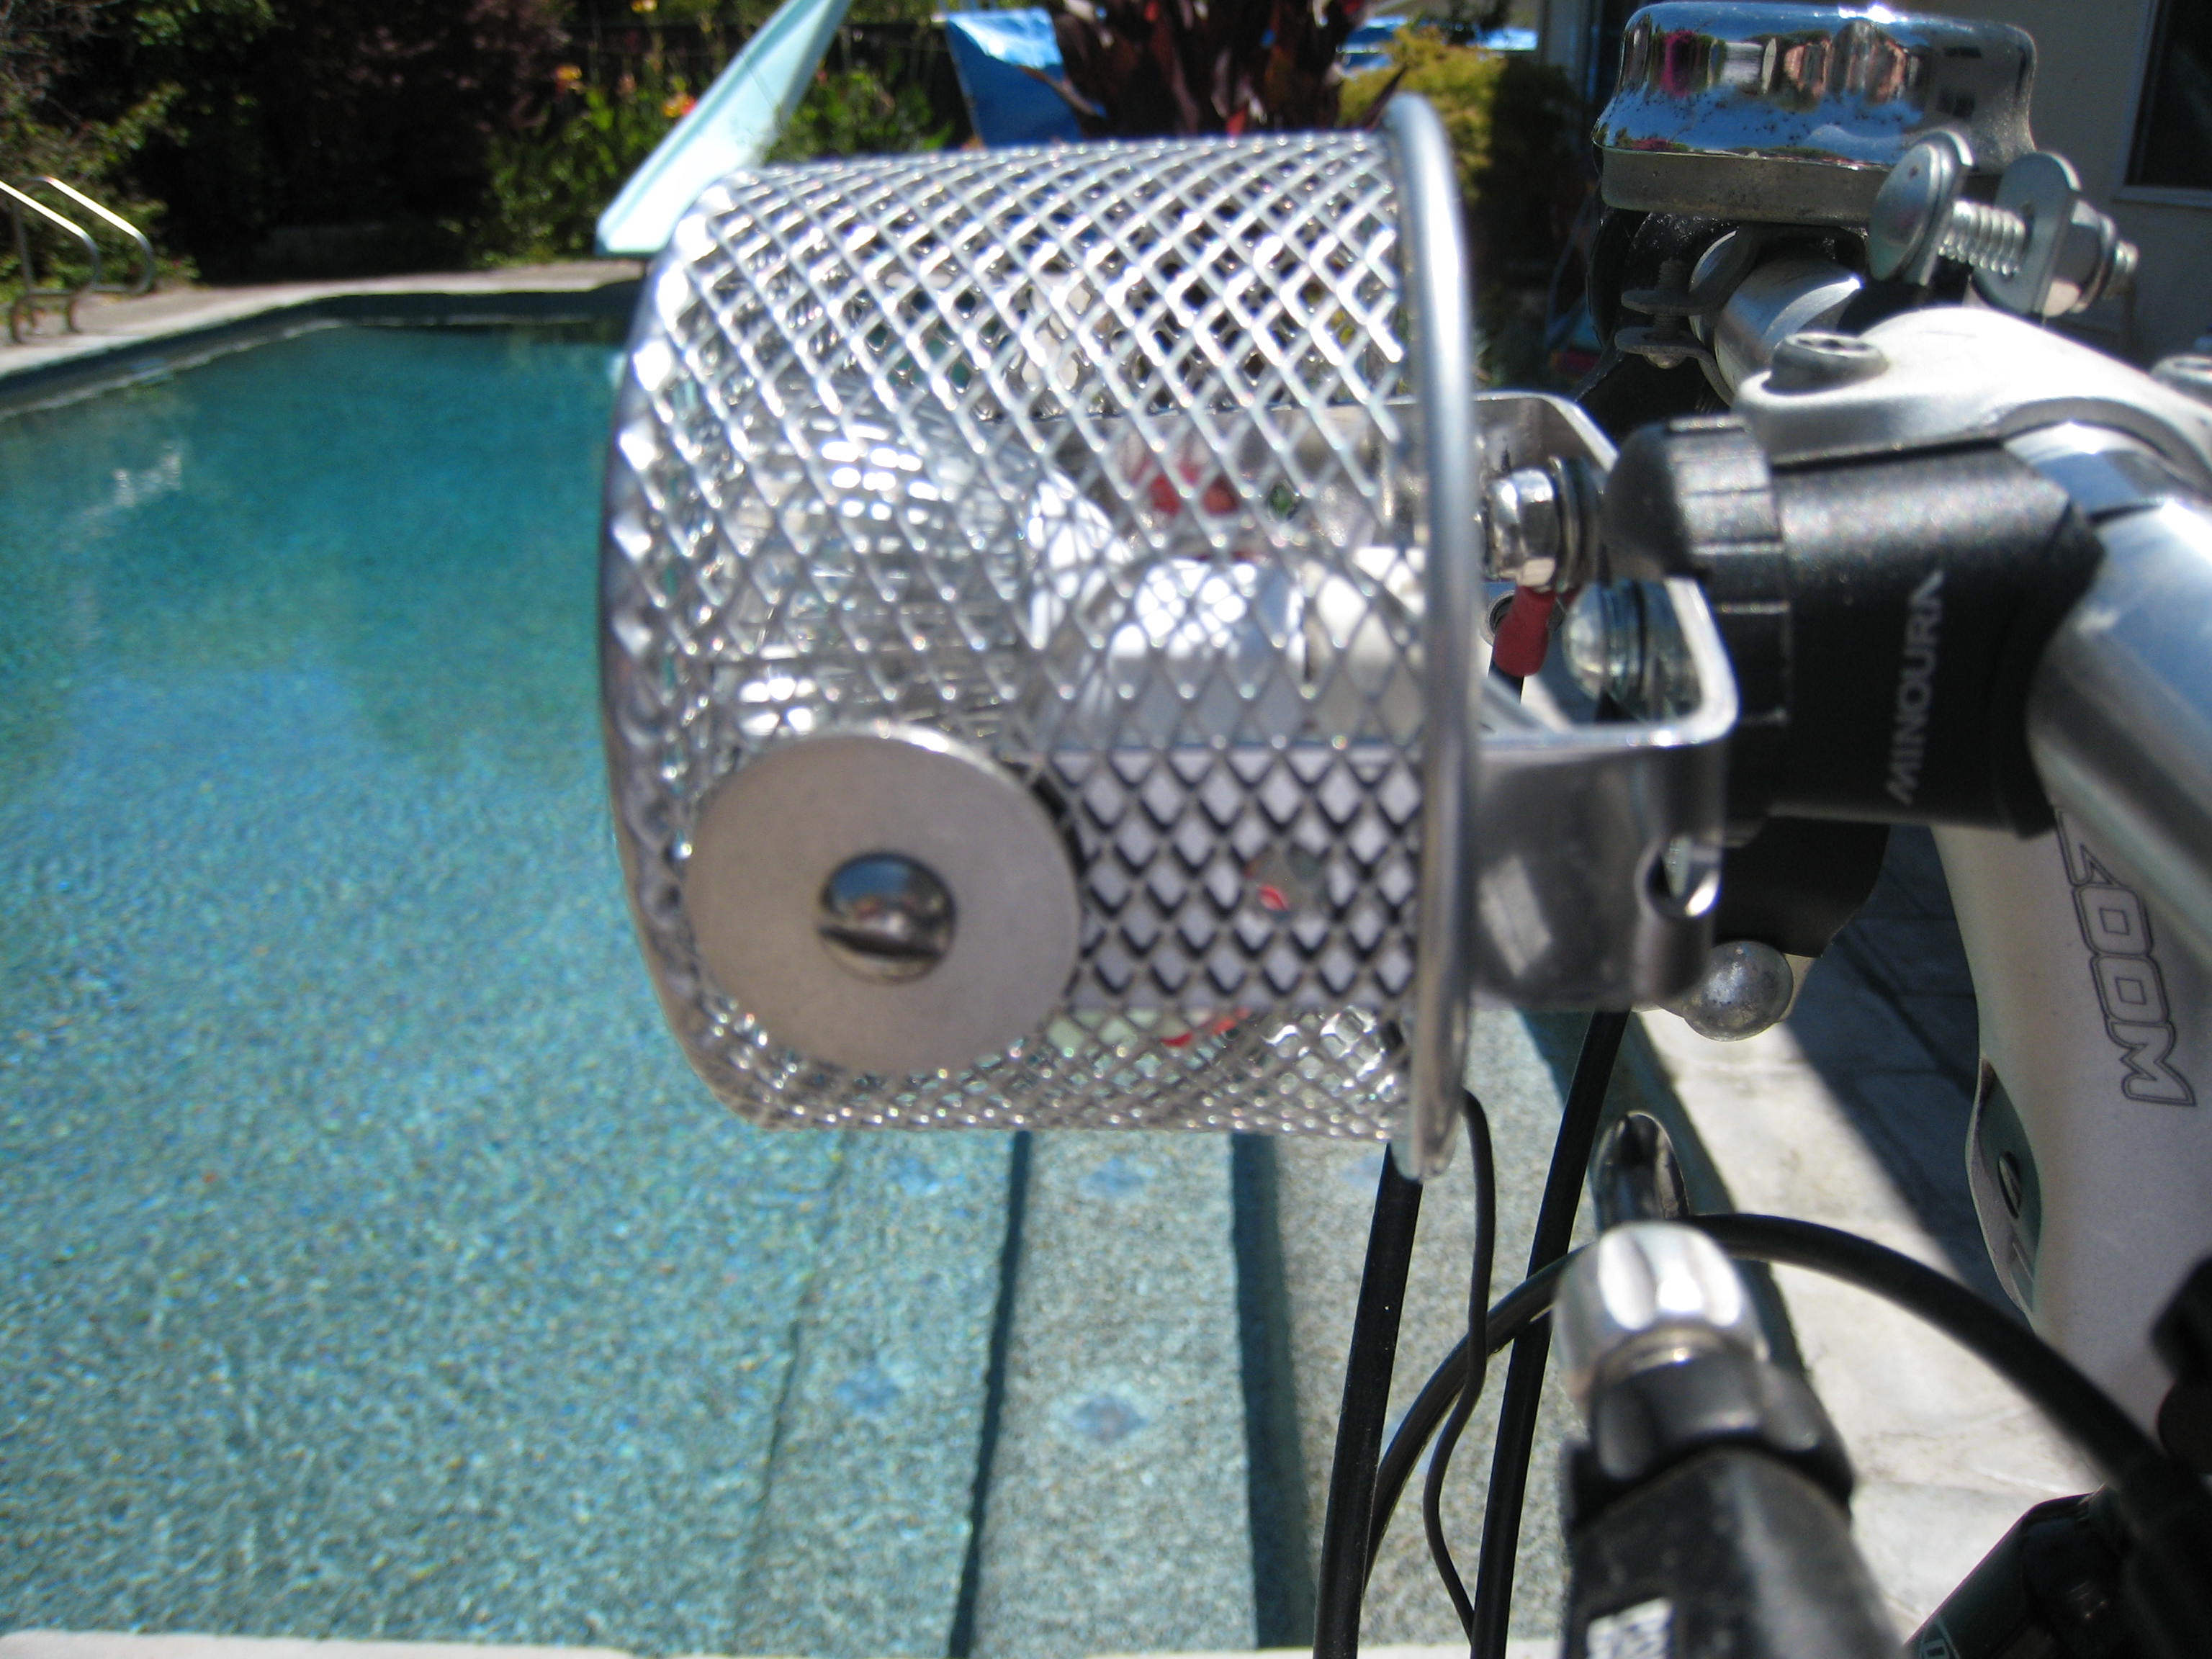
Figure 6:
Side View of Completed System
(you can see the ground lug toward the rear)
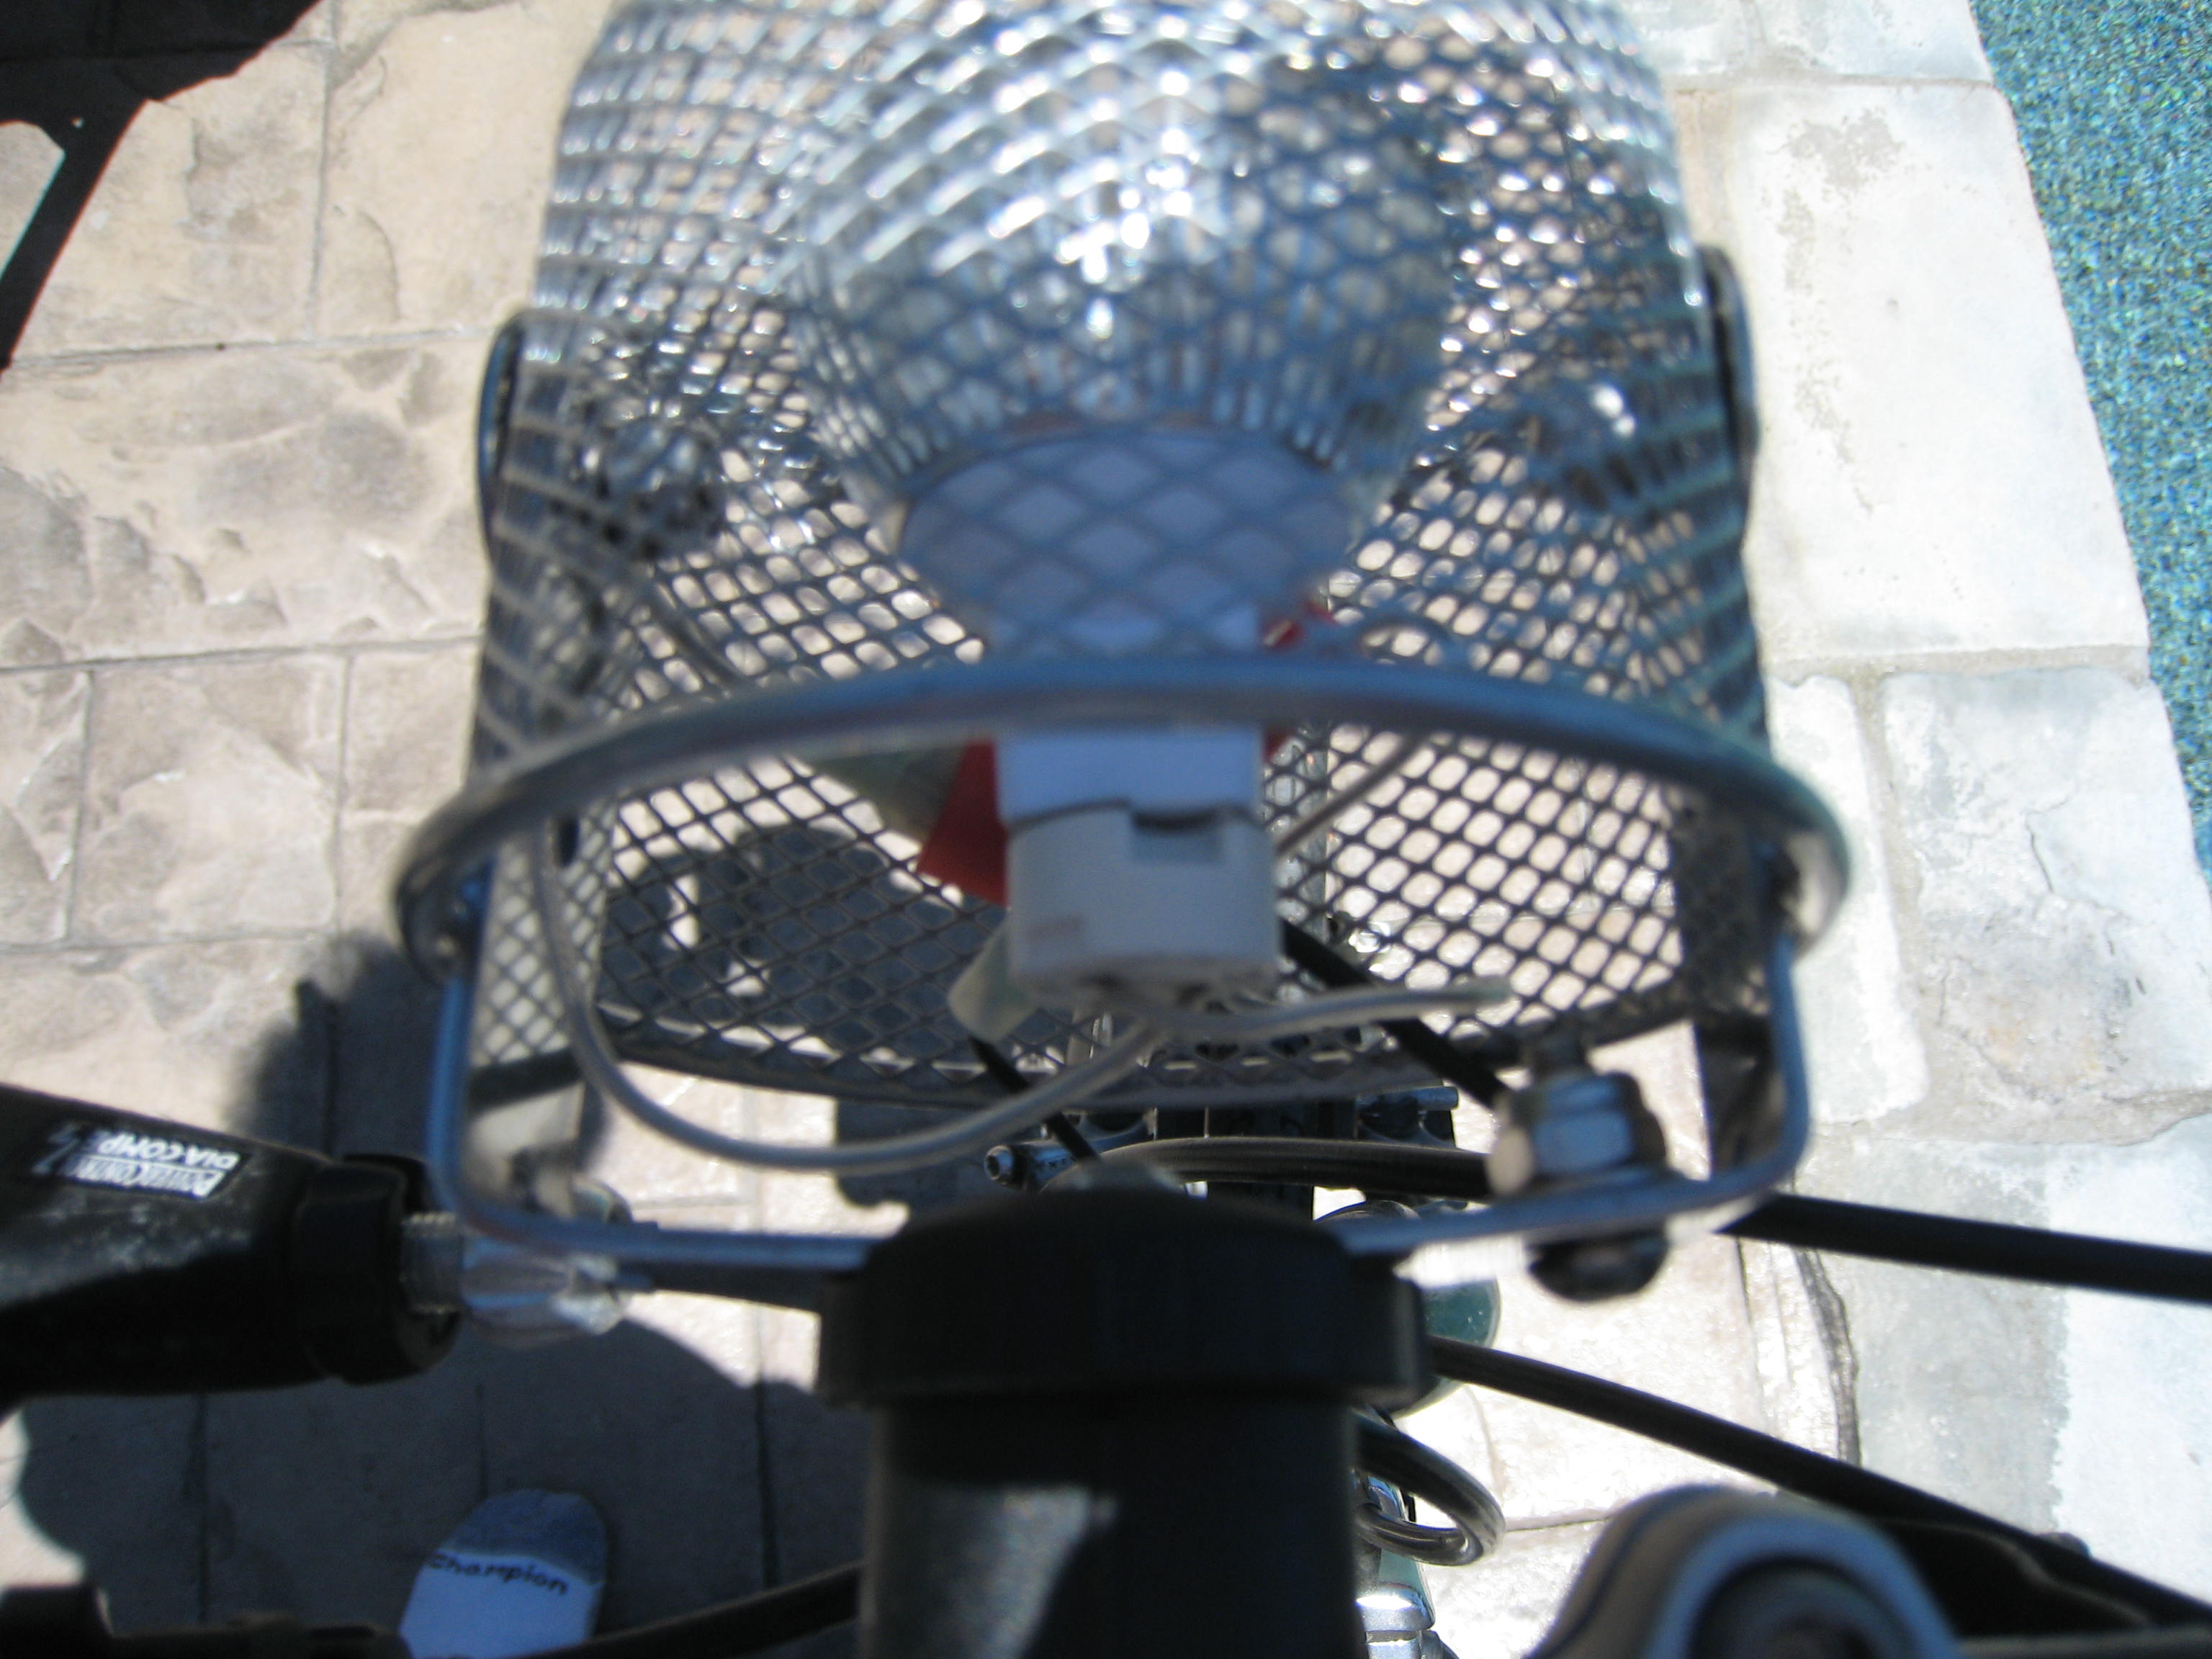
Figure 7: Rear View of Completed System
I connected one wire of the socket to the existing wire from the dynamo. The other wire is grounded to the steel bracket using a crimp lug. I used quick-disconnect insulated male and female spade lugs at the ends of the wires from the socket though I could have also just soldered everything.
Switches
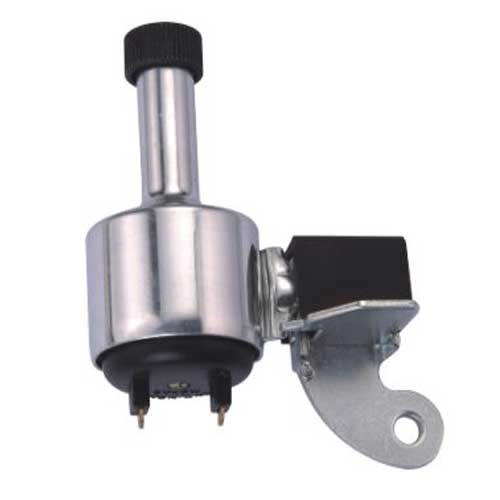
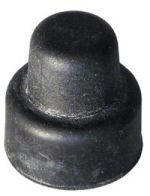
For a tire-driven dynamo (sidewall or bottom bracket) no on-off switch is needed because these dynamos can be disengaged mechanically. For a hub dynamo, a power switch is needed unless you want your light on all the time. The PB-21 pushbutton switch with the WPC-2 rubber cap is a good choice. It's very low profile and wires are attached. You still might want to seal the flat part of the switch and where the wires go in with some sealant. Note that with the pushbutton switch you do not know if it's on or off without checking to see if the light is on or off.
 |
 |
 |
 |
| PB-21 From AllElectronics |
WPC-2 Cap for PB-21 (glue on) |
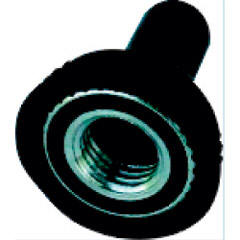
Mini-Toggle with 6mm threaded shaft from Parts Express | Mini-Toggle Cover with M6 threading |
Figure 8: Switches
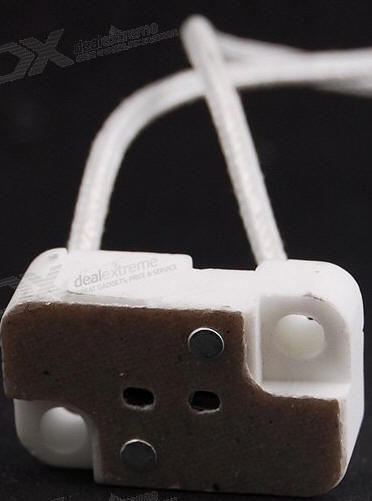
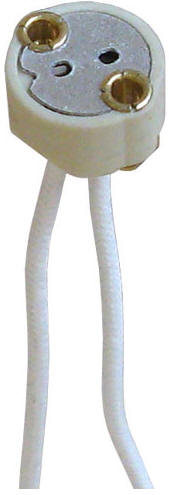
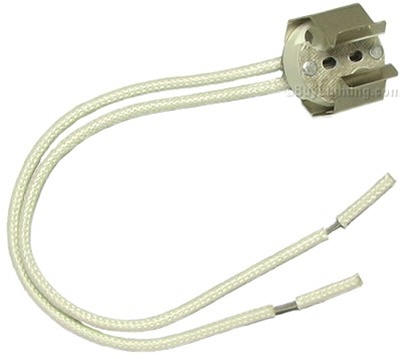
MR16 Sockets
There's a wide variety of MR16 sockets available. Originally I wanted a socket that could securely hold the lamp and that could be bolted to a handlebar or other mount without the need for an enclosure. I could not find such a socket. The system I ended up using is better because it protects the lamp and is more difficult to steal, but it requires more work to fabricate. I think the best socket is the one with the retaining clip, but I have not used that socket. The QLV-1 looks like it has potential to be used without the mesh enclosure. You may want to seal the connection once the socket is in place with some waterproof grease.
Note that a socket is not really necessary. You can solder directly to the pins on the MR16 lamp. The LED lamp will last for such a long time that it's not necessary to use a socket.
 |
 |
 |
 |
 |
| Round Ceramic MR16 Socket from DealExtreme | Rectangular Ceramic MR16 Socket from DealExtreme | Socket with Reinforced Mounting Holes from AllElectronics | QLV-1 MR16 Holder from Bulbtronics |
Figure 9: Sockets
Final Product Attached to the Bike
|
|
|
|
| On my Montague Urban Full Size Folder with a Union/Marwi Bottle Dynamo. Light is Mounted to Handlebars. | On My Daughter's Specialized Expedition with a Shimano Hub Dynamo. Light is Mounted to Bottom of Topeak Basket. No switch, the light is on whenever the bicycle is in motion. |
Figure 10:
Final Product On Two Different Bikes
(photo on left taken on a day when my pool isn't green)
Tire-Driven
Tire-driven dynamos don't require the building of a new wheel. They can slip in wet conditions and the side-wall driven dynamos will affect tire life. The bottom bracket dynamos are better than the side-wall dynamos but cannot be used on aluminum frames because they will crush or break the weak aluminum tubing. Some older touring bicycles even had internal wiring from the bottom bracket up to the headset for use with bottom bracket dynamos. Of course none of these should be used on plastic (carbon-fiber) frames.
|
|
|
 |
|
|
|
Union/Marwi 6V/500mA
Side Driven Dynamo. |
Sanyo NH-10 6V/500mA Bottom Bracket
Dynamo. DISCONTINUED |
Union/Basta Roller Bracket Dynamo. $70-80 for Dynamo only, $100 with lamps and remote cable. From Yellow Jersey. |
Busch and Muller 12V/500mA Dymotec
S12 Dynamo. |
Tung-Lin 12V/500mA Dynamo Also sold as part of many 12V dynamo light systems. |
Figure 12a: Sampling of Tire-Driven Dynamos
 |
 |
|
| Brake Bolt Mount | Stem Clamp Mount |
 |
|
Front Rack Mount |
Figure 12b:
Bicycles with Front Tire Driven Dynamo and Brake
Bolt, Stem, and Front Rack Mounted Incandescent Front Lights
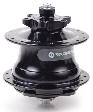
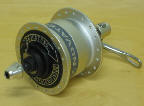
Hub
Hub dynamos are less trouble, work well in wet weather, and are more efficient than tire driven dynamos. However when your lights are off there is still drag. They are more expensive than tire-driven dynamos and of course they have to have a wheel built around them. The Shimano DH3N70 is the most popular dyno-hub in the U.S. and it sells for about $90. However lately there have often been new complete wheels with Shimano hubs available for under $100 (search eBay) . Of course the ideal thing would be for bicycles to come with dynamo front wheels since the added cost of a dynamo hub at the time the wheel is made is only a few dollars, versus the significant extra cost to add one later. In countries where cycling is more transportational than recreational you're already seeing lower cost bicycles with inexpensive hub dynamos.
Hub dynamos seem to be making a comeback with several new manufacturers entering the business. One significant innovation is the ability to switch the hub off when you don't need your lights on. This reduces drag slightly since even when lights are off the dynamo mechanism adds several watts of drag. See http://www.ecovelo.info/2009/11/05/new-dyno-hub-test/ for a good test on drag. Unfortunately, despite what some non-technical people believe, there's no such thing as a free lunch, and any light you generate from a hub (or bottle) dynamo requires input power from your body.
If you're thinking of using your existing rim and building a wheel with the new hub, remember that you'll also need shorter spokes, and spokes can cost you $1 each at retail unless you can convince your local shop with a spoke cutter/threader to shorten your old spokes.
If you use a hub dynamo then you'll need to add a switch on the lamp to turn it on and off since the hub dynamo is always engaged (unless you don't mind your lights being on all the time.
Be sure to lock your wheels when you lock your bike. Often the wheel is worth more than the rest of the bike.
There are some reviews of dynohubs at http://swhs.home.xs4all.nl/fiets/tests/verlichting/index_en.html.
|
|
 |
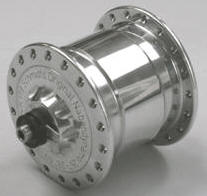 |
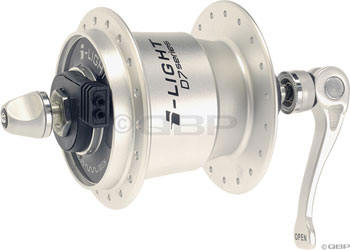
 |
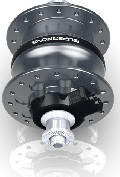
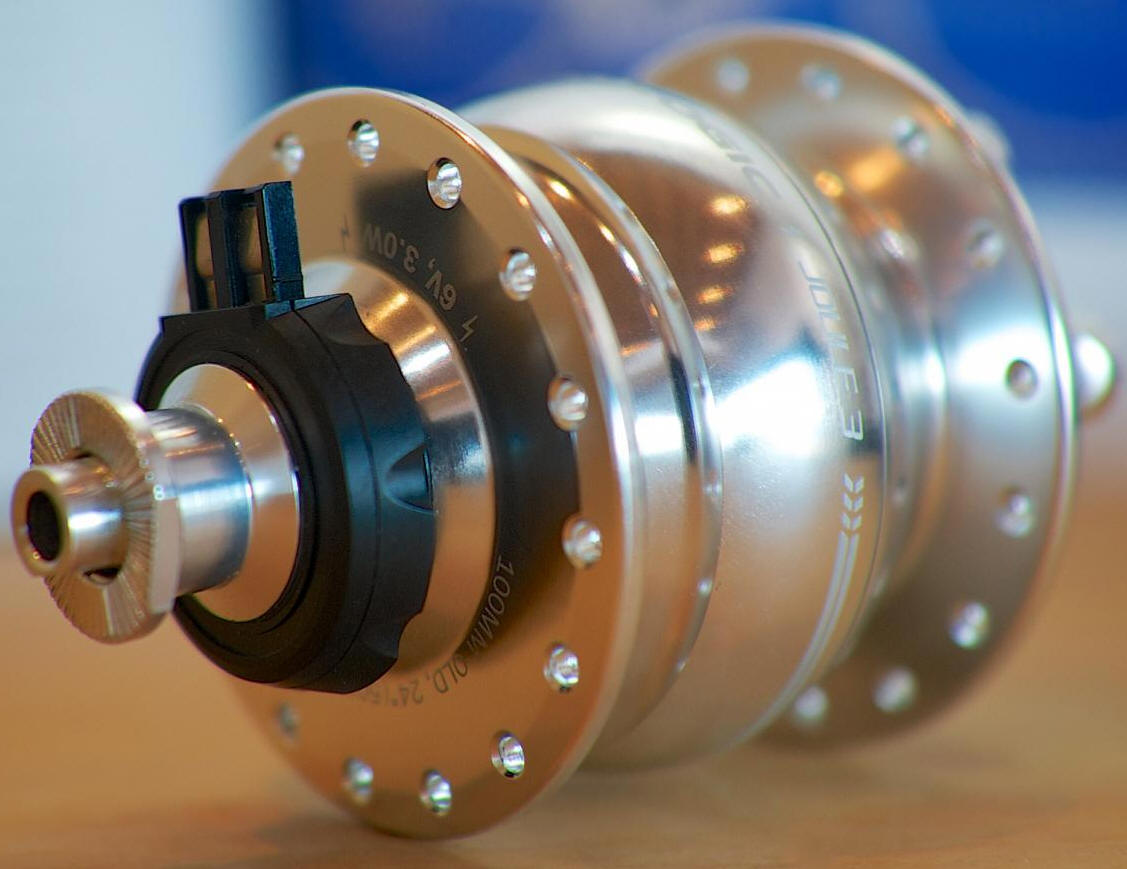
| Shimano Hub Dynamo. About $100. | SRAM Hub Dynamo. About $65. | Schmidt Son hub. The best dynamo hub with the lowest drag. $250-350 from Peter White. | Biologic Joule Hub in 20" wheel for Dahon. About $90 with wheel (click here). |
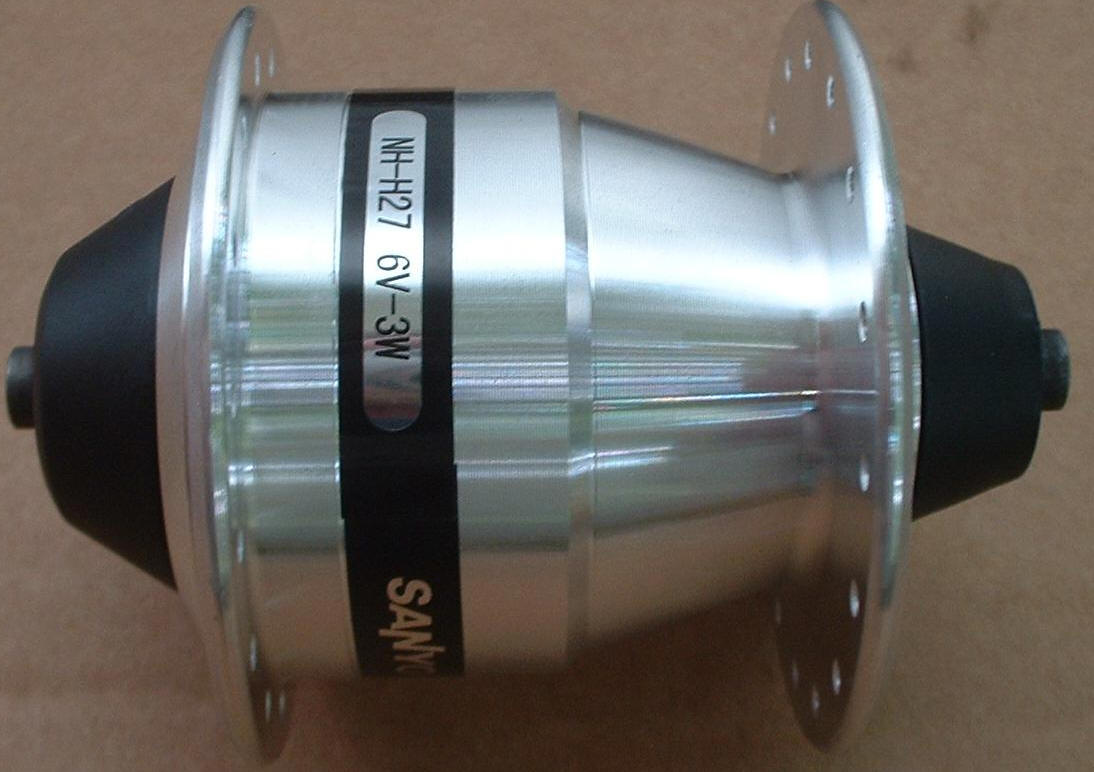 |
 |
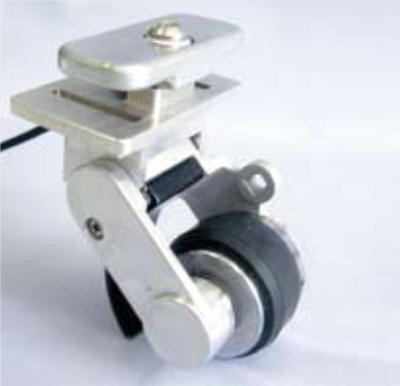
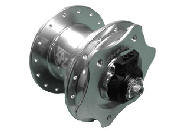 |
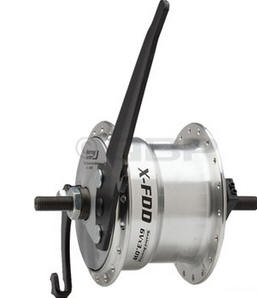
 |
| Sanyo NH-H27 Hub Dynamo. | Sturmey-Archer Hub Dynamo with Drum Brake. | Shutter Precision Switchable Dynamo. Rim and disc brake versions. Used on one Tern model. Appears to be the same as the Joule Biologic | Shutter Precision Non-Switchable Dynamo. Rim and disc brake versions. |
|
|
 |
|
 |
|
Supernova Infinity 8 Switchable |
Supernova Infinity S
|
Novatech Dynamo Hub |
Biologic Joule 3. World's Most Efficient Hub Dynamo Same as Shutter Precision |
Figure 13a: Sampling of Hub Dynamos
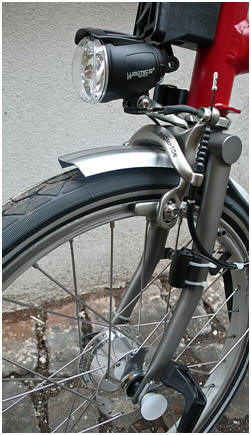
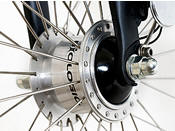
Figure 13b: Brompton with a Son hub and a B&M Cyo
LED Light
A Brompton Front Wheel with a SON hub and
a Cyo LED lamp costs more than $500.
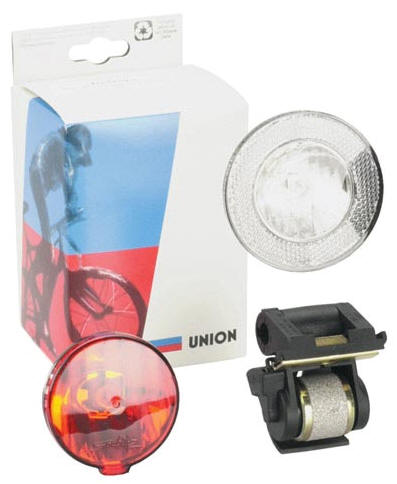
El Cheapo 12V Dynamo Light Set
J&B Importers sells a 12V dynamo light set through various hardware stores and drug stores. You can use the dynamo from this set with a 12-36V MR16 LED lamp.
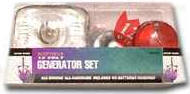
Figure 14: El-Cheapo 12V dynamo lighting system
http://www.tooldistrict.com/12vgeneratorwbulb6676-1byjandbimporters.aspx
Commercial LED Dynamo Lights Under US$50
There's no real benefit in a commercial dynamo light other than if it includes a stand light and/or a strobe, but there are two LED front lights that are not outrageously priced.
Planet Bike Blaze Dynamo 2 Watt, 150 lumens
Includes Stand Light. Steady and Flash Modes. $48.
http://www.amazon.com/dp/B001G7Q258
Avenir Dynamo 3 Watt
Includes Stand Light. Steady Mode Only. $27.
http://www.amazon.com/dp/B007QNLLVG
Now that I've used this light for a few days, I have noticed some things about it:
1. It doesn't get hot at all, since it's probably only at about 1/3 the
maximum power.
2. The finned heat sink allows light to shine up through the fins, and it's
annoying, so there needs to be a shade over the top of the enclosure. I need to
make one out of plastic or foam.
3. There is not much difference between low speed and high speed in terms of the
light output. The dynamo saturates and that's the limit of it's output no matter
how fast you ride (which is why I'm thinking of trying the 12V dynamo).
4. The beam pattern is very well shaped because the four LEDs are being
collimated into a good beam. If I ride in the center of the right lane on a two
lane road then the beam just reaches the sidewalk on the right and shines into
the opposing lane. This is a bit too wide of a beam. A 35 degree beam would be
better than the present 50 degrees or so.
Stand-Light and/or Strobe
A stand-light keeps the light on when the dynamo is stopped by the use of a battery or large capacitor. A strobe is often used for increased visibility during day-time riding. If you're into building simple electronic projects you can built a stand-light and/or strobe pretty easily. I considered designing this with a micro-controller, but it would have complicated the design with the need for voltage regulators,so I went with a discrete design.
5-9VAC Supply
If you plan on building the stand-light, strobe, or strobe & stand-light circuits, you should consider building an AC power supply that can simulate a dynamo by delivering around 5-9VAC or 10-18V (for a 12V dynamo) at 500mA in order to perform testing and development without the need for a dynamo to be hooked up. Since we're dealing with low current and voltage here, a voltage divider made with high wattage power resistors is sufficient, though crude. A variable power resistor makes it easy to adjust the voltage.
Figure 15: AC Power Supply for Testing and Development
A stand-light keeps the light on when the bicycle is not moving, or is moving too slowly to light the lamp. It would not be difficult to construct such a device. I'm in the process of building one, using an 8.4V (9V size) NiMH battery as the power source. It would probably cost around $20 to construct this stand-light. It's much better than capacitor based stand-lights used on commercial dynamo headlamps. No doubt there are many other ways to do this, including having the battery powering the light at all times, and the dynamo only charging the battery.
Nothing is free, and a small amount of power is used to energize the relay and charge the battery. You're probably going to use 250mW or so (out of a total of 4W that the dynamo can generate) for the stand-light functionality. The bill of materials is for a 6V dynamo. For a 12V dynamo you'd need a different relay, or a voltage regulator or zener diode to protect the relay coil from over-voltage, and maybe change the value of R1.
You may find it simpler to just add a battery powered LED flasher (with a steady mode) rather than going through the trouble of a stand-light.
Figure 16: Stand-Light Circuit
Bill of Materials
(allelectronics.com part numbers)
BR1 Bridge Rectifier built from four Schottky Diodes (1N5822S). Schottky bridge rectifiers are available but they are expensive and not easily available.
S1,S2 SPST toggle switch (MTS-4)
K1 12VDC DPDT relay (RLY-212)
R1 Resistor (choose so charge current is around 20mA) Use 1/2 watt resistor. Try around 20 ohms.
D1 Schottky Diode (1N5822S)
B1 8.4V NiMH battery [9V size] (NMH-925) or DealExtreme 6390
C1 47uF 35V capacitor (47R35)
Theory of Operation
Turn on the switch S1 to the lamp. When you
start pedaling, BR1 rectifies the AC from the dynamo and the K1 relay coil
energizes at around 8VDC and the lamp is powered by AC directly from the dynamo.
A small amount of current is sent to charge the battery through the current
limiting resistor (use an mA meter and choose a resistor to limit current to the
battery to around 20mA) and D1 (which prevents the battery from energizing the
relay when the dynamo is not running).
When you stop, the relay coil de-energizes and the lamp is powered by the
battery. The battery will provide around 20 minutes of operation when fully
charged.
S2 is normally kept closed, to charge the battery, but can be opened on long rides to avoid over-charging. This is especially important for hub dynamos (which are always engaged) since the battery would be charging even when the lights are off. This is not a "smart charger."
C1 smoothes the full wave rectified DC. It probably isn't required, but I put it in anyway.
When the battery is fully charged (8.4V) the voltage from the bridge rectifier needs to be at least 8.6V before current will flow into the battery (there's a 0.2V drop through the diode). At 9.0V, a battery that has been depleted to 8.0V the voltage across the resistor would be 0.4V. For 20mA of charge current you'd need a 20 ohm resistor. As the battery charges, the voltage across the resistor falls and the charge current goes down. If you use the stand-light a great deal then you may want a lower value resistor so more current is used to charge the battery.
Notes
The DC ouput of BR1 is about 1.4 x the input voltage, so 6V x 1.4 =8.4V which energize a 12V relay. Be sure the 12V relay you choose will trigger at 8.4V. Most 12VDC relays have a "Must Operate" voltage of 70% of rated voltage, which would be 8.4V (and will operate at slightly less).
Use a Schottky diode for D1 because of much lower voltage drop. Build BR1 from four Schottky diodes for lower losses.
The circuit will work with a 12V dynamo, but the 12VDC relay needs to be changed to a 24VDC relay, R1 may need tweaking, and the battery charging voltage needs to be decreased so it does not exceed 10VDC, or use two 8.4V batteries in series. so the battery voltage matches the rectified dynamo voltage..
Adding strobe capability to this system would require that the AC provided by the dynamo be rectified then switched on and off with something like a 555 timer (which can operate from a wide range of voltages). Since a 555 cannot source or sink 500mA, a transistor is used to drive the MR16. Use a bridge rectifier made from four 2A Schottky diodes. Unfortunately, since the LED module is not a resistive load, you cannot use a triac to flash the lamp while operating it on AC from the dynamo. You could use a reed relay instead of a switching transistor, and operate the lamp on AC, but relays are not designed for so many cycles and would wear out after a few thousand hours of operation.
You may find it simpler to just add a battery powered LED flasher (with a steady mode) rather than going through the trouble of a stand-light.

Figure 17: Strobe Circuit
BR1 Bridge Rectifier built from four Schottky Diodes (1N5822S). Schottky bridge rectifiers are available but they are expensive and not easily available.
C1 4.7uF (4.7R50)
C2 47uF 35V capacitor (47R35)
C3 10nf (103D50)
R1 68K 1/4W (291-68K)
R2 4.7K 1/4W (291-4.7K)
R3 10K 1/4W (291-10K)
Q1 PNP Power Transistor (TIP32C)
IC1 555 Timer (LM555)
S1 3PDT Center-Off Switch (MTS-63)
IC2 LM317L (for 12VDC dynamos only)* (LM317LZ) plus appropriate resistors
Theory of Operation
The output of the dynamo is rectified by BR1 and smoothed by C2.
The 555 turns Q1, and hence the LED, on and off at a rate of 4 times per second.
The 555 can operate at a wide range of input voltages so the varying voltage of the dynamo is not an issue (with a 12V dynamo you'll need to regulate the supply voltage of the 555 which is limited to 18V), and the frequency and duty cycle is independent of the voltage.
The 3PDT center-off switch allows the LED to be driven directly from the dynamo for non-strobe operation, without any of the losses of the bridge rectifier. The center-off position allows the light to be turned off completely. Be sure to wire the switch correctly so the dynamo is not connected to the bridge rectifier when the LED is connected directly to the dynamo, or you'll needlessly be wasting power in the strobe circuit even when the LED is not connected to the strobe.
Strobe Rate
With the values chosen, the light will flash at a rate of about 4 times per second, and be on for a 5% duty cycle. You can vary R1, R2, and C1 to change these parameters.
555 Timing Equations:
1
Frequency= -----------------------------------
0.693 (C1) (R1+2R2)
High=(0.693) (R1+R2) (C)
Low=(0.693)(R2)(C)
See: http://www.ohmslawcalculator.com/555_astable.php for a good calculator of values.
555 Pin-Out
* The 555 can operate at voltages up to 18VDC. A 12VAC dynamo at normal speed puts out about 17VDC after rectification and at high speed could exceed 18VDC after rectification. Add an LM317L and choose components so it regulates to about 14 volts (connect regulated output to pins 4 & 8 of the 555).
For an LM317 Vout = 1.25(1 + R2/R1). Use 220 ohms for R1, 2.2K for R2).
Voltage Regulation for 555 for 12VAC Dynamo Operation
Strobe with Automatic Strobe Stand-Light
This combines the stand-light circuit and the strobe circuit. It's a little more complicated because of the need to charge the battery with a low current. The stand-light battery is charged only in strobe mode. It complicates the circuit to charge the stand-light in steady mode, plus you want all the available power from the dynamo used to power the LED when in steady mode.
Figure 18: Strobe and Stand-Light Circuit
This circuit uses a 3PDT center-off toggle switch to control all the functions. The switch near the dynamo is S1A (sorry about that).
Off
If the switch is in the center position everything is powered off and the battery is disconnected from the circuit. The battery is not being charged.
Dynamo Running
If the switch is in the X (night-solid) position, and the dynamo is running, then K1 is energized by BR1 through S1B and the LED is powered directly from the dynamo with AC. This results in minimal losses (only the small amount of power needed for the coil of K1).
If the switch is in the Y (day-strobe) position then BR1 does not energize relay K1, and the LED is powered with DC through BR1, S1B, Q1, and the normally closed contacts of K1A. The stand-light battery is being charged through R4 (as long as the voltage at the junction of R4 and D1 is at least 0.2V higher than the voltage at the junction of R4 and D3).
Dynamo Not Running
If the switch is in the X (night-solid) or Y (day-strobe) position then the battery will power the LED in strobe mode (through S1C, K1B, D1, and Q1) when the dynamo is not running. There is no option for a "steady" stand light with this circuit.
Strobe Rate
With the values chosen, the light will flash at a rate of about 4 times per second, and be on for a 5% duty cycle. You can vary R1, R2, and C1 to change these parameters.
555 Timing Equations:
1
Frequency= -----------------------------------
0.693 (C1) (R1+2R2)
High=(0.693) (R1+R2) (C)
Low=(0.693)(R2)(C)
See: http://www.ohmslawcalculator.com/555_astable.php for a good calculator of values.
555 Pin-Out
For 12VAC dynamos several changes are necessary. The relays need to be 24V relays, or use zener diodes to drop the coil voltage to 12 volts or less. The voltage to the 555 needs an LM317L regulator to keep it below 18V. Use two 8.4V batteries in series. so the battery voltage matches the rectified dynamo voltage (you could also drop the charging voltage with a voltage regulator.
Figure 19. Current Paths for Solid-On Powered by Dynamo
Figure 20. Current Paths for Strobe Powered by Dynamo
Figure 21. Current Paths for Strobe Powered by Battery
Bill of Materials
BR1 Bridge Rectifier built from four Schottky Diodes (1N5822S). Schottky bridge rectifiers are available but they are expensive and not easily available.
C1 4.7uF (4.7R50)
C2 47uF 35V capacitor (47R35)
C3 10nf (103D50)
R1 68K 1/4W (291-68K)
R2 4.7K 1/4W (291-4.7K)
R3 10K 1/4W (291-10K)
R4* Resistor (choose so charge current is around 20mA) Use 1/2 watt resistor. Try around 20 ohms. (293-20). Remember that the current through the resistor is the voltage at S1C minus the battery voltage. So if there's 10V at S1C (dynamo at 7V) the charge current is (10-8.4V)/20 ohms=80mA.
Q1 PNP Power Transistor (TIP32C)
IC1 555 Timer (LM555)
S1 3PDT Center-Off Switch (MTS-63)
K1 12VDC 4PDT Aromat DS4E-M-DC12V or Omron G6A-474P-ST40-US-DC12 (or use two more easily available DPDT RLY-212 relays or one DPDT RLY-212 and one SPST relay)
D1 Schottky Diode (1N5822S)
B1 8.4V NiMH battery [9V size] (NMH-925) or DealExtreme 6390
IC2 LM317L (for 12VDC dynamos only)* (LM317LZ) plus appropriate resistors fo
* The 555 can operate at voltages up to 18VDC. A 12VAC dynamo at normal speed puts out about 17VDC after rectification and at high speed could exceed 18VDC after rectification. Add an LM317L and choose components so it regulates to about 14 volts (connect regulated output to pins 4 & 8 of the 555).
For an LM317 Vout = 1.25(1 + R2/R1). Use 220 ohms for R1, 2.2K for R2).
Since rear LED flashers are widely available, it's preferable to use dynamo power for the front light only. When shopping for a rear flasher look for one that uses AA batteries (not AAA) and that has side-pointing LEDs as well as rear LEDs. The best rear lamp on the market at this point is the Cateye TL-LD1100. It costs $25-40.
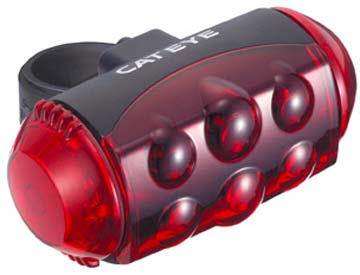
Figure 22: CatEye TL-LD1100
You probably should add a front LED flashing light in addition to the dynamo powered front light. Not only does it serve as a standlight, it is also visible in the daytime. You can get a 1AA or 2AA flashlight/strobe from DealExtreme for about $15-20. You really need a flashlight when riding at night anyway, in case of the need to do repairs.
Multi-Mode AA powered Flashlights
http://www.dealextreme.com/details.dx/sku.16181
http://www.dealextreme.com/details.dx/sku.28546
Flashlight Mount
http://www.dealextreme.com/details.dx/sku.31871
A good dynamo-powered headlight is only one piece of a good commute bicycle. Other essentials are front and rear racks, front and rear lights, front and rear fenders, dynamo, bell, chainguard, and kickstand.
Other Sites With Homebrew Dynamo Bicycle Light Information
http://home.comcast.net/~mandmlj/BikeLights/index.html#generator.
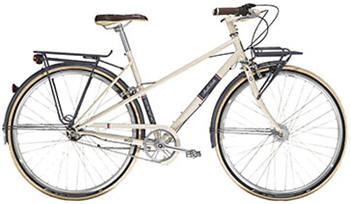
Commute Bicycles with Dynamo Hubs, Chainguards, and LED Lights
Buying a complete commute bicycle is a fairly expensive and difficult proposition in the U.S.. A true commute bicycle, with a dynamo hub, LED lights, chainguard, fenders, and rear rack will start at about $700, not on sale. REI often has sales with Novara bicycles from 15% to 20% off. There are very, very, few complete commute bicycles available for sale in the U.S. anymore. You will have a hard time finding a store that stocks these models (other than REI for the Novara Transfer).
|
|
|
Trek Belleville, $720 |
Breezer Uptown Infinity LS, $1220 |
Wheels with low-end dynamo hubs start at about $60. For higher end wheels with higher end hubs expect to pay from $200-400.
Low End
Mid Range Hand Built
http://www.amazon.com/dp/B003UW6DXS
High End Hand Built
http://www.peterwhitecycles.com/Wheels.asp
Many people have inquired about the possibility of charging cellular phones from a bicycle dynamo. Yes, it's possible, but probably not at the same time that you're powering lights from the dynamo. A bicycle dynamo puts out about 500mA of current at around 6-9VAC (depending on speed). USB chargers for phones generally exceed the 500mA USB spec.
There are no good commercial products for converting the dynamo output to 5VDC. Even some of the homebrew designs are very poor, using a linear voltage regulator which results in significant power losses because it is so inefficient.
What you need for an efficient design is a switching voltage regulator. You can buy the VMP-3201-5V buck switching regulator module for less than $6. Since it requires a DC input, you'll need to rectify and smooth the output of the dynamo with a bridge rectifier (preferably made from Schottky diodes) and a capacitor. It accepts inputs from 5.8VDC to 24VDC, and produces 5V at up to 1.2A. It's a surface mount device, so it's not all that easy for a hobbyist to use.. They claim up to 95% efficiency for the VMP-3201, so if true, the losses will be minimal and it should supply about 800mA. For a 12V dynamo use the higher current VMP-3202-5V because the output current at 5V could be up to 1.6A.
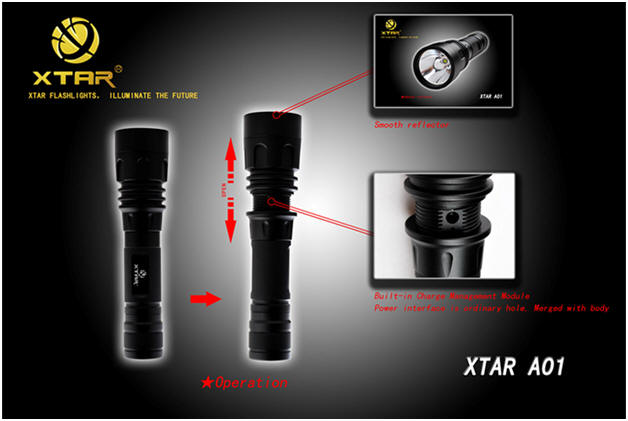
You could also use the 5VDC output to charge a Li-Ion powered flashlight. For example, the XTAR A01 flashlight uses a 18650 Li-Ion battery and has an integrated charging port that connects to a USB port with the included cable. They advise to purchase an 18650 battery with integrated protection circuitry.
For around $20 I have a very good LED dynamo light that uses four 1 watt Cree LED emitters. I don't even think that it looks too kludgy! No hose clamps, no PVC, no electrical tape, and no zip ties. With my old incandescent dynamo light I had to have supplemental battery powered lights because they were so poor.
To purchase a comparable LED lamp for a dynamo system would cost more than $100, since there is not yet any mass-market for such lamps and hence economies of scale have not kicked in. The same lamp can be used on a 12VDC battery powered system. You could power it from a single sealed-lead-acid 12V battery, ten to twelve NiMH batteries in series, or three or four 3.7V lithium-ion cells in series. Most of the 12V LED lamps will operate from 8VDC to 15VDC as long as there is sufficient current. A hybrid system is also a definite possibility, running off of batteries when more power is needed, and off the dynamo when riding in less challenging situations or if the batteries are discharged.
Questions, Comments, Complaints, Suggestions? Click Here to Send Mail to Webmaster
Search Engine Submission - AddMe