| Bicycle Lighting
Systems
Last Update: 26 October 2004 Comments,
Suggestions, Questions, Incorrect or Missing Links, Complaints, Compliments? This is a Mainly Non-Commercial Site, However I am Selling Flash Flags A Fair and Balanced View of Bicycle LightingTM |
This web site details how to construct a high performance bicycle lighting system
Also contains information on bells, horns, dynamo powered lights, and other safety devices
| Warning!
This
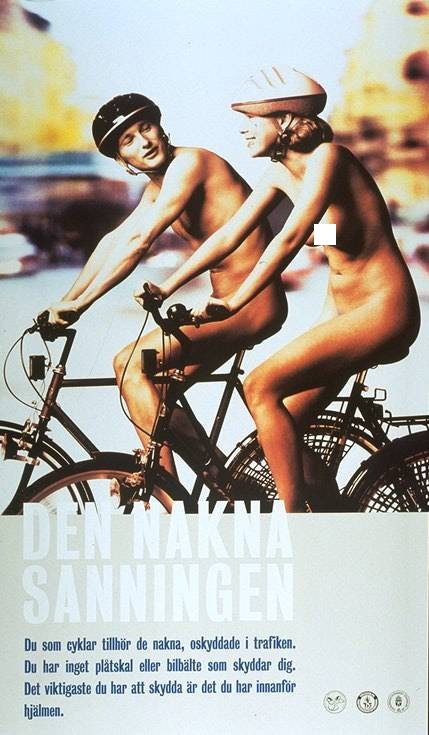
site contains a small amount of nudity!
A nudity-free version of this site is available at http://bicyclelighting.com, however it omits some photos of lighting equipment and bicycles. If you feel that you will be offended or harmed by viewing nude images, or if you are under 18 years of age, then you should leave now. |
|
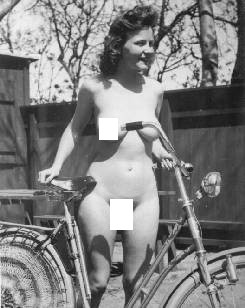
Why is there nudity on a web site about bicycle lights? I went looking on-line for pictures of bicycles with lights, reflector brackets, bells, water bottles, rear racks, etc.. This being the WWW, occasionally all I could find were pictures with some nudity. No one goes around taking pictures of bicycle lights, but for some reason they do take pictures of nude women and bicycles, go figure. I wanted to have examples of bicycles with these accessories installed. The photos are for educational purposes. There is no pornography. Look only at the accessories, not the riders. |
"For commuters, the best front light is the very bright rechargeable lamp."
Ken Kifer, Ken
Kifer's Bike Pages
Ken Kifer was killed, while riding his bicycle, by a drunk driver, on September 14, 2003. His wisdom about cycling lives on.
"With vastly more light available, night bicycling is qualitatively far safer. The road can
be lit
both further ahead and, even more important, far more brightly to the sides of the bicycle."
Marty Goodman, Writing about the CatEye's Stadium Bicycle Light,
in History of Electric Lighting Technology
Introduction
Not everyone can afford to buy a commercially
manufactured, very bright rechargeable lighting system, which Ken Kifer
accurately describes as the best light for commuters. While prices have come
down, a good rechargeable lighting system is still over $100 when you add in a
good tail light. Adequate dynamo powered lights will cost you over $350 in the
U.S. (6 watt dynamo plus front and rear lamp). A lot of people settle for less
expensive 3 watt generator light sets which are not suitable for commuting, at
least in the U.S.. Others buy el-cheapo handlebar mount lights which are not
very bright, and usually not very reliable.
This site describes how to build a high performance, rechargeable. lighting system without spending a lot of money. You can spend as little as $40 to construct a system, complete with a sealed beam headlamp, xenon strobe tail light, rechargeable battery, and charger.
All components are available from retail or mail-order stores. I don't sell anything (except Flash Flags), this is purely an informational site. This site contains my informed opinions, as well as the views of other groups and individuals. There are many different solutions for bicycle lighting that meet the criteria of "seeing and being seen," and there are many solutions that do not meet these criteria. Choose wisely and use common sense.
You don't have to spend hundreds of dollars for an adequate lighting system. A lighting system is not rocket science, it's basically connecting a battery to some lamps. The challenge is in sourcing the proper components and mounting them to the bicycle in a secure and reliable manner.
|
|
|
Not Rocket Science! |
History
This site evolved from a set of plans I wrote back
in the 1980's for a 78WH lighting system. I also
had a side business manufacturing and selling lighting systems for a while, but
it was too much work for too little money. From time to time I would get e-mails
asking for these plans; I resurrected them from their Wordstar DOS format,
updated them, and put them on a web site.
|
|
Return to Table of Contents |
|
e-mail webmaster |
|
Making Your Presence Known
Riding safely at night (and even in the daytime)
means doing everything possible, within reason, to make yourself visible and
your presence known. Your life depends on being visible to vehicles. This is the
U.S. we're talking about here, complete with lunatic drivers (both drunk and
sober); elderly drivers who should not be driving in the daytime, let alone at
night; and inexperienced drivers (young and old) who may look out for other
vehicles, but don't look for pedestrians and cyclists very carefully, even in
the daytime. It's a place where motorists that engage in serial red light
running, and that never stop for pedestrians in crosswalks, will complain
bitterly about a cyclist not coming to a complete stop at a stop sign.
Clueless Motorists
Except for yahoos and drunks, most
motorists don't intend to behave badly around bicycles--they are simply
clueless. Even non-clueless motorists, including myself, get very upset when I have a close call with a
bicyclist that is not visible at night. On the other hand, motorist behavior when they see a highly visible
bicycle is truly amazing. They don't crowd you and they don't turn in front of
you; approaching from the rear they arc around you giving you plenty of room.
The Netherlands are not the
U.S.A.
Some well-meaning, but misinformed, people claim that 2.4W headlights (generator
lights) are sufficient because this sort of lighting is widely used in the
Netherlands and some other countries in Europe. I believe that they are
incorrect in their assertions because the conditions for cycling in the U.S.
differ greatly than those in these other countries.
No Double-Blind Study
There is never going to be a double-blind study on the
effectiveness of good lights versus lousy lights and the rate of bicycle-vehicle
collisions; you're just going to have to look at the big picture and use some common
sense and comprehend that a bicycle
with 2.4 watt headlight and 0.6W tail light is nearly invisible in a sea of
bright lights.
Stadium Lights
Advocates of inadequate lighting, that are unable to present coherent reasons for
their position, will often claim that I am advocating that
bicyclists install stadium lights on their bicycle. Such an exaggeration shows just how weak the position the poor light advocates is. No one is saying that you should tow around a car battery that
powers dual 130 watt off-road driving lights. There are both commercial and
home-made systems that will make you very visible without going to ridiculous
extremes. Cyclists that have gotten away with inadequate lights for years are
fond of pointing to themselves as proof that in fact their equipment is just
fine, but of course all it proves is that they've been lucky so far.
The Logic-Free Zone
It seems like every time there is a tragic bicycle accident, the apologists come
out of the woodwork with the same assertions:
There is no proof that the lack of proper lighting contributed to the collision (if the incident occurred at night)
There is no proof that a helmet would have prevented death or injuries (if a helmet was worn then they will claim that this proves that helmets are worthless)
If people drove better then this wouldn't have happened so why should cyclists be expected to wear helmets and/or use proper lights
There are magnitudes more deaths from motor vehicle accidents than from bicycle accidents, yet no one expects occupants of motor vehicles to wear helmets.
|
|
Return to Table of Contents |
|
e-mail webmaster |
|
Discover the Pleasure and Safety of Night Cycling
Many cyclists are discovering the enjoyment of night and early morning
riding. The weather is cooler, the traffic is much lighter, and a ride before or after work is a great way to start the day or unwind after a grueling day.
I especially enjoy a post-dinner ride to a coffee house because I can pretend that I'm in Amsterdam or
Taipei instead of San Jose.
A common misconception is that night bicycle riding is extremely dangerous. This fallacy results from seeing, or more accurately, not seeing, cyclists riding at night with inadequate or no lighting. But as John Forester, author of Effective Cycling (widely considered to be the bible of cycling information), writes in his chapter titled Riding at Night, "...the increase in danger is not sufficiently great to prohibit nighttime riding for either business or pleasure, provided that one takes the proper precautions in both equipment and behavior." I would even go further than Forester and say that given the daytime traffic levels in many urban areas, night riding is probably safer than daytime riding provided you equip your bicycle properly. At night, with a top quality lighting system, motor vehicles are less likely to fail to see you than in the daytime. The key to safely enjoying night riding is equipping your bicycle with a high performance lighting system which lets you see the road and which, more importantly, lets motorists see you. With a bright xenon strobe and a powerful headlight, a bicyclist is very visible at night. Too many people have gotten the impression that riding at night is exceptionally dangerous because they so often see cyclists riding with inadequate lights; cyclists that use and promote inadequate lighting do a disservice to all cyclists that ride responsibly at night.
In the 1980's I used to lead all night bicycle rides for a local bicycle club (Western Wheelers). These rides started at 2:00 a.m.. We rode throughout Silicon Valley with no problems other than one drunk coming out their house and hurling a beer bottle at us (he missed). I also led the same type of ride up in San Francisco, riding through North Beach (including Lombard Street), Chinatown (with a 3:30 a.m. restaurant stop), downtown (via the Stockton tunnel), Fisherman's Wharf, Golden Gate Park, and across the Golden Gate Bridge. It was wonderful riding through San Francisco on virtually traffic-free streets (if anything, people were scared of us!). Take back the night!
|
|
Return to Table of Contents |
|
e-mail webmaster |
|
Legalese
Nothing can eliminate the dangers inherent in
riding a bicycle. No lighting system can completely eliminate the dangers
inherent in bicycle riding at night. In no way do I intend to imply that use of
a bicycle lighting system built according to these instructions will reduce or
eliminate the dangers inherent in bicycle riding at night. Bicycling is a
dangerous activity regardless of the time of day. I assume no liability for
accidents, death, or injuries incurred as a result of using a a system built
according to these instructions. You should take following precautions to lessen
the danger:
Check state and local laws regarding the use of high wattage lights on bicycles, and regarding flashing strobes (as well as legal colors). In most states, flashing red lights (i.e. LED blinkers) are not legal, but flashing amber lights are fine. Most LED blinkers can be set to steady-on if law enforcement objects to the flashing mode.
Always carry spare batteries, bulbs, fuses, and the tools and knowledge to install them.
Carry a legal back-up lighting system in case your primary system fails. Check state laws regarding bicycle lighting requirements to ensure that the back-up system is adequate.
Ensure that the system is properly attached to the bicycle. Check mounting brackets, Velcro straps, wiring harnesses, and rear rack attachment hardware every time you ride. This is especially important because if the system fell off, or if the wiring harnesses became tangled in the spokes, it could cause you to crash.
Check wiring harnesses for fraying or breakage. A short in a wiring harness will cause the fuse in the system unit to blow.
Ride safely and obey all traffic laws. Ride defensively. Anticipate the actions of inexperienced, poor, and reckless drivers.
Wear reflective clothing.
Properly wear an ANSI or Snell approved bicycle helmet.
Install a loud horn on your bicycle.
Make sure that your bicycle is in safe riding condition.
|
|
Return to Table of Contents |
|
e-mail webmaster |
|
Seeing
versus Being Seen
There are two things you have to
consider when riding at night:
1. Seeing the road
2. Being seen by motor vehicles (as well as
pedestrians and other cyclists)
Being Seen
On streets that are well lit you need
lights that will make you visible. The best lights for this are xenon strobes. You can
put a red or amber xenon strobe on the back of your bike and a clear xenon
strobe on the front. You'll still need a low wattage front headlight to remain
legal. A xenon strobe is similar to what's used in a camera flash. An electronic
circuit charges a to a high voltage and then discharges it through a xenon tube.
Xenon lights are incredibly bright considering their relatively low current
draw. Xenon strobes are visible in areas with a lot of ambient light, and are
even visible in the daytime. Avoid LED blinkers which are cute, but not very
visible except in total darkness.
Seeing
On darker streets you need to be able to see the road in front of you. How
far you need to see depends partly on how fast you ride. For quartz-halogen
lamps, a good rule of thumb is a minimum of 10 watts, then an additional watt
for every mph over 10 mph. So at 20 mph you should have a minimum of 20 watts.
To reduce the amount of watt-hours you have to carry around, it is a good idea
to have two headlamps, and select either or both depending on your needs. This
is why commercial lighting systems often offer dual lamp systems, i.e. one 20
watt and one 5 or 10 watt headlamp, or two 10 watt headlamps.
|
|
Return to Table of Contents |
|
e-mail webmaster |
|
Myths
and Facts About High Quality Rechargeable Lighting Systems
I added this section because there are
so many myths being promulgated by individuals who are very much against the
use of bright, high
quality bicycle lighting systems. As these people create more myths, I'll
add to this section.
Myth
It takes weeks of cobbling in a workshop to construct
a rechargeable bicycle lighting system.
Fact
Once the components are acquired, it takes about one
hour to construct. If you have to fabricate a brake bolt mounting bracket from
aluminum flat, then add about another hour.
Myth
High quality rechargeable bicycle lighting systems are
very expensive
Fact
While it is true that there are commercial systems
costing hundreds of dollars, it is very simple to construct your own system for
well under $100, and you can even get by for less than $50.
Myth
Dynamo systems are more reliable than battery powered
systems
Fact
Battery based systems are MUCH simpler than the dynamo
systems, and hence more reliable. They’re a battery connected to a lamp. No
moving parts. No slippage. No voltage regulators that waste power as they
attempt to prevent bulb burnout at high speeds. No connections that are exposed
to the weather (if done right). The only unreliable part of battery system is
the user who forgets to charge the batteries!
Myth
Dynamo systems are the best option for commuting
Fact
The experts agree that a very bright rechargeable
battery powered lighting system is the best system for commuting. There is one
dynamo system that uses a 5W headlamp (as opposed to a 2.4-3W headlamp); this
would be adequate for commuting, but it is very expensive.
Myth
LED blinkers are the best type of rear light.
Fact
LED blinkers have many drawbacks. The most serious is
the narrow field of view. There are a couple of decent LED blinkers on the
market, but neither is as good as a xenon strobe.
Myth
MR16 and MR11 lamps are “decorator” lamps, because
they are used in some track lighting fixtures and display cases.
Fact
MR16 and MR11 lamps are used in a wide variety of
scientific, consumer, and commercial products. The reason for their popularity
is because the fact that the reflector and the bulb are precisely matched
together. The reflector and the bulb are one unit. These lamps are popular
because they provide an excellent ratio of illumination per watt.
Myth
You’re advocating that cyclists put megawatts of lamps
on their bicycles and haul around tons of batteries to power them.
Fact
The advocates of dynamo systems tend to exaggerate. No
one has suggested that megawatts of lamps are necessary for cyclists.
Myth
I know that my lights are fine, because I asked someone to tell me if they
could see my bike at night and they said that they could.
Fact
This is not a reliable test because the person is specifically looking for
your bike.
Myth
I know that my low power lights are fine, because I've been using them for years and
haven't had any problems.
Fact
This is not proof of anything. You may just be lucky. You may be
exceptionally cautious. There are lots of examples of people getting away with
dangerous behavior for long periods of time.
Myth
Small battery powered, and dynamo lights, meet the legal requirements for
lighting so they must be fine.
Fact
The minimum legal requirements for bicycle lighting are just that, minimum
legal requirements. The minimum legal requirements are inadequate, according to
every expert on bicycle lighting. There is no requirement for a rear light at
all, just a reflector meets the legal requirement.
Myth
LEDs make good bicycle headlights because they have a high lumens/watt ratio
and because they are "solid-state" devices without "white-hot" filaments.
Fact
LEDs make lousy bicycle headlights, at least so far. The very bright 5W LEDs
have a very short life, 500 hours, and run too hot for applications without
active cooling. 1W LEDs have long lives, but it requires multiple 1W LEDs to
achieve a reasonable intensity, and there is no good way to collimate the output
of individual LEDs into a usable beam.
LEDs make reasonable "being seen" lights if you use enough of them, and use the proper reflector and lens, i.e. the Reallite 18 LED rear flasher.
While low power LEDs do have a higher lumens/watt ratio than low power quartz-halogen bulbs, they are not orders of magnitude better. LEDs are not as efficient as HID bulbs.
|
|
Return to Table of Contents |
|
e-mail webmaster |
|
Cost
You can build a very high quality lighting system
with NiMH batteries for about $110, including a smart charger. If you want to use a sealed lead acid
battery then you can lower the cost to about $75. You can eve get by with
spending as little as $40 for a very capable single headlamp system.
The commercial lighting manufacturers charge very high prices for their NiMH
systems, even though NiMH batteries have plunged in price as they have become a
consumer item used in digital cameras. A 24AH NiMH battery pack will cost you
less than $15 (ten 2000 mAH AA cells and a ten cell battery holder). What drives
up the price of homebuilt systems are the niggling bits of hardware, connectors,
battery holders, and switches; items that are very cheap in production
quantities, but very costly when you buy individual quantities and have to pay
shipping (many of these
pieces are available only via mail-order, and the shipping costs can be $5 on a $1
item). On the other hand, the commercially available lighting systems charge very
high prices for their NiMH battery models, even though NiMH batteries are now
very cheap.
|
|
Return to Table of Contents |
|
e-mail webmaster |
|
Sourcing
As an electronics hobbyist for most of
my life, and an electrical engineer who frequently is involved in prototyping, I
am very familiar with component sourcing. Non-engineer types often have no idea
where to buy the parts at reasonable prices and are shocked when they see how
much parts cost at places like Radio Shack or Fry's.
There must be no product that has a bigger mark-up than replacement lamps for commercial bicycle lighting systems. I can buy a 12 volt, 10W or 20W MR11 flood beam lamp, with cover, for $2 at a local store (Ikea). Night-Sun charges $20 for this lamp, and the other commercial lighting companies aren't a whole lot better (I was quoted a wholesale price of $0.80 for MR16 lamps of any wattage). Other components such as batteries and chargers vary wildly in price, and most cyclists are not familiar with the lowest cost suppliers.
NiMH batteries have become extremely inexpensive; you can buy a pack of ten 2000mAH AA cells for less than $10, but if you go to Fry's, the exact same product sells for $20. Commercial bicycle lighting manufacturers charge very high prices for their NiMH systems.
Watts Versus Lumens
Technically, a watt is a unit of power, not
light. Lumens are a better unit to use because the lumen is weighted to how the
human eye responds to light. This table compares different lamps, their
power consumption in watts, and their light power (luminous flux) in lumens. But
even knowing the lumens is not enough information. Without a distribution
diagram, in candelas, you still don't know the intensity. The reflector and lens
will determine the beam angle, and hence the intensity (whether the candelas are
focused exactly where they need to be). For MR11 and MR16 lamps, the
manufacturer will often specify the candelas based on the different beam angles,
but candelas cannot be specified for a standalone bulb (though sometimes someone
will use the less useful "Mean Spherical Candlepower," which is the luminous
flux divided by 4 pi). The bottom line is that lumens, and lumens per watt, are
a good start in determining the optimal headlamp configuration. For more
information please see:
http://www.electro-optical.com/whitepapers/candela.htm and
http://www.caves.org.uk/led/foot1.pdf.
|
Lamp
Type |
Normal
Voltage |
10%
Over-Voltaged |
20%
Over-Voltaged |
||||||||||||
|
Volts |
Amps |
Watts |
Lumens |
Lumens/Watt |
Volts |
Amps |
Watts |
Lumens |
Lumens/Watt |
Volts |
Amps |
Watts |
Lumens |
Lumens/Watt |
|
|
MR11 |
12 |
0.5 |
6 |
80 |
13.3 |
13.2 |
0.5 |
7.1 |
111.2 |
15.7 |
14.4 |
0.5 |
7.4 |
146.4 |
19.7 |
|
MR11 |
12 |
0.8 |
10 |
190 |
19.0 |
13.2 |
0.9 |
11.8 |
264.1 |
22.4 |
14.4 |
0.9 |
12.4 |
347.7 |
28.0 |
|
MR11 |
12 |
1.7 |
20 |
400 |
20.0 |
13.2 |
1.8 |
23.6 |
556.0 |
23.6 |
14.4 |
1.7 |
24.8 |
732.0 |
29.5 |
|
MR16 |
12 |
0.8 |
10 |
400 |
40.0 |
13.2 |
0.9 |
11.8 |
556.0 |
47.1 |
14.4 |
0.9 |
12.4 |
732.0 |
59.0 |
|
MR16 |
12 |
1.7 |
20 |
850 |
42.5 |
13.2 |
1.8 |
23.6 |
1181.5 |
50.1 |
14.4 |
1.7 |
24.8 |
1555.5 |
62.7 |
|
MR16 |
12 |
2.9 |
35 |
1250 |
35.7 |
13.2 |
3.1 |
41.3 |
1737.5 |
42.1 |
14.4 |
3.0 |
43.4 |
2287.5 |
52.7 |
|
HS3 |
|
0.4 |
2.4 |
36 |
15.0 |
Not
Applicable |
Not
Applicable |
||||||||
|
HS3 |
6 |
0.5 |
3 |
46 |
15.3 |
Not
Applicable |
Not
Applicable |
||||||||
| Luxeon V Portable | 6.8 | 0.7 | 4.8 | 120 | 25 | Not Applicable |
Not
Applicable |
||||||||
| Luxeon Star | 3.4 | 0.35 | 1.2 | 25 | 21 |
Not
Applicable |
Not
Applicable |
||||||||
| Light & Motion HID | 10.8 | 1.0 | 11.0 | 550 | 55 | Not Applicable | Not Applicable | ||||||||
| Light & Motion HID | 10.8 | 1.25 | 13.5 | 675 | 50 | Not Applicable | Not Applicable | ||||||||
The MR11 and MR16 lamps are most common in sealed-lead acid and NiCad or NiMH battery powered lights, while the HS3 bulbs are used in generator light sets. Both are quartz-halogen. This data shows the huge advantage of using MR16 lamps versus MR11 lamps; the larger reflector of the MR16 makes a big difference in efficiency.
By using the over-voltaging technique, you can greatly increase the efficiency of quartz-halogen lamps (at the expense of a reduction in bulb life). It is not possible to over-voltage with a generator lighting system.
The bottom line is that battery powered lights using MR11 and MR16 lamps, are far more efficient in terms of lumens/watt than generator powered lamps. However, if you were able to find a 2.4W MR16 or MR11, it would not be as good as a 2.4W high end generator light such as a Lumotec.
4.8W LED lamps provide about twice the efficiency of a 5W quartz-halogen lamp, but at a much higher price. Lumens are only part of the equation too, as LED lamps cannot be focused into as good of a beam with the use of optics, at least not yet.
HID lamps are very efficient, but a 10% over-voltaged 10W MR16 comes close in efficiency to an HID, and a 20% over-voltaged MR16 beats an HID in efficiency. However the over-voltaged MR16 will have a much shorter lamp life than an HID.
|
|
Return to Table of Contents |
|
e-mail webmaster |
|
System
Recommendations
While each person's needs may vary, here are some suggestions for lighting
systems.
Buy one set of Optronics MR16 based driving lights, one 10W narrow flood MR16 lamp, one 20W flood MR16 lamp, a 5AH sealed lead-acid battery, a dual-rate 1000mAH charger, a 12 volt Xenon strobe tail light, a frame bag for the batteries, connectors, a plastic box for the switches, and three switches. As an alternative to the MR16 lights, buy two 14W sealed beams. I prefer the latter solution but it is a bit more work to construct.
For a budget system, use one 5AH battery, one 14W sealed beam, one xenon strobe, and one dual rate charger. You can construct something for less than $50.
You will have to figure out a place for the battery pack and a way to mount the headlights to the bicycle. I prefer mounting the lights to the front reflector bracket (use a rectangle of aluminum or wood for two lights, but for one light you can mount it directly to the bracket). The batteries can be placed in a frame bag, seat bag, or rack-top bag.
I am less enthusiastic about NiMH systems because of the need to parallel AA battery packs in order to provide sufficient current to the lamps if going over 16 watts or so. Using C or D cells will work, but is very expensive because C & D cells are much more expensive per AH then AA cells. Also, it is rather a pain to build the AA packs with a battery holder due to the tiny solder tabs on the holders. While parallel AA packs solve the cost and current issue, you have to charge the packs separately which is a pain if you want to charge your batteries overnight (unless you buy two chargers).
|
|
Return to Table of Contents |
|
e-mail webmaster |
|
Headlights
The
headlight(s) are a) one or two 12 volt, 14W or 25W quartz-halogen sealed beam(s) or
b) automotive driving
light(s) with the stock high wattage MR-11 or MR16 lamp(s) changed to a lower wattages. It is
also possible to use an an automotive driving light with an H3 bulb.
MR11 and MR16 based housings will always be metal because of heat issues
(plastic is a thermal insulator and will not conduct the heat away from the
small lamp).
Dual headlights make sense for several reasons. First, on a single ride, you may be riding part of the time in areas where you just need to be seen, and two headlights are unnecessary; you extend your run time by turning off the one headlight. Second, if one headlight burns out, you have a back-up. Third, dual headlights make your bicycle look more like a motorcycle.
If you ride a lot on bicycle paths or shared pedestrian/bicycle paths, then you should consider adding a very low wattage headlamp (i.e. 5W), and an LED blinker. While a 5W lamp and LED blinker are not suitable for road riding, they are adequate for low speed riding on paths. You could also opt for an AA powered Mag Light for use on bike paths. It is inconsiderate to use high power lights on bicycle paths, and since there are no motor vehicles, "being seen" is less of an issue.
Sealed Beam
I find a sealed beam is less troublesome
than a housing with a removable lamp and the larger reflector produces more
light per watt than an MR11 lamp, though in a less focused pattern. The 14W beam is
actually perfect for bicycle commuting at speeds up to 20 mph; it both lights
the road and makes you very visible. The
sealed beams make the bicycle look more like a motorcycle than do the tiny MR11
lamps. The beam is used without a housing, and is very
lightweight (less than an MR11 or MR16 lamp inside a metal housing). It runs cooler than the MR11 and MR16 type of lamps, and it is
waterproof. However the sealed
beams are not as cool looking (I think that they're retro looking) as those tiny housings used by commercial
systems, and the beam is not easily aimable once installed.
Use 8/32" screws (length depends on what you are mounting it to) through the terminal holes after you tap threads with the short self-tapping screws that are included. Use ring lugs for a #8 stud on these bolts to bring power to the headlight. The set-up does look rather geeky due to the wooden plank. Painting the plank black, or covering it with black heat shrink tubing, would degeekify it quite a bit (in my opinion). A system that an engineer can love! My six year old son was very impressed with it. Kids that I pass while riding think that the lights are way cool.
The 14W beam is Intermatic/Malibu LV504, the 25 watt beam is LV505. The LV505 is sold only at Home Depot (I have not seen it on-line or at other hardware stores).
|
|
 |
|
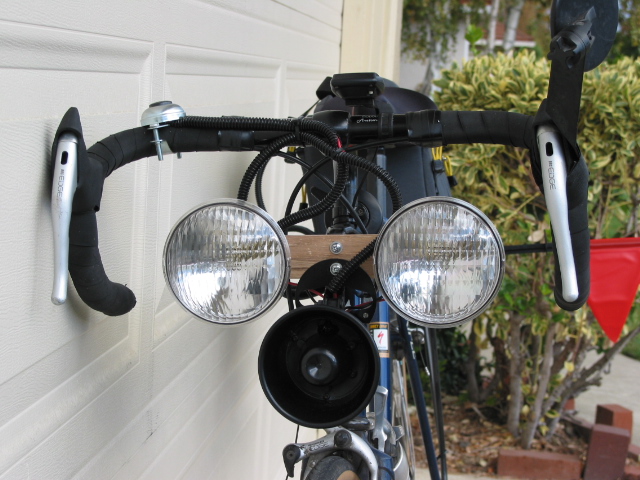
Quartz-Halogen Sealed
Beam |
My road bike/commuting bike with dual 14W quartz-halogen sealed beams mounted on solid oak and attached to the reflector bracket. No handlebar clutter! 25 watt quartz- halogen sealed beams are also available, but avoid the 11 watt non-halogen sealed beam. I2 volt horn is between the two headlights. |
MR11
Lamp Based Headlamps
Most commercial bicycle lighting
systems use MR11 halogen lamps. While these lamps are easy to find, it has been
a problem finding the proper enclosure. Try to avoid using PVC pipe, tow ball
covers, etc. for a housing. These are tacky, do not dissipate heat well, are not
aimable, and the mounting to the bicycle is difficult. I did find two different inexpensive
driving lights that use the MR11 lamps (thanks to an e-mailer for pointing out
the availability of the Eagle Eye Driving/Fog lights).
The problem with MR11 based headlamps is that the reflector is really too small to be efficient enough with lower wattage bulbs. Thus, the MR16 based headlamps are a better choice in terms of lumens/watt.
Click Images for Details
 |
|
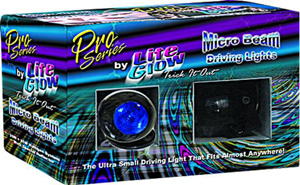
| Micro Beam (get the ones with
clear lenses) Comes with 35 watt lamps. MR11 lamps with covers are used, there is no lens build into the fixture. |
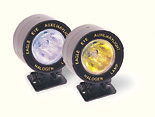
Eagle Eye
Driving/Fog Lights These are similar to the Micro Beam, but they come with 20 watt lamps. Choose the ones with clear lenses. A fuse and fuse holder are included. Also available under the Rally brand, at Pep Boys, for $30. Not sure if lens is built into the fixture or if an MR11 lamp with a lens is needed. |
| $22 | $23 $25 |
A pair of Lite Glow Micro Beam driving lights (35W MR11 lamps) costs $22 from http://www.autobarn.net/tb3000series.html, though I should warn you that if they are out of stock and waiting for shipment from the manufacturer that if can take months for your order to come. Get the ones with clear lenses.
A similar light to the Micro Beams are the Eagle Eye Driving/Fog lights, model 1862BW. These come with 20 watt lamps, so they may be a better choice than the 35 watt Micro Beam (you only have to change one of the lamps to a lower wattage lamp if doing a dual lamp system). Do a Google search for 1862BW. Two sources are: TRUCKADDONS.COM and EarlOwen.com (call them at 800/527-2006 and the price may be a bit cheaper).
MR16
Lamp Based Headlamps
The larger reflector of MR16 lamps means more light output for a given
wattage. This comes at the expense of a slightly larger and heavier housing. 12 volt MR16
lamps are available from 5W to 75W versions. 6 volt MR16 lamps are available in
5W and 10W versions. 5W MR16 bulbs are very hard to find, but I
did find one source in the U.K., see: http://www.e-go.gb.com/parts.asp.
MR16 (and MR11) lamps are especially good for battery powered applications that require high efficiency because their precise beam control increases the center beam candlepower. This is not easy to do with assemblies where the reflector and bulb are two separate pieces.
The driving lights should be relatively waterproof, but use some silicone sealant on the seams. I was quite surprised at the difficulty of finding MR16 based driving lights. I think that it has to do with the fact that with a sealed unit it is difficult to keep a 50W lamp from overheating. Most automotive driving lights use 55 watt H3 bulbs with a big housing, big, reflector and big glass lens, which helps to mitigate thermal issues. MR16 track lights are ventilated, and use MR16 lamps without covers. These driving lights are a much better method of using MR16 lamps than fabricating your own holder.
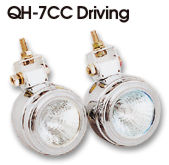
The QH-7CC is basically a metal can with a socket and an MR16 (with cover) lamp. The cover ring removes without tools by turning and pulling. You should use some silicone sealant around the ring so it doesn't vibrate off, and seal the back where the wires come out.
The Eagle Eye 1874C is a very interesting fixture since it allows two lamps in one fixture, just as some of the higher end commercial bicycle lighting fixtures. However there is actually a big disadvantage in using a dual lamp fixture because each lamp cannot be aimed separately. With two separate lamps you can aim one straight ahead to illuminate the road far ahead of you, and one slightly down to illuminate the road surface right in front of you.
Click Images for Details
|
|
|
|
|
|
| Optronics QH-7CC
MR16 driving lights (set of two). Comes with 50W lamps which you can
change to a lower wattage. I
read one review of these that suggested some silicone sealant around the
seams, and I agree with this recommendation. One of these would be very easy to mount to a reflector bracket.
You can change lamps without tools. These fixtures do not have lenses so you must us lamps with covers. Ignore the JC Whitney catalog blurb that says that these are H3 bulbs, they are MR16 bulbs. Also ignore the on-line description which states that these have yellow lenses, they have clear lenses, as stated in the paper catalog. |
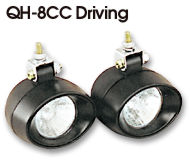
Optronics QH-8CC MR16 driving
lights. Comes with 50W lamps which you can change to a lower wattage. One of these would be very easy to mount to a reflector bracket.
I have not found these for sale anywhere. JC Whitney sells the version with yellow fog-light lenses. |
Eagle
Eye 1866C; 50W MR16 lamps.
Thanks to an alert reader, a source for these lamps has been found. Get the clear version (C suffix) Screwdriver needed to change lamp. |
Eagle Eye 1873C; 50W MR16
lamps
Get the clear version (C suffix) Screwdriver needed to change lamp. |
Eagle Eye 1874C; Dual 50W
MR16 lamps
Wow, this is the fixture I've been looking for. Thanks to the person who e-mailed me this. With this fixture you can have two different lamps in one fixture (high/low, spot/flood, etc.). Share a set of these with a friend, or equip two bicycles with lights. A little more expensive than using two single Optronics lamps, but less hassle to mount. Get the clear version (C suffix) Screwdriver needed to change lamp. |
|
Unavailable |
H3 Headlamps
There are many automotive driving
lights that use H3 type halogen bulbs. These driving lights are available
with rectangular reflectors and lenses which are better than the small round
MR11 type lamps. The problem with H3 based headlamps is the lack of any H3 bulbs
lower than 25W. The lowest wattage 12V H3 bulb is 35W. The lowest wattage 6V H3
bulb is 25W (very hard to find, but I did locate one source for it). If you go this route then be sure to use switches and connectors
that are rated at 6 amps. You'll want to use 7500mAH NiMH D cells or a 6V sealed
lead acid battery. One advantage of the H3 fixtures are that they typically have
better lenses and reflectors than the MR11 and MR16 lamps. One disadvantage is
that they typically have thick, heavy, glass lenses because the lenses are
designed to be more resistant to breakage.
Click Images for Details

 |
|
 |
| H3 Auxiliary Lights (12V 55W, H3) | Slimline Driving Light (12V 55W, H3) | 6 Volt, 25W H3 Bulb |
| 2/$20 (rectangular) 2/$19 (round) | $32 | $7.50 |
Low Wattage
MR11 and MR16 Lamps
Since the lamps that come with
the MR11 and MR16 based driving lights may be too high of a wattage for a battery powered
light, you will want to replace the included lamp with a a lower wattage lamp. Check
to see if the housings have their own lens and use lamps without covers, or if
they require a lamp with an integral cover.
MR11
There are 12 volt MR11 lamps available at 5W, 10W, and 20W. There are also 6 volt MR-11
lamps available if you want to build a 6 volt system, but you don't get as big
of a choice in lamp types.
MR11 lamps come in different types with regards to the type of beam they project:
| ANSI Code |
Beam Description |
Beam Angle (Degrees) |
| FTA | Narrow Spot | 9.5 |
| FTB | Spot | 10 |
| FTC | Narrow Flood | 17 |
| FTD | Wide Flood | 27 |
| FTE | Spot | 12 |
| FTF | Narrow Flood | 18 |
| FTH | Wide Flood | 38 |
Lamps can come with or without cover glass. If your fixtures already have a glass lens then you don't need the lens, and in fact the lamp will probably not fit in the fixture with the lens on there (you can probably pry it off, especially if you heat it first). There will be a C or L or FG suffix to indicate a cover or lens or front glass. The description will always mention a lens or cover if the lamp has a cover.
The lower wattage lamps generally do not specify a beam angle as the light is too weak to matter. 5W and 10W lamps are more for being seen and staying legal than being able to actually see anything. Starting with 20W lamps you get a wider choice in beam angles. Try to get an FTD or FTH lamp (27 or 38 degrees) for your 20W main headlamp. Ikea sells the 38 degree 20 watt lamp (and the 10 watt 38 degree lamp) for $2 each. Got that? $2. Night-Sun charges $20 for a replacement MR11 12 volt flood lamp (1000% more). And at Ikea you can eat lunch really cheap too!
The more common the lamp, the cheaper they are. For example the 12 volt 20W or 10W wide flood lamps with cover cost as little as $2 at Ikea, but even mail order you can get the 20W for $2.45. The lower wattage lamps are more of a specialty item and cost more, i.e. the 5W lamp costs $5.60. It is outrageous what the commercial bicycle lighting companies charge for replacement lamps. For example, Night Sun charges $20 for 20W flood lamp that you can purchase for $2 at Ikea..
See lamp specs at: http://www.bright.co.jp/english/prd/hal_01.html
Sources
Ikea
Ikea stores sell the 12V MR11 FTH/G
wide flood for $2 in 10W and 20W versions. Not available on-line. Unfortunately,
none of their fixtures for MR11 lamps are suitable for bicycle lights.
http://www.atlantalightbulbs.com
6 volt lamps
5W 6V MR11 G4
10W 6V MR11 G4
12 volt lamps
5W 12V MR11 G4
20W 12V MR11 FTD/L
DG
Lighting Supplies , good prices. 12
volt only, 20W and 35W.
United
Halogen Bulb sells 5W,10W, 20W, and 35W lamps in both 12 volt and 6 volt
varieties.
PEC
Online Lamp Store sells four types of 12V 20W
lamps
Harrington
Lights sells 5W and 10W, 6V and 12V, narrow flood lamps
MR16
MR16 lamps come in different types with regards to the type of beam they project. For 20W lamps the codes are as follows:
| ANSI Code |
Beam Description |
Beam Angle (Degrees) |
| EZX | Narrow Spot | 6 |
| ESX | Spot | 12 |
| BBF | Narrow Flood | 24 |
| BAB | Flood | 38 |
If using the Optronics QH-7CC driving lights then you need MR16 lamps with lenses.
Sources
Harrington
Lights sells 12V 10W MR16 lamps (narrow flood), with a lens.
Harrington
Lights sells 12V 20W MR16 lamps (flood and narrow spot)
5W MR16 bulbs are very hard to find, but I
did find one source in the U.K., see: http://www.e-go.gb.com/parts.asp.
These bulbs all have lenses. These have an 18 degree beam angle, which is
halfway between spot and narrow flood. A flood pattern would be better if this
lamp is to be used as a "being seen," while a spot pattern would be better if
this lamp is to be used as a "seeing" lamp, but the 18 degree angle is a
compromise that allows this lamp to be used in a single lamp system.
|
|
Return to Table of Contents |
|
e-mail webmaster |
|
Headlight
Mounting
The biggest challenge in a homebrew lighting
system is the headlight mounting to the bicycle. Prior to the popularity
of threadless headsets*, a front reflector bracket was standard equipment below
the big headset nuts, or could be easily added. This made an ideal mount for
headlights; it was ideally positioned, it facilitated a very secure mount, and
it did not add to handlebar clutter. It was usable on road bikes with taped or
foamed bars because it did not depend on a clamp that only worked with a
specific diameter of bars. Except for higher end touring and road bikes, most
new bikes now use the cheaper threadless headsets which cannot use the headset
mount reflector bracket. There are also brake bolt mount steel reflector
brackets that will work just as well, and plastic brackets that are okay for
lighter headlamps.
Note that all bicycles sold in the U.S. still require a front reflector however the mounting may no longer be sturdy enough to mount a headlight on. If it is a piece of steel attached the brake bolt then it's fine. It it's a thin plastic loop clamp or other plastic part, then forget it. Note that you can always buy a piece of aluminum bar and build your own brake bolt mount bracket that fits your particular bike (just bend the aluminum bar to the proper shape in a vise, and drill the appropriate holes). Try to avoid using radiator hose clamps.
*Try to avoid buying bicycles with threadless headsets. The reason for these headsets is that it makes it easier for bicycle manufacturers and shops because they no longer have to stock different lengths of forks (they simply saw the fork to size). You lose height adjustability of the handlebars with these headsets, unless you use a funky extender. Threadless headsets are in the same category of aluminum tubing and compact frames. They save money for the manufacturer, but they are bad for the end user. Amusingly, now bike manufacturers are touting "adjustable stems" as a feature, on bikes where they went back to threaded headsets.
Headlight Mounting to
Reflector Bracket
Remove the front reflector and mount the
headlight to the front reflector bracket via an insulator. This avoids the need for funky
handlebar clamps, and eliminates handlebar clutter. If your bike doesn't have a front reflector bracket then
you'll need to buy one at a bike store or come up with some other mounting
method. You can add a reflector bracket to threaded headsets but not to
threadless headsets (you will need a headset wrench). For the Micro Beam driving lights you may need to fasten it
to a rectangle of wood or metal to make the mounting holes line up with the
reflector bracket. The top of the line Nitto front rack has an integral mount
for a headlamp.
Click Images for Details or for Larger View and More Pictures
|
|
 |
|
|
|
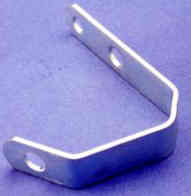
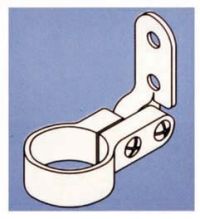
| Commercial reflector
bracket
for brake bolt. You can bend and drill your own from a section of aluminum
flat (Home Depot). I don't know where you can buy one already made.
Avoid 90° bends in aluminum flat bar, follow the example above.
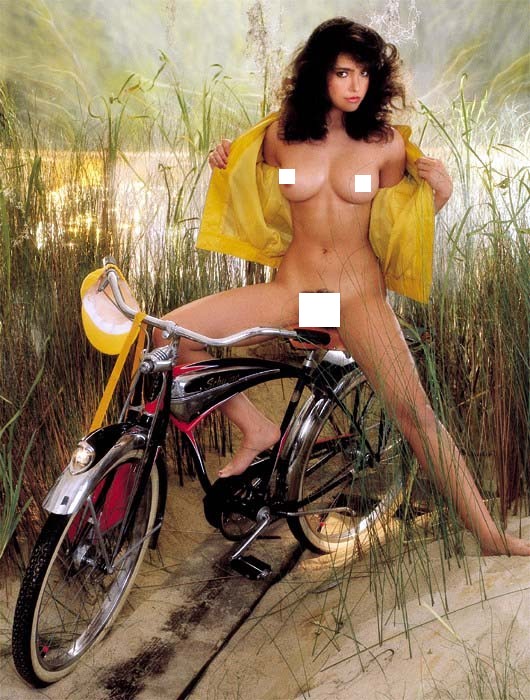
The bracket goes under the steering tube and is fastened with a bolt through the brake bolt hole. Most forks still have this hole, even though it isn't used for brakes any more (some fenders use it). Click the lower picture for a larger view of this bicycle with this type of bracket. Pay no attention to the shameless hussy on the bicycle. |
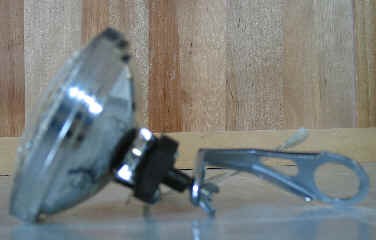
Home made reflector bracket
for brake bolt made from a piece of flat aluminum with a QH-7CC driving
light attached to it. Don't do 90 degree bends as this will weaken the
aluminum. The bend at the bottom of this bracket is about 65 degrees.
The bracket goes under the steering tube and is fastened with a bolt through the brake bolt hole. Most forks still have this hole, even though it isn't used for brakes any more (some fenders use it). |
Commercial reflector bracket for a threaded headset. A bike shop will sell you this very cheaply if they still have any! Click the lower picture for a larger view of this bicycle with this type of bracket and other bicycles with similar brackets, including a close-up of the headset. | Dimension Front Reflector Bracket. This would be fine for a single plastic sealed beam, but not much more. $2.95 from bikeman.com. | Nitto steel front rack has a mount for a front headlamp. $128 |
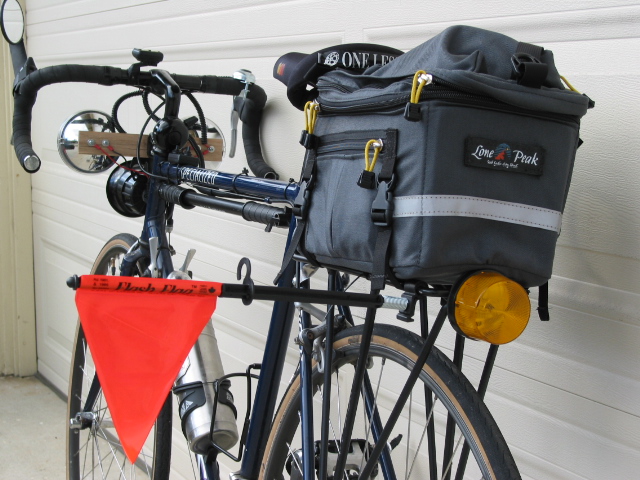
|
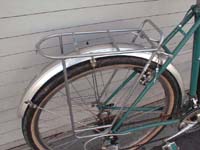
|
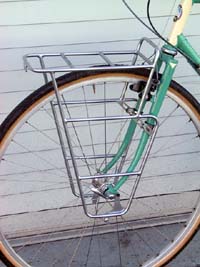
| This bicycle has an improperly installed rear rack (tilted down) and the rear reflector is blocked even without any luggage on the rack. Try to keep your rear rack level because any rear light attached to it will be more visible if it is straight. The front reflector, if it exists at all, is blocked by the front basket. Pay no attention to the woman who is obviously trying in vain to take attention away from the bicycle. |
Click Images for Larger View and More Pictures
|
|
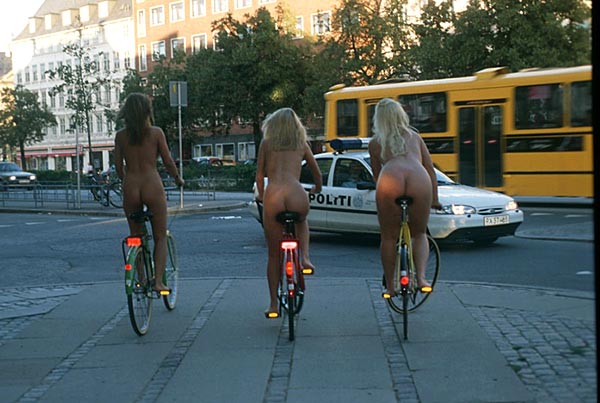
|

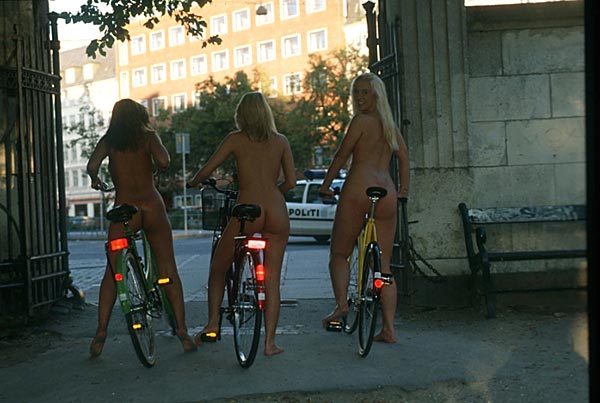
|
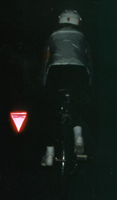
| These women in Copenhagen have LED flashers on their bicycles | The police ignore nudity in favor of solving crimes. We are very uncivilized in the U.S. | End of the ride. Nude cycling is fairly common in Denmark. |
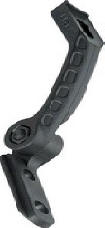
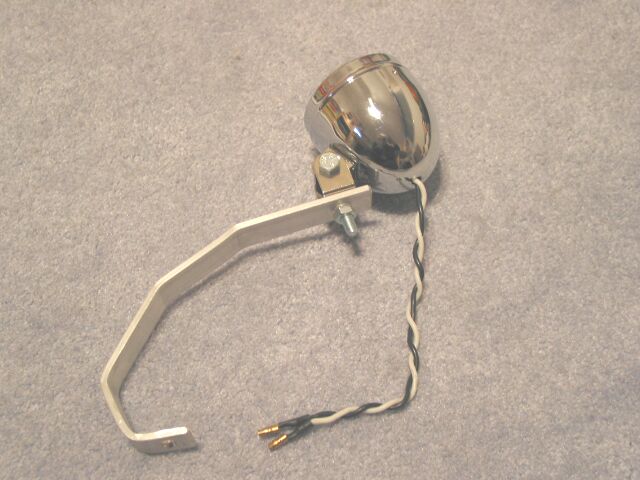
Headlight Mounting (Sealed
Beam Insulator)
You must fabricate a non-conductive mounting fixture that
screws onto the sealed beam through the holes in the tabs.
|
|
| 14W Sealed Beam attached to an wood insulator (black), attached to a headset mount reflector bracket. A wing lock-nut is used for easy on-off without any danger of the nut vibrating loose. Simple, secure, very light, weatherproof, and not clamped to the crowded handlebars. A brake bolt mount reflector bracket could also be used. |
See the knob at http://store.yahoo.com/dlawlesshardware/woodknobsolb.html, which may work, but the shipping is high. If you are doing a dual system then forget about this and just use a rectangle of wood. Cover the wood with black heat shrink tubing if you wish.
Click Image for Details
My latest system is a dual 14W system for which I used an 11" length of 2" wide oak strip that was about $1 from Orchard Supply Hardware. I get about 1.75 hours of run-time with both headlights and a 1.8W strobe, on a 12V 5AH sealed lead acid battery. Recharging a completely discharged battery takes about six hours with a 900mA charger.
Drill two holes in the flat part to match the holes on the sealed beam. Drill the center hole of the knob all the way through, countersink the top, and
insert a long bolt all the way through (before you fasten the sealed beam to the
knob). Then you use a lock nut (I used a wing lock nut) to secure the headlight
assembly to the front reflector bracket (bend the reflector bracket to aim the
light). If you don't have a front reflector bracket then you can buy one at a
bike store for a dollar or so, but all bikes sold in the U.S. have front
reflector brackets.
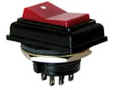
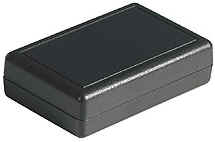
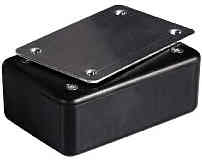
Mounting Lights and/or Switch Box and/or
Battery Box to Handlebars or Frame
If you want to mount the lights or switch box to
your handlebars then you will need some clamps.
Click Images for Details
|
|
|

|
|

|
 |
|
Self-Locking Nylon Pipe Hanger |
U-Bolt | Loop Strap |
Conduit Clamps |
Zefal Gizmo Clamp | Driftmaster Pro 204-B (1/2" threaded hole) |
|
|
|
|
Home Depot |
|
$5 (Cabela's sells the 204-B) |
Self-Locking
Nylon Pipe Hanger
Remember,
when choosing the proper size that the McMaster catalog diameters are inner
diameters of the conduit or tubing. Measure the diameter of the tubing you're
using with a vernier caliper. Choose the outer diameter that is the
closest to the diameter of your tubing (choose a size equal to, or a bit smaller
than the diameter of your tubing). These clamps have an advantage over conduit
clamps because the attachment point is in the center. For example, if you want
to hang a 2" deep plastic enclosure from your top tube it will not be
possible with a U bolt or conduit clamp because they are too wide.
Tubing
diameter charts are at: http://www.alliedtube.com/html/ecd.htm
|
Trade Size Designator Inner Diameter (for reference only) |
Outer Diameter (choose the size, smaller than, but closest to your tubing size) |
McMaster Part # |
| ½" GRC | 0.84" (for 7/8" grip area handlebars) | 30075T3 |
| ¾" EMT | 0.922" (for 15/16" grip area handlebars) | 30075T16 |
| Threaded Rod Adapter (nut) | 30075T21 |
U-Bolt
Choose stainless steel,
with mounting plate, 1/4"-20 thread size, with dimensions A=1.75",
B=1", C=1". Slip a piece of 1/4" rubber hose over the unthreaded
section. $12 for 5 pieces at McMaster.
Loop
Strap
These are available at hardware stores, or
from McMaster (must buy a package of 50 from McMaster).
Conduit
Clamps
These are available in the electrical section of hardware stores, i.e. Home
Depot. Use a strip of rubber to ensure a tight fit (or heat shrink a piece of
tubing around it). Steel clamps are also available. Remember that the size
printed on the package is for the INNER diameter of the conduit, a 1/2"
clamp is closer to 3/4", a 3/4" clamp is closer to 1". Conduit
clamps attached to a rectangle of aluminum or wood, with the lamps attached to
the rectangle, provide a secure, inexpensive mounting to the handlebars (some
spacers or extra nuts on longer bolts may be needed to clear the handlebar bolt
to the stem).
Zefal
Gizmo Clamp
Zefal
Gizmo Clamps are good for attaching accessories to the frame, but even the
smallest size is too large to use on the handlebars.
Round
Rail Clamps
These are used to secure fishing rods to 7/8" round rails on boats. Probably
about the most secure and painless way to attach a light fixture. Available with
1/2" threads. You will have to buy the proper length and
threading of bolt, as the bolts that come with driving lights are too long and
are probably threaded differently.
Commercial
Headlight Mounts
A variety of headlight mounting hardware can be seen and purchased from Peter
White Cycles. He has brackets that attach to the brake bolt of various
types of brakes, as well as a handlebar bracket. These brackets are designed for
Lumotec headlights, but you should be able to adapt them for your own use.
|
|
Return to Table of Contents |
|
e-mail webmaster |
|
Taillights
One of the biggest problems with commercial
lighting systems is the inadequate tail lights. The only tail light that is
bright enough is a xenon strobe
light. These are finally being offered by Lightman, and are
also being resold by Night-Sun (in fact xenon strobe tail lights are the only
tail lights sold by Night-Sun). With a 12 volt system you can also use one of the many Xenon strobes
available for automobile use; these are much less expensive, typically under
$10. Xenon strobes are a far better choice than LED
blinkers. Xenon strobes are much more visible, especially in areas that have a
lot of ambient light. Xenon strobes are also very visible in the daytime, where
LED blinkers are worthless. In low visibility conditions, such as rain or fog,
LED blinkers are useless, while xenon strobes will still be visible. Xenon
strobes are much less directional, with visibility over an 180 degree range,
while LED blinkers are limited to 50-60 degrees. I've seen concerns voiced that
the xenon strobes are so bright that they annoy motorists, but in fifteen years
of using them I have never known this to be the case (these strobes are not as
bright as the strobes used on tow trucks or police cars).
So why are LED blinkers so popular if they are so much worse than xenon strobes? Amusingly, one cyclist in rec.bicycles.misc claimed that LED blinkers must be effective simply because so many people use them. The fact is that they are popular because they are cheap and widely available. Please don't fall for the "Everybody does it, so it must be safe" fallacy.
If you choose to use an LED blinker, go with the large Real Lite LED blinker (see below), even though it is four times as expensive as a xenon strobe. If you still choose to use a small LED blinker then also use some large red reflectors. In Effective Cycling (click to buy, but beware that some of the material is dated), John Forrester goes so far as saying that if you have adequate reflectors then LED blinkers are unnecessary. While in general Forrester's statement is true, there are cases where an LED blinker is better than reflectors-only; i.e. if a vehicle doesn't have its headlights on, a reflector doesn't work.
Two other good LED lights are the Specialized Afterburner Comp, and the Trek Disco Inferno. Both of these solve the problem of the visibility angle, inherent in the cheaper LED taillights. Good luck finding the Specialized and Trek products!
Note that flashing red lights are not legal for use on moving vehicles in many countries, and in most states in the U.S.. An LED blinker is not bright enough for the police to bother you (in most cases), but a red strobe may be a different story. If using a strobe, it is better to go with an amber strobe, since in most places these are legal for use on slow-moving vehicles.
There is an extensive U.K. study on beacons, entitled: Motor vehicle conspicuity: - Warning Beacons. It is very interesting to read the comparisons of detection times based on color, especially the big difference between real-world and constant intensity. Amber had the poorest detection time based on constant intensity, but the best in real world because of the way strobes are manufactured (amber strobes of are higher intensity given a specific lamp intensity filtered by a colored dome because the amber domes transmit the most light (other than clear domes)). They conclude that amber and red strobes, together, offer the best compromise in detection and discomfort, though such a set-up is not legal at this time in the U.K..
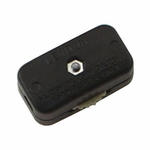
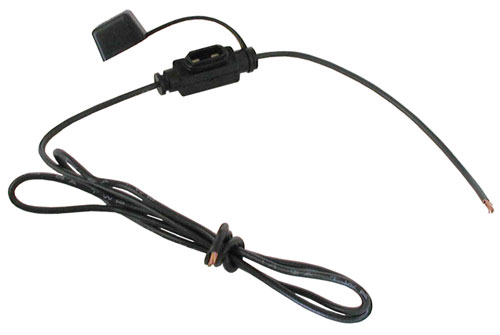
Xenon Strobe
The
taillight I use is a Velleman xenon strobe tail light available from All
Electronics (red, green, and blue also available); current draw is 1.8W.
There are other 12 volt Xenon strobes available, including one that is re-sold
by Nightsun. There are now several commercial xenon strobes
available, but you have to order them on-line as bicycle shops do not carry
them. Blue strobes may not be legal to use as they are often restricted to law
enforcement personnel. Red flashing lights are illegal for use on moving
vehicles in most places, and this includes bicycles. Amber is the best choice,
both for visibility and legality. Xenon strobes usually are sealed, with the bulbs
soldered onto the printed circuit board. Replacement bulbs are sold at Radio
Shack, but it's probably more trouble than it's worth for the Velleman strobe at
only $9.
The flash frequency of xenon strobes decreases as the battery voltage falls. This is a problem on the AA powered xenon strobes. You always want to have good batteries in the strobe. The 12 volt strobe is a better option if you are running a 12 volt system.
A red taillight should always be used in conjunction with an amber strobe. This keeps you legal, and provides additional visibility. You can use an LED blinker, set to steady-on to be legal, but flashing is better).
Click Images for Details

|
 |
 |
 |
 |
 |
|
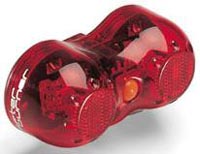
| Velleman
HAA40 Amber Strobe Variety of Colors 120 flashes per minute |
Basic
Does not include Bicycle Mount |
Basic
Bike
Variety of Colors |
Bike
Commute*
Variety of Colors *Night-Sun sells this for $30, with a 12 volt, non-self-powered version for $40) |
Professional
Variety of Colors |
Sparky
Variety of Colors |
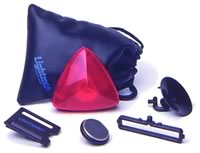
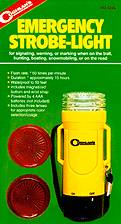
Coghlan
Strobe
Comes with clear, red, and amber lenses. Magnetic or belt mount so you'll need to figure out a way to attach it to your bicycle. Uses 4 AAA batteries |
| $9 | $16 | $25 | $35 | $50 | $20 | $11 |
| 12 Volt Xenon Strobe | Self-Powered Xenon strobes | |||||
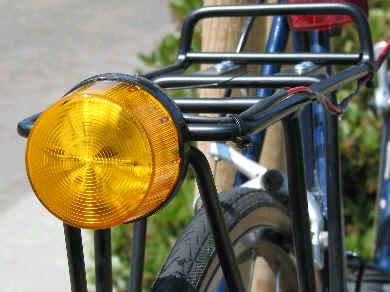
Rear Rack
The Velleman strobe has two studs out the bottom and they include nuts and
lock washers. I simply used a piece of flexible steel (from a hose clamp) and
drilled two holes in it to match the studs (with a little extra length). I then
clamped the strobe onto the back of the rear rack (a Specialized Expedition
Rack). You could also use a short piece of steel banding from crates. Some rear
racks Tubus Cargo
Rack has a place to mount rear lights. You can also get a self-powered Xenon strobe. I don't think that
blue is legal for non-law enforcement personnel. Note that most states require a
red rear reflector but do not forbid the use of amber lights (which are more
visible than flashing red lights); do not remove your red reflector if you
choose an amber strobe. I find that amber strobes are better because to a
motorist they denote caution, while a red strobe blends in with other red tail
lights of cars. Check local laws.
You may want to consider using two xenon strobes, one in the center and one extending out to the left side (or one on the left side and one on the right side). Use a thin strip of wood to mount the strobes, and then fasten the strip of wood to your rack. The wood should be thin so it breaks if hit.
 |
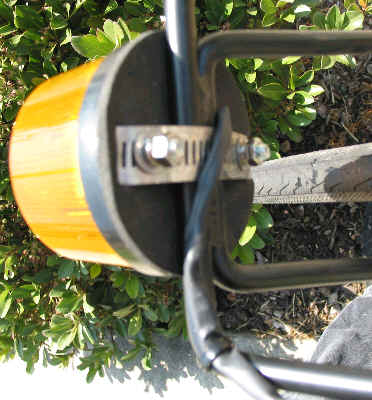 |
| Amber Strobe attached to Rear Rack. Use a short strip of flexible steel with holes drilled to match the studs. I had an old hose clamp that I grabbed. You can't use stiff aluminum bar because the studs aren't long enough. Use some Loctite on the nuts as well. Strain relief the thin wire that goes into the strobe with a cable tie to the rack. Battery goes into a rack top bag that I carry while commuting. | |
Reflector Bracket
Rear reflector brackets that mount to the rear brake bolt are fine, even the
Dimension plastic one. This approach should only be used if you do not have a
rear rack, since the rack, even without luggage, will block the light.
Click Images for Details
 |
|
| Dimension Rear Reflector Bracket. $2.95 from bikeman.com. | This bicycle has a steel reflector bracket attached to the brake bolt. Simply replace the rear reflector with the rear taillight (some drilling may be required). |
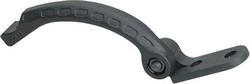
Seat Post or Seat
Mounting a strobe to the seat post can be accomplished with a seat post
bracket. Note the swivel so you can make the light straight even though the seat
post is slanted. Measure the diameter of your seat post with a vernier caliper
and order the proper size bracket.
Click Images for Details
|
|
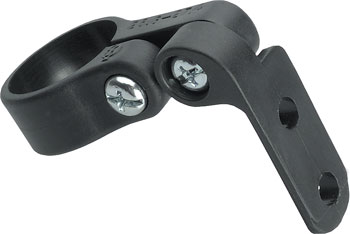 |
|
 |
| Cygolite Seat Post Bracket Fits 25.4-27.2mm seat posts. $2. | Dimension Seat Post Bracket RF1009 Fits 28.6-31.8 mm seat posts. $3.95 | Dimension Seat Post Bracket RF1008 Fits 26.8-27.4 mm seat posts. $3.95 | This bicycle has a reflector bracket attached to the seat post. Ignore the woman holding the bicycle. |
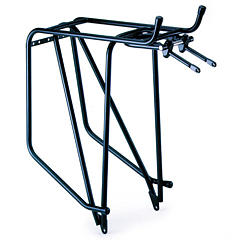
Rear
Racks with Integral Reflector/Light Brackets
If you're buying a new rear rack you should try to buy one that has an
integral mount for a reflector/rear light. The steel racks are nice, but very
expensive.
Click Images for Details
 |
 |
 |
 |
|
Axiom Odyssee Tubular Alloy Rack with reflector/rear light bracket |
Tubus CroMo Steel Rack | Nitto Steel Rear Rack | Utility bicycles almost always have rear racks installed. The taillight can be attached to the rack. |
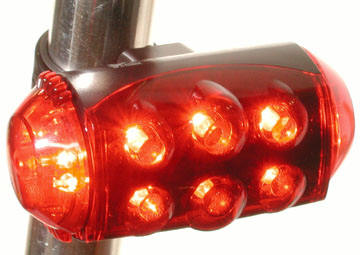
LED Blinkers
LED blinkers became popular because they
are cheap, widely available and because the batteries last a long time. LED
blinkers are often the only type of tail lights sold at bicycle shops, web
retailers, and hardware stores, which leads to their popularity. So since
everyone seems to use them this must mean that they are good, right? Well, no,
not really. Here is a list of some of the problems with LED blinkers.
They are not very bright. They look great when it's really dark with no other light sources from vehicles, street lights, etc., but in reality they do little to make a cyclist visible in traffic.
They have a limited visibility range (50-60 degrees) compared with 180 degrees for xenon strobes.
They are virtually worthless in rain, fog, or other low visibility conditions.
The cheaper ones have no reflective material behind the red lens; unfortunately you will be unable to determine this until you open the package and inspect the unit.
They are usually not built very well. They are not waterproof, the snap on lenses can pop off when you hit a bump, and the mounting to the bicycle is usually by a cheap plastic clamp.
They are not visible in daylight (a xenon strobe is visible even in the daytime).
They are small, and to a driver small means far away (note that this does not apply to the 4"x6" LED flashers)
They are red, which is a less visible color, especially to older drivers. Yellow is a better color for a flasher because it is more visible to the eye.
They need to be carefully positioned in order to be visible. This is due to their limited visibility range.
They do not emit enough light to be useful at all on winding roads. With a xenon strobe, a motorist coming around a curve will have an earlier warning.
In most states, flashing red lights are not permitted on moving vehicles, but flashing amber lights are okay.
In areas where flashing lights are illegal, high brightness LEDs may be a viable alternative to a strobe (in most of Europe, blinking lights are illegal and the LEDs stay on all the time). 18 high brightness LEDs will draw 360 mA or so when on all the time, and maybe 100 mA when flashing, a Xenon strobe will draw 150mA max.
In short, I am very much in favor of spending the money for xenon strobes because they are far more effective. Even Night-Sun, the premier high performance bicycle light company, sells only xenon strobes for tail lights.
Also read "http://www.gonecycling.com/commuter/commuting.html" which states: "Certainly the most common type is the LED flashing rear light. Be aware that the devices are very directional. Unless a motorist is directly and level behind you, and you aimed it right, the effect is not much better than a reflector of the same size... Reflectors work great at the back of the bicycle. I use a three inch amber reflector on the fender and it works great. I'm sure it is the first thing a motorist will see on a flat level section. For illumination, I used a Xenon strobe. It is much less directional than LED and brighter too. More expensive and the batteries last only two winter commutes."
There are (or were) some decent LED blinkers. One is called Real Lite, and it is available from Harris Cyclery. It is quite costly at $40. If Sheldon Brown endorses it then that's good enough for me! I received an e-mail from the importer of the Real Lite that stated that the Real Lite uses high-brightness LEDs while the cheaper 18 LED blinkers do not. This is part of the reason for the disparity in price; the high brightness LEDs are much more expensive. The Real Lite LEDs will have a longer lifetime than a xenon strobe.
The Specialized Afterburner Comp has a unique lens system that appears to somewhat solve the viewing angle problem. Unfortunately it has been discontinued. The big complaint about this light is the poor mounting bracket, so you'll have to figure out a way to mount it. Martin Kreig of the National Bicycle Greenway, wrote: “I've been lusting for the perfect bike flasher since the days of the trusty Belt Beacon.
The Trek webpage at http://www.trekbikes.com/accessories/cat_browse.jsp?category_id=130 states that Trek offers tail lights with up to 330 degrees of visibility, and up to 5000 feet. Unfortunately this statement is untrue, because Trek has discontinued the Disco Inferno which was their highest end LED flasher, and the two remaining models are of lesser performance.
Click Images for Details
|
|
|
 |
| Real Lite 18 LED Tail Light. Uses 4AA Batteries. | Specialized Afterburner Comp | Trek Disco Inferno |
| $40 | $20 | ? |
While the discontinuation of the only two wide angle LED flashers (from Trek and Specialized) was a disappointment, they were never widely available anyway, and few people were even aware they existed.
Not to despair, Sheldon Brown has come to the rescue with two good replacements.
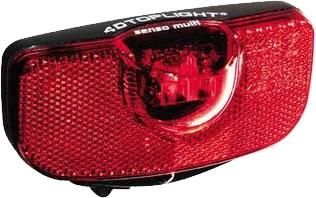
First there is the B&M 4DToplight Senso, available in three different versions. The 4DT is not a flasher, but it does offer the wide angle of visibility. One good thing about these B&M rear lights is that they are available both in battery powered, and dynamo powered/battery backed up, versions; this means that dynamo aficionados finally have a decent rear lamp available. As far as I can tell, they are sold only by Harris Cyclery (Sheldon Brown), though one version is sold by Peter White Cycles.
Click over to: http://sheldonbrown.com/harris/lighting/shimano.html
and search for "Taillights for rack mounting" and scroll down to
the 4D series. There are three versions available:
1. 4DToplight Senso, (battery powered, switches on by itself in the dark): $
26.95
2. 4DToplight Senso Multi, (generator or battery powered, switches on by itself
in the dark): $ 29.95
3. 4DToplight Permanent, (battery powered only, doesn't turn on by itself): $
21.95
At least in the U.S., the 4DT should be used in conjunction with a Real Lite 18 LED flasher, since a flashing rear light has become the de-facto identifier of bicycles.
Second there is the Cat Eye LD1000 with six rear facing LEDs, and two sideways facing LEDs on each side. This is battery powered (2 AA) only. Quite pricey at $36, but there is no real competition. Click over to: http://harriscyclery.net/site/itemdetails.cfm?ID=1578.
Can someone explain why there is only one place in the U.S. to buy the only decent rear LED flasher? Is Sheldon Brown’s shop the only one that understands anything about what makes a good rear LED flasher?
|
|
 |
| B&M Senso Multi | Cat Eye LD1000 |
| $22-30 | $36 |
While it's great that there are some decent rear LED lights available, xenon strobes remain the best option for a rear light in a 12 volt system. This is due to their much greater brightness, wide angle of visibility, and significantly lower cost.
|
|
Return to Table of Contents |
|
e-mail webmaster |
|
12 Volt or 6 Volt?
I've always liked 12 volt systems. 6 volt systems
require larger gauge wire and higher current switches (for equivalent wattage). 6 volt systems have
higher I2R losses and will have more contact resistance on
connectors. 12 volt lead-acid batteries have always been less expensive per
amp-hour than 6 volt lead acid batteries. With NiMH batteries, it's more
practical to use a single 12 volt pack than carry two six volt packs of half the
capacity. 12 volt Xenon strobes are common, 6 volt Xenon strobes are not. The
only time a 6 volt system would be preferable is if you have a headlamp that
uses an H3 style bulb because the lowest wattage 6V bulb is 25 watts, while the
lowest wattage 12 volt bulb is 35 watts. Volkswagen switched from 6 volts to 12
volts on the 1967 Beetle for a very good reason! Read 42
Volt Electrical Systems
for a discussion on wire and contact resistance. If you build a 6 volt NiMH
system you should consider using C or D cell batteries for longer battery life
on a single battery pack.
Remember, wire and switches are rated mainly by current. For example, 30 Watts/12 volts = 2.5 amps, while. 30 Watts/6 volts = 5 amps. You will need heavier gauge wire and may need switches with a higher current rating if you go with a 6 volt system.
|
|
Return to Table of Contents |
|
e-mail webmaster |
|
Batteries
Maximum Current Draw
Calculate the current draw of your lamps (Amps=Watts/Volts). Try not to exceed
70% of the batteries AH rating per hour. I.e., on a 5AH battery, try to keep the
current draw at or below 3.5A (42 watts of lamps @ 12 volts). For a 10 pack of
2000mAH AA cells (2AH), try to keep the current draw down to 1.4A (16W of lamps
@ 12 volts). On my 30W system, using a ten pack of 2000mAH
NiMH AA cells did not really work. The current draw was 2.5A, 125% of the AH
ratting of the battery. The batteries were unable to supply that much current so
the lamps were not at full brightness (and the batteries got very hot). However
if I turned on only one of the headlamps the NiMH batteries were fine. To use NiMH cells
with 30 watts of lamps I would have to
use two packs of AA cells in parallel, or use C or D cells.
Minimum Battery Sizes Based on Total Watts of Lamps
| Head Lamps (W) |
Tail Lamps (W) |
Total (W) | Current Draw (A) |
Minimum 12V Battery (AH) |
Minimum 12V Battery (WH) |
| 10 | 2 | 12 | 1 | 1.5 | 14 |
| 14 | 2 | 16 | 1.3 | 2 | 24 |
| 15 | 2 | 17 | 1.4 | 2.1 | 25 |
| 20 | 2 | 22 | 1.8 | 2.75 | 33 |
| 25 | 2 | 27 | 2.2 | 3.3 | 40 |
| 28 | 2 | 30 | 2.5 | 3.75 | 45 |
| 30 | 2 | 32 | 2.7 | 4.2 | 50 |
| 35 | 2 | 37 | 3.1 | 4.6 | 55 |
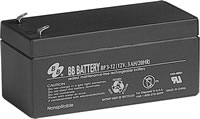
Sealed Lead Acid
For 12 volt systems, sealed lead acid batteries are
less expensive than NiMH batteries, especially due to the fact that a smart NiMH
charger costs $45-85, while a smart sealed-lead acid charger can be purchased
for as little as $14. The downside to sealed lead-acid
batteries is that they are heavier in terms of weight/Watt-Hour. Sealed
lead-acid batteries are rated at 20 hour discharge rates and faster discharge
rates (as will be the case with bicycle lights) mean that the actual watt-hours
you get will be less than the rating. The sealed lead-acid chargers are cheap
enough that you could keep one at work and one at home.
The best selection of sealed lead-acid batteries and chargers, at the best prices are at zbattery.com. Keep your sealed lead-acid batteries charged during long periods of non-usage or they will go bad. Do not buy old or used sealed lead-acid batteries. "Removed from equipment" means that the battery is either used or has sat around for a long time. I bought three SLA batteries from American Science and Surplus and all were bad.
Sealed Lead Acid Batteries
 |
 |
 |
 |
| 2.3AH | 3.0AH | 5.0AH | 7.0AH |
| 7.01" x 1.34" x 2.36" | 5.28" x 2.64" x 2.36" | 3.54" x 2.76" x 4.02" | 5.94" x 2.54" x 3.66" |
| 2.2# | 3.0# | 4.06# | 5.85# |
| $9.97 | $10.37 | 10.57 | $13.87 |
NiMH
(Nickel Metal Hydride)
You can use ten
NiMH batteries (AA, C, or D) if you want to spend the extra money. A ten cell AA
battery holder is available from Minute-Man
Electronics, and is also available from Thomas-Distributing.
Watch
out for the thin wires usually used on AA battery holders as they may not be
sufficient for high drain batteries. Conventional alkaline cells are not capable
of high discharge rates and these battery holders are usually designed for low
current drain.
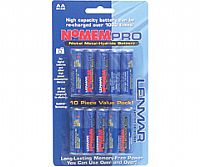
For AA NiMH batteries, do a www.froogle.com search for "LENMAR PRO-1020." I have seen these ten packs of 2000mAH AA cells available for less than $10. However the best source, including shipping, appears to be K&B Electronics whose price is $10.79; many of the lower priced retailers have very high shipping charges. Efunctional.com has a lower price than K&B, but unless you're ordering several packs then the higher shipping offsets the lower price. If you live near a Fry's Electronics, watch for their sale on Lenmar 2000 mAH batteries, usually one 4-pack for $5. Fry's sells the Lenmar ten pack for $18, not on sale. It used to be that it was better to order NiMH batteries from places like Thomas-Distributing, but now that AA cells have become a commodity item you can find them more cheaply at other outlets. Costco sells a bundle of a Panasonic charger, six Panasonic 2100 AA cells, and two Panasonic AAA cells, for $20, the six AA batteries would be sufficient for a 10W system. Micro-Center sells 4 packs of Sakar iConcepts 2000mAH AA NiMH batteries for $4.94, I don't know the actual capacity of these batteries.
While NiMH batteries can have relatively high discharge rates, it is best to keep the rate at 70% or less than the battery capacity. I.e. a 2000 mAH cell will work longest if the discharge current is under 1.3A. Ten 1.2V 2000mAH batteries will provide 24WH, so try to keep the wattage of the lights less than or equal to 16 watts. Discharge rates of greater than 1.3 amps are not advised as the internal resistance of the batteries is too high for such a high discharge rate. I tried 30W (two 14W headlamps and one 2W tail lamp) on ten NiMH AA cells, and could see that the headlights dim when both headlamps are turned on (plus the batteries get very hot).
NiMH Batteries
|
|
 |
|
|
| PRO1020 NoMEM PRO | C size, button top | D size, button top | D size, button top |
| AA | C | D | D |
| 2000 mAH | 4500 mAH | 7500 mAH | 9000 mAH |
| $8.73 $10.79 | $4.50 each | 2/$11.99 | $7.50 each |
Over-Voltaging with NiMH batteries
You can use eleven cells (13.2V) or twelve
cells (14.4V) for extra brightness and duration with drastically reduced bulb life.
The only charger than can go up to 14.4V is the MH-C777PLUS, but the other Maha
charger I listed will do 13.2V packs. The trick of slightly over-voltaging a
bulb in order to increase brightness and duration is used by some of the
commercial bicycle lighting companies. Use two six-AA battery holders instead of
a single ten AA battery holder, if you're going to over-voltage to 14.4V. Use
one ten-AA battery holder and one one-AA battery holder if you're going to
over-voltage to 13.2V.
The big advantage in over-voltaging is that you get disproportionately more brightness for the increase in power consumption. The big disadvantage in over-voltaging is that bulb life is disproportionately reduced.
You can see a graph of light output versus power versus bulb life at: http://www.myra-simon.com/bike/lights.html#overvolting. Over-voltaging by 10% (13.2V) increases power consumption by about 18% and decreases bulb life by about 74%, but it increases light output by about 39%. Over-voltaging by 20% (14.4V) increases power consumption by about 24% and decreases bulb life by about 88%,but it increases light output by about 83%. So a 2000 hour lamp will last about 500 hours if over-voltaged by 10%, about 250 hours if over-voltaged by 20%. Even so, bulbs are cheap, and 250 hours could equal a year of commuting. There are long life (10,000 hour) MR16 lamps, but not in the lower wattages used for bicycle lighting. Carrying an extra bulb is a good idea even when you're not over-voltaging. In short, over-voltaging is a very good idea as long as you are willing to accept the consequence of more frequent bulb changes.
Parallel NiMH Battery Packs for Longer Duration
For longer duration, and/or higher current capacity, use higher mAH batteries, or use multiple battery packs.
While higher mAH cells (i.e. C cells or D cells) are technically a better
solution, the advantage of using AA cells is that they are very inexpensive (C
& D cells have not come down in price nearly as much). One
good thing about NiMH battery packs is that you can connect them in parallel (same
voltage). You can connect two 12-14.4 volt packs together and double your
duration. Each pack must have the same number of cells and you should use the same
type of cells (same capacity) from the same manufacturer in each pack. Both packs should be fully charged when connecting them together. You do not
need any isolation between the packs. There is one caveat:
YOU CANNOT CHARGE PARALLEL-CONNECTED NiMH PACKS--YOU MUST CHARGE EACH PACK SEPARATELY!
Is that clear? Separate the two packs and charge each pack on its own.
Serial Battery Packs for Longer Duration
You can always carry extra battery packs and simply install a fresh pack when the first pack is exhausted.
NiMH Battery mAH Ratings
Every brand of NiMH batteries is different. A 2000mAH cell will have real
mAH rating from 1754mAH to 1856mAH (according to an independent test). You can see
ratings of various NiMH AA cells at: http://www.imaging-resource.com/ACCS/BATTS/BATTS.HTM.
Perform a cost/mAH analysis on the various batteries. For example, the Lenmar 1754mAH AA
cells cost about $0.90 each, while the Powerex 1856mAH AA cells cost $3.50 each; nearly
4X the price for less than a 6% increase in capacity (and in the duration test
there was less than a 3% difference).
|
|
Return to Table of Contents |
|
e-mail webmaster |
|
Wide-Mouth
Water Bottle
This
method is used by many of the commercial lighting system manufacturers; they
like it because it is very inexpensive, does not require clamping or strapping
the battery to the frame, and is easily removable, which many commuters require.
I hate it because I want my water bottle cage free for a water bottle. You may
need to formulate the battery pack to fit the bottle, which may mean buying
batteries with solder tabs and arranging them in a cylinder pattern (this is
more expensive than buying standard AA cells, but not significantly more). The wires come out through
the nipple. You could also put the switches through the side of the bottle. Of
course you lose the use of the water bottle cage for a real water bottle or
coffee bottle. Not to worry, there are many ways of adding another bottle cage,
see my web site Adding
Water Bottle Cages to Bicycles without Braze-Ons for details.
A water bottle (or coffee bottle) belongs in your water
bottle holder, not a jacket, bottle of air, cell phone, tools, lock, or batteries.
It is quite annoying how
so many accessory manufacturers think that
the water bottle cage is fair game as way for them to get around providing their own
mounting hardware. I don't want to give up my water bottle cage for a battery, cell phone, tools,
compressed air, jacket, etc. Your mileage may vary, but what are you going to do when you're thirsty or
hot, drink batteries or tools? While in the past, road bikes and touring bikes
usually came with two or three sets of braze-ons for cages, this is normally not
the case any more, in fact on some compact frame "women's" bicycles,
the single set of water bottle cage braze-ons isn't even usable without a
special rotating bottle cage (see below); my wife bought a Specialized
Expedition and got the "man's" model, solely because of the water
bottle issue, but few people would even have realized the problem at the time of
purchase, and even fewer would have been aware of the workaround.
Many
different accessories compete for your water bottle cage, but as the right-most
picture demonstrates, water is the best
thing to keep there!
(Click
Images for Details)
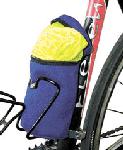 |
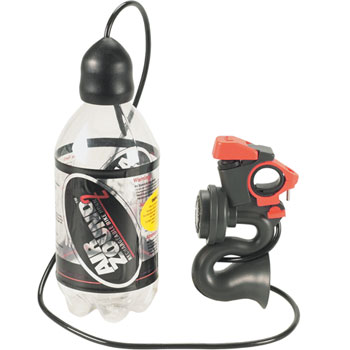 |
 |
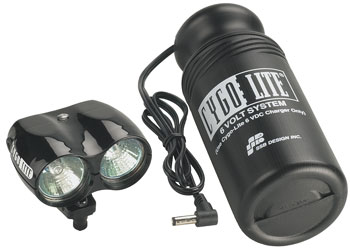 |
 |
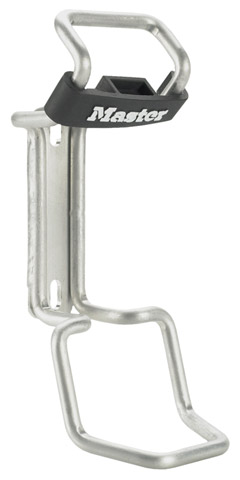 |
 |
 |
 |
|
| Jacket
Bag
Use Profile Cage for best fit |
Airzound
II
Use Profile Cage for best fit |
Cell
Safe DX4
Use Profile Cage for best fit |
Tool
Bag
Use Profile Cage for best fit |
29pc Water Bottle Bicycle Tool Set | Master Lock Street Cuff Bracket | Fuel
Bottles (for bicycle camping)
Use Profile Cage for best fit |
JSB-700
Vacuum Bottle (not available) Use Profile Cage for best fit |
This cyclist, cooling off on a Sonoma County trail on a scorching afternoon, is glad to have a water bottle rather than a bottle of batteries! This is not a common sight--unfortunately. |
The profile cage is preferred for many water bottle cage-mount accessories because it grips the bottom of the bottle only. Many water bottle type accessories don't have the indentation for the angled section of a metal cage to go into.
Click Image for Details
A solution for bicycle frames
where a normal water bottle cage is not usable
Click
Images for Details
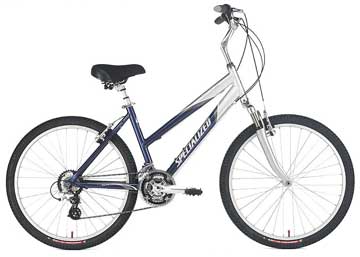 |
 |
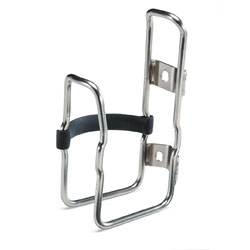 |
| This "women's" frame bicycle has a useless set of water bottle braze-ons unless you buy one of the new rotating bottle cages (the braze-ons are right above the "S" and the "E" in "Specialized" on the lower down tube). | This unique bottle cage solves the problem of being able to use a water bottle on some "women's" bicycle frames. $16. | This cage from Specialized solves the problem of being able to use a water bottle on smaller frame bicycles. $10. |
Frame Bag, Seat Bag,
Rack-Top Bag
The
battery or battery pack is placed inside a frame bag or seat bag. Use a rack-top
bag that attaches securely with buckle type fasteners, not Velcro. Not only
because the battery is heavy, but because the Velcro type of attachment doesn't
retain its strength over years or removal and attachment.
 |
|
The Lone Peak RP-700 attaches with buckles, not Velcro. I went through two poor quality rack packs before spending the big bucks on a higher quality product with superior design features. I'll let you know in five years how it holds up! |
Plastic Case
The battery or battery pack
is placed inside a plastic case which is attached to the frame with
some sort of clamp, i.e. the Zefal Gizmo Clamps, padded U bolts, etc. This is
more permanent mount which is less likely to be stolen if left on the bike. You
could put the switches through the side of the box as well, eliminating the
handlebar controls. This approach makes battery changes more difficult as you'll
have to remove the lid of the case, so it's not a good approach if the duration
of your commute requires battery swaps (though you could put multiple battery
packs inside and have SPDT switch to select between the two (while it is fine to
connect two battery packs in parallel for running the lights (no isolation is
needed), it is NOT fine to charge two packs in parallel, so a switch is
necessary)). It also requires
that the charger be located close to the bicycle.
Inside Seat Tube
I've
never tried this, but AA cells will fit inside a seat tube. You'll need to buy
solder-tab type batteries, make a ten pack, seal the pack inside heat shrink
tubing with wires coming out through the seat post. You may want to use some
foam to prevent rattling. If the top of the seat post is sealed then you'll need
to drill a hole for the wires.
Images for Details
 |
 |
|
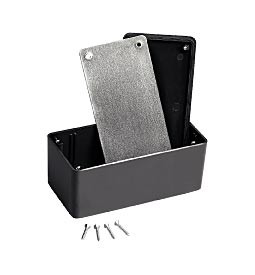 |
| Frame Bag | Seat Bag | Wide Mouth Water Bottle | Plastic
Enclosure 6"x4"x2" 270-1806 Big enough for two AA battery packs (smaller enclosures available) |
| $3 | $6 | $5 | $5 |
|
|
Return to Table of Contents |
|
e-mail webmaster |
|
Switches
I like to use push button switches
without exposed contacts as these have the shallowest depth so you can use the
smallest plastic box to hold them. These switches are
not weatherproof so you should enclose them somehow. Mount all the switches in a
little plastic box that you attach to your handlebars with a cable clamp. Radio Shack sells a small
plastic box (9/16x1-3/8x2-1/8"), part number 270-288 that will work, as
long as the depth of the switch is not too much (only the pushbutton switch in
the parts list will fit). You may be able to find rubber
boots that go over the switches. If you use any switch other than the pushbutton
then you'll have to go to a slightly deeper box (also available at Radio Shack). Its
a tight fit putting three pushbutton switches inside this tiny enclosure, and
the wires from the switches make it more difficult. Connect the wire from the
battery to one side of each switch, inside the box; don't try to run all six
switch wires out of the box (the schematic shoes all the wires going through the
switch box, but this is not a good idea if you use the tiny enclosure). A
slightly larger enclosure will make things easier to construct.
A three speed ceiling fan switch is another option. You will not be able to have both headlights on at the same time though you will be able to have an option for the tail light to be on by itself. There are many types of fan switches with different internal structures. You want one with the sequence of operation of: Off. L-1, L-2, L-3. One such switch is the Fantec 21101 "CAM #01", available at Home Depot for about $4.
You can buy a dual handlebar switch for $18 from J.C. Whitney. However if you have three lights to switch (two head, one tail) you'll need to have the tail light come on automatically with either headlight being switched on. You can use two 1 amp silicon diodes to achieve this. I could see that when mountain biking off-road, by yourself, that a tail light would not be necessary.
Drill four holes in the bottom of the box and attach it your handlebars with two cable ties. It may be too small to use a U bolt or loop strap.
Click Images for Details
|
|
|
|
 |
|
|
|
|
|
| Rocker
Switch (also usable as battery selector switch for dual battery system) |
Toggle
Switch (also usable as battery selector switch for dual battery system) |
Pushbutton Switch Very small, very shallow, easy to mount, wire leads |
Three
position switch (ceiling fan). Check current rating. Check sequence (which contact is connected to where on each pull; there are many variations on the fan switch). Buy at Home Depot. |
Leviton 423-3 Cord
Switch Using an in-line cord switches can eliminate the need for a switch box. Just insert the switch in a convenient location between the battery and the light. Buy at Home Depot. |
Ultracompact
Enclosure 270-288 9/16x1-3/8x2-1/8" Good for pushbutton switches, not deep enough for other switches |
Compact
Enclosure 270-1801 This 3"x2"x1" enclosure is a little larger than the ultracompact enclosure and easier to work with. It can be used with larger switches. |
Handlebar Switch Set for 7/8" bars. Very nice, but you'll need diodes to isolate the tail light from the two headlights, and won't be able to turn the tail light on or off independently | 1 Amp
Diode 276-1101 (for dual switch system, allows tail light to be on when either headlight is is switched on, but not independently) |
| $1.35 | $1 | $1 | $4 | $2 | $2.29 | $18 | $0.59 |
To mount the ultra-compact switch box to the handlebars, follow
these steps:
1. Drill a hole in each corner.
2. Use two cable ties through the holes, and
around the handlebar or frame.
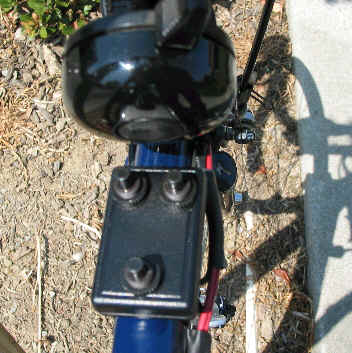 |
| Switch Box Mounted to the Top Tube with Two Cable Ties. Top Buttons are for left and right headlight, bottom is for taillight. |
|
|
Return to Table of Contents |
|
e-mail webmaster |
|
Connectors
You can attach a connector to each
lamp for modularity. You then bring a connector for each lamp out of the switch
box. You can forget about modularity and eliminate the connectors between the
lamps and the switch box (only a connector for the charger) but the whole system will have to be installed and
removed as a unit. This saves money, assembly time, and will be more reliable.
Don't get carried away with modularity unless you're planning to move the system
from bike to bike; every extra connector adds expense and assembly time, and
decreases reliability.
You cut apart the weatherproof power cable shown below left and use both halves. You'll need five of these (one pair for each lamp, one pair for the switch box to the battery, one half of a pair for the charger to the battery). This is but one connector option. It's a bit less hassle than Molex connectors with their individual pins. If you decide to combine the battery and switches together in one enclosure, with three pairs of wires coming out for the lamps, you may want to use a barrel style connector pair for the charger, with the DC Jack mounting on the enclosure. If you put the battery in a frame bag then just use one of the weatherproof power cables on the charger and connect the charger to the battery after you disconnect the battery from the switch box.
Click Images for Details
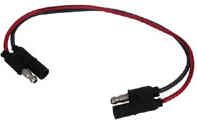 |
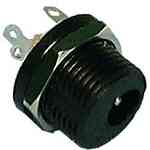 |
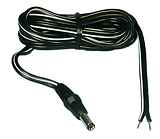 |
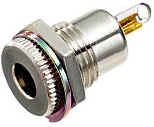 |
 |
| Weatherproof Power Cable | Philmore 248 DC
Jack 2.5mm Center Pin x 5.5mm ID |
Philmore TC258 5.5mm O.D. x 2.5mm I.D. with molded plug & 6' of 18 AWG wire |
Radio Shack DC Jack
274-1576 5.5mm O.D. x 2.5mm I.D. |
Radio Shack DC Plug
274-1573 5.5mm D.O. x 2.5mm I.D. |
| $1 | $1.81 | $1.73 | $2.49 | $2.49 |
|
|
Return to Table of Contents |
|
e-mail webmaster |
|
Soldering
There is a very good tutorial about proper
soldering technique for 12 volt automotive electronics at: http://www.mmxpress.com/technical/connections.htm.
You want to do "butt" soldering when soldering wires together. Use
heat shrink tubing over these connections, not electrical tape. Stagger the butt
connections when doing two-conductor cables, and use only one length of tubing
to cover both splices.
|
|
|
Staggered Butt Connections Eliminate Bulges |
|
|
Return to Table of Contents |
|
e-mail webmaster |
|
Run Time
It can be quite complex to calculate
the actual run time of a system because the actual battery rating cannot be
directly used. Sealed lead-acid batteries are typically rated for 20 hour
discharge rates (5% per hour, C=0.05), but their ratings decrease significantly at high
discharge rates. For example, a 2.3AH, 12V sealed lead-acid battery has a 28WH
rating only when the discharge current is 0.115 amps. With a 26 watt lighting
system the discharge current is 2.2A, and the battery rating is about 1.3AH,
only about 57% of its rated capacity. "C" refers to the discharge rate
in terms of the capacity; a 7AH battery discharged at 0.35A/H would have a C
rating of 0.05 while the same battery discharged at a rate of 1.4A/H would have
a C rating of 0.5. There is a chart with this information at http://www.flex.com/~kalepa/techman.pdf.
On my system, which has a 12V, 5AH battery driving two 14W headlamps and a 2W
tail light (30W), I get about 1.7 hours of run time. So a 60WH battery runs 30W
of lights for 1.7 hours, which is a 0.85 derating factor (much better than the
chart below indicates). However I have not actually measured the current from
the battery, I'm using the ratings from the lamps.
NiMH batteries do not suffer from the nearly the same problem in terms of discharge current lowering the capacity, in fact the current drain needs to be extremely high before the capacity goes down (at at low drain rates it actually goes up).
|
Battery
Type |
Volts |
AH
(Amp-Hours) |
Watt-Hours |
Watts
(Front + Rear) |
Discharge
Current (A) |
"C" |
Derating |
Run-Time
(Hours) |
|
Sealed Lead Acid |
12 |
7 |
84 |
15 |
1.3 |
0.2 |
0.80 |
4.48 |
|
Sealed Lead Acid |
12 |
5 |
60 |
15 |
1.3 |
0.3 |
0.75 |
3.00 |
|
Sealed Lead Acid |
12 |
3 |
36 |
15 |
1.3 |
0.4 |
0.70 |
1.68 |
|
Sealed Lead Acid |
12 |
2.3 |
28 |
15 |
1.3 |
0.5 |
0.65 |
1.20 |
|
Sealed Lead Acid |
12 |
7 |
84 |
26 |
2.2 |
0.3 |
0.71 |
2.31 |
|
Sealed Lead Acid |
12 |
5 |
60 |
26 |
2.2 |
0.4 |
0.70 |
1.62 |
|
Sealed Lead Acid |
12 |
3 |
36 |
26 |
2.2 |
0.7 |
0.60 |
0.83 |
|
Sealed Lead Acid |
12 |
2.3 |
28 |
26 |
2.2 |
0.9 |
0.57 |
0.60 |
|
NiMH |
12 |
2 |
24 |
15 |
1.3 |
0.6 |
1 |
1.60 |
|
NiMH |
12 |
2 |
24 |
26 |
2.2 |
1.1 |
1 |
0.92 |
|
NiMH |
12 |
2 |
24 |
36 |
3.0 |
1.0 |
1 |
0.67 |
|
NiMH |
12 |
7.5 |
90 |
15 |
1.3 |
0.2 |
1.1 |
6.60 |
|
NiMH |
12 |
7.5 |
90 |
26 |
2.2 |
0.3 |
1.1 |
3.81 |
|
NiMH |
12 |
7.5 |
90 |
36 |
3 |
0.4 |
1.0 |
3.00 |
|
|
Return to Table of Contents |
|
e-mail webmaster |
|
Charger
Different battery types use different types of
chargers. There actually is a charger that can do both Lead-Acid and NiMH
batteries (as well as nearly every other type of rechargeable battery), but it
is very expensive.
Lead Acid
For lead acid batteries the best choice is the Yuasa 12V900, though
the dual rate charger is also fine, and 1/3 the price. Do not use a charger with
too high of a charging current for your battery as it will damage the battery.
You can choose a lower charging current but it will take longer than necessary
to charge the battery. Usually you want to be able to charge your battery
overnight, i.e. in eight to ten hours. It would take ten hours to charge a 5AH
battery with a 500mA charger, five hours with a 1000mA charger.
Sealed Lead Acid Charging Rate Table
| AH Range | Maximum Charging Current |
| 2.0-10AH | 500mA |
| 4.0-11AH | 900mA |
| 4.5-12AH | 1000mA |
| 10-20AH | 2000mA |
Click Images for Details
NiMH
NiMH chargers that can charge ten batteries at
once are the Maha
MH-C777 PLUS, and the Maha
MH-C777. The MH-C777 PLUS will charge up to twelve NiMH or NiCad
batteries, as well as Li-Ion batteries. These chargers do not charge lead acid
batteries.
Click Images for Details
|
|
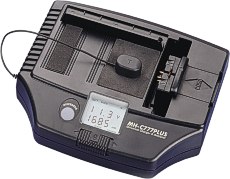 |
|
No Photo Available |
|
MH-C777,
$45 This is the cheapest "smart" charger. It will charge up to 13.2 volt battery packs. If you're planning to use 12 NiMH batteries (14.4V) then don't use this charger. |
MH-C777
Plus, $83 This smart charger is probably the best choice since it will charge up to 14.4V NiMH packs, plus it will charge most every battery type in your home except lead-acid. |
Used with both Maha chargers to connect to battery holders (included by many resellers, extras available). Cut off the alligator clips and attach the mating connecter for your battery. |
TurboCat 13.2 Volt Ni-Cad/NiMH Battery Charger. $18. This is a "dumb" charger, and will damage the batteries if left connected for a long time after the batteries are fully charged. Use with a timer if you want to charge the batteries while you're sleeping. |
Charger to End All Chargers (charges all kinds
of batteries)
The ultimate charger is the GPMM 3150
Electrifly Triton DC Computerized, Charger, Discharger, and Cycler.
Designed primarily for radio-controlled toys, this
unit will charge 1-24 NiCad or NiMH batteries, 1-4 Li-Ion or Li-Po batteries,
and 6V, 12V, and 24V lead acid batteries. It requires connection to a car
battery, or to a hefty DC power supply (13 amps). $128 without a DC power
supply. You'll be at over $150 by the time you buy a power supply and pay for
shipping. You actually can use a much lower amperage power supply if you are not
trying to charge a lot of batteries at a fast charge rate. This charger is
capable of charging at 28.8 volts, 5 amps, which would be 144 watts, which would
require an input current of 12 amps at 12 volts if there were no losses, hence
the 13 amp input requirement (156 watts). If you are charging a 14.4 volt pack at a 3AH
rate, then a 5 amp 12 volt (60 watt) power supply is sufficient. The charger will accept
10.5-15 volts input.
Click Images for Details
 |
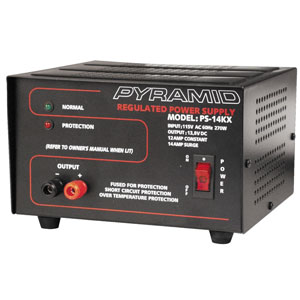 |
|
|
Electrifly Triton $128 |
Pyramid PS-14KX 13.8 volt 12 amp power supply (153 watts) |
Pyramid PS-9KX 13.8 volt 5 amp power supply (69 watts) |
Build Your Own Charger
You can build your own smart charger with the Maxim MAX712 or MAX713integrated
circuit. They have evaluation kits, the MAX712EVKIT, and MAX713EVKIT, but I have
not found a way to buy one, and I think that they are quite expensive. The
MAX712 is a linear-mode charger and requires less external components. The
MAX713 is a switching-mode charger and generates less heat, but is a more
complex design. I only found this device since we are looking at this device for
a reference design for something I'm doing at work, that the newer higher
capacity NiMH cells make possible (previously we only looked at Li-Ion
batteries, but Li-Ion batteries are very costly and are temperamental.
http://pdfserv.maxim-ic.com/en/ds/MAX712EVKIT.pdf
http://pdfserv.maxim-ic.com/en/ds/MAX713SWEVKIT.pdf
These chargers will charge up to 16 NiMH cells.
Unattended Sequential Charging of
Multiple NiMH Battery Packs with a Single Charger
Since NiMH chargers are so expensive it is not practical to buy a seperate
charger for each battery pack used in a parallel battery configuration. Yet many
people want to charger multiple NiMH packs overnight without human intervention.
To do this you need to be able to automatically switch the charger from one
battery pack to another at a programmable interval. You won't actually be able
to switch when a pack is fully charged, you'll only be able to switch at
specified intervals.
Sprinkler Timer
Use a multi-zone sprinkler timer that activates relays (one at a time) that
connect each battery pack to the charger. The Lawn Genie LD6 timer can be used.
This timer drives 24VAC solenoid valves but can also drive 24VAC relays. The
manual is at: http://www.lawngenie.com/PDF/LD4-LD6.pdf.
The LD6 is available for $29 from http://www.easycart.net/ecarts/dripsupply/ELECTRIC_TIMERS.html.
The timer will drive 24VAC relay coils, up to 250mA.
For 24VAC relays, go to http://www.minute-man.com/acatalog/ and search for R10-11A10-24.
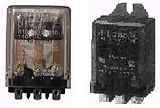
You'll need to buy one relay for
each battery pack, i.e. if you're sequentially charging three battery packs over
night then you'll need three relays. Unfortunately, 24VAC relays are not cheap;
$9.50 each from Minuteman. You could add a bridge rectifier and a filter
capacitor to each channel and use 24VDC relays which are very cheap. You don't
really need double pole relays, connect the - side of all the battery packs
together and to the - side of the charger, and just switch the + side. 24VDC
relays are available for as little as $0.50 each from All Electronics. Add an
LED with a 1.2K ohm dropping resistor to the output of each bridge rectifier so
you know which relay is energized. Using DC relays means more work constructing
the system, but a big savings in cost. Be sure to wire the bridge rectifiers
properly. I have not tested this circuit.
Program the timer to only have one zone on at a time, sequentially, for the
number of hours you need. I.e. if charging three battery packs over a 12 hour
period, program each zone to be on for four hours (four hours is the maximum
time per zone, but each zone can be programmed to come on twice per day so you
could go up to eight hours). Be sure not to overlap zone times, there is nothing
that prevents multiple zones from being programmed to be on at the same time;
you have to program things correctly.
The diagram below shows the sprinkler timer hooked up to three relays and three battery packs. This can be expanded to up to six battery packs.
Mechanical Cam Timer
A cruder solution can be constructed with an old fashioned mechanical cam timer,
but these are very difficult to find. Each cam drives a micro-switch. You set
the cams to turn the switch on and off at specific times in the cycles. For
example, on a 12 hour timer with four battery packs to charge, you would set the
cams for three hours on, nine hours off, and stagger the turn-on times by three
hours. You do not need any relays, simply connect the negative side of all the
battery packs to the negative side of the charger, and switch only the positive
side.
Battery Holders
If you want to make up battery packs with standard button-top NiMH cells,
you will need to obtain battery holders for the cells. These are available from Minute-Man
Electronics. You can also buy solder-tab type of NiMH batteries and make
up backs by soldering the batteries together (as is done in commercial battery
packs). Soldering batteries together is more reliable, but consumer button-top
batteries now cost less than solder-tab batteries.
Warning! Soldering wires to the tabs on the battery holders is tricky because if you heat the tabs too much they will melt the plastic of the battery holder and the battery holder will be ruined. The holes in the tabs of the battery holder are too small for the wires from the connector harness or the fuse holder. Bend the tabs up and carefully enlarge the holes with a high speed drill using a 1/16" bit. Tightly twist the wire, remove strands if you must, until it will fit through the enlarged hole. Then remove the wire from the hole and tin it with solder. Insert the tinned wire through the hole and solder onto the tab. Don't hold the soldering iron on the tab for more than a few seconds.
Strain relief the wires onto the battery pack somehow; I drilled two holes in the side of the battery pack and ran a thin wire through the holes and ties the thicker wires against the body of the battery pack. You could also simply run a big cable tie all the way around the battery pack.
You also might be able to attach ring lugs to the wires and attach them to the rivets in the tabs, using 2-56 nuts, bolts, and washers, but I have not tried this method.
Click Images for Details
|
 |
|
10
AA Battery Holder Also available from Thomas Distributing but unclear if it has snaps or wires. |
10
D Cell Holder |
|
|
Return to Table of Contents |
|
e-mail webmaster |
|
Who
Can Build This
Construction
of this system should only be undertaken by a reasonably well mechanically
inclined person. You should be able to solder, know your
way around Home Depot and Radio Shack, and know how to use drills, Xacto knives,
Dremel tools, heat guns, etc..
|
|
Return to Table of Contents |
|
e-mail webmaster |
|
Parts
list (note that there are multiple possible sources for most of these items)
Watch your shipping charges if you order
from a bunch a different retailers.
| Item | One Source | QTY | Each $ | Total $ |
| Headlight (choice of one) | ||||
| Malibu 12V 25W sealed beam LV505 (PAR 36) | Home Depot | 1 | 2/15 | 15 |
| Malibu 12V 14W sealed beam LV504 (PAR 36) | Home Depot | 1 | 2/15 | 15 |
| Micro Beam Driving Lights | Auto Barn | 1 | 2/22 | 22 |
| Optronics QH-7CC MR16 Driving Lights | JC Whitney | 1 | 2/15 | 15 |
| Lamp Bulbs | ||||
| 20W and 5W MR11 lamps | atlantalightbulbs.com | 1 each | 2.45+5.60 | 13 |
| 20W MR16 lamps | Harrington Lights | Varies | $2.25 | |
| 10W MR16 lamps | Harrington Lights | Varies | $4.93 | |
| 5W MR16 lamps | e-go | Varies | $6 | |
| Taillight | ||||
| Xenon Strobe, Velleman HAA40 1.8W | All Electronics | 1 | 9 | 9 |
| Battery (choice of one) | ||||
| 12V 7.0AH Sealed Lead Acid (5.9#) | zbattery.com | 1 | 14 | 14 |
| 12V 5.0AH Sealed Lead Acid (4.1#) | All Electronics | 1 | 15 | 15 |
| 12V 5.0AH Sealed Lead Acid (4.1#) | zbattery.com | 1 | 11 | 11 |
| 12V 3.0AH Sealed Lead Acid (3#) | zbattery.com | 1 | 11 | 11 |
| 12V 2.3AH Sealed Lead Acid (2.2#) | zbattery.com | 1 | 10 | 10 |
| 2000 mAH AA NiMH cells | Thomas | 3 4-packs | 8.57 | 26 |
| 2000
mAH AA NiMH cells Watch shipping charges at lower priced retailers. Also check eFunctional.com if you're buying multiple packs ($8.73, but higher shipping). |
K&B | 1 10-pack | 10.79 | 10.79 |
| 4500 mAH C NIMH cells (generic) | Battery Store | 10 | 4.50 | 45 |
| 7500 mAH D NiMH cells (GP-Golden Power) | SterlingTek | 10 | 6 | 60 |
| 9000 mAH D NIMH cells (generic) | Battery Store | 10 | 7.50 | 75 |
| Charger (choice of one) | ||||
| Smart Sealed Lead Acid Charger Yuasa 12V900 | Yuasa | 1 | 42 | 42 |
| 12BC0500 Dual Rate Sealed Lead Acid Charger | zbattery.com | 1 | 14 | 14 |
| NiMH smart charger | Thomas | 1 | 45 | 45 |
| NiMH smart charger (w/Li-Ion ability) | Thomas | 1 | 83 | 83 |
| NiMH "dumb" charger | Turbocat | 1 | 18 | 18 |
| Switches and Fuses and Diodes | ||||
| SPST Pushbutton Switch | All Electronics/Radio Shack | 2-3 | 1 | 2-3 |
| SPDT switch (for dual battery option) | All Electronics/Radio Shack | 1 | 1.35 | 1.35 |
| Fuse Holder | All Electronics/Radio Shack | 1 | 0.85 | 0.85 |
| 10A Mini Blade Fuse | All Electronics/Radio Shack | 1 | 1 (3) | 1 |
| 1A Silicon Diode (for two switch option) | All Electronics/Radio Shack | 2 | 1 (15) | 1 |
| Connectors | ||||
| Weatherproof Connector Pairs | All Electronics/Radio Shack | 5 | 1 | 5 |
| DC Power Jack | Minute-Man | 1 | 1.81 | 1.81 |
| DC Power Plug | Minute-Man | 1 | 1.73 | 1.73 |
| Battery Holders | ||||
| 10 AA | Minute Man | 2 | 1 | 2 |
| 10 D (use 10 & 2 or 4 & 6) | Minute Man | 4+2 | 1 each | 6 |
| Enclosures | ||||
| Frame Bag to hold batteries | Nashbar | 1 | 3 | 3 |
| Ultracompact Enclosure to hold switches | Radio Shack 270-288 | 1 | 2 | 2 |
| Enclosure to hold two ten packs of AA cells | Radio Shack 270-1806 | |||
| Wire | ||||
| 18
gauge wire (16 gauge for >25W headlamps) The wires for the strobe can be 22 gauge as it draws only 150 mA. Use sheathed multi-conductor stranded wire. |
Home Depot | |||
| Heat Shrink Tubing | Home Depot/All Electronics | |||
| Cable ties | Home Depot/All Electronics |
|
|
Return to Table of Contents |
|
e-mail webmaster |
|
Tools
Some basic tools are
needed to construct a lighting system. A heat gun is best for shrinking heat
shrinkable tubing, but if you are careful you can use a butane lighter held a
safe distance from the tubing (don't set it on fire!).
| Soldering Iron |
| Electric Drill and bits |
| Screwdrivers & nut drivers |
| Heat gun |
|
|
Return to Table of Contents |
|
e-mail webmaster |
|
Electrical
& Mechanical Construction
The
system will be subjected to a lot of bumps, weather conditions, and stresses on
wires. Solder and crimp all connections for good electrical and mechanical connections.
Cover connections with heat shrink tubing when appropriate; no electrical tape
and no wire nuts! Stress relief all wiring, especially the thin wires
coming out of the strobe. Use lock nuts, lock washers, or Loctite, on bolts.
Fuses
Sealed lead acid and NiMH batteries
are capable of supplying large amounts of current. A short from + to - could
result in a fire as the wire insulation melts. You need to have a fuse as close
to the battery terminals as possible. Use a mini-blade fuse with a weatherproof
holder. The old spring loaded, inline, 3AG fuse holders are very troublesome and
in fact were a major point of failure in lighting systems that I used to
manufacture (the plastic tabs would break off one side and the two sides could
no longer be locked together). A 10 amp fuse is a good choice. Carry spare
fuses, but of course figure out the cause of the fuse blowing before replacing
it.
Click Images for Details
Wiring
Buy multi-conductor wire in a sheath. This is
available by the foot at Home Depot. Sheathed wire looks much neater than using
multiple single conductor wires and twisting them or cable tying them together.
For the headlights buy four conductor 18 gauge stranded wire. For the tail light
buy two conductor 22 gauge stranded wire. For the battery to the switch box buy 2
conductor 18 gauge stranded wire. For headlamps greater than 25W use 16 gauge
wire. If the headlamp wattage total is greater than 25W use 16 gauge wire from
the battery to the switch box; but for two 20W lamps you can run 18 gauge to
each from the switch box. These wire gauges apply to 12 volt systems. For a 6
volt system you will need larger gauge (smaller number) wire because you will be
drawing more current for the same wattage. If you use individual wires then
consider using black plastic wire loom over the wires.
Attach one connector to the battery with the male side fused.
Attach a connector to each lamp, the polarity on the battery, charger, and tail light matters. There is no polarity on the headlamps.
The three connectors for the lights are switched, the one for the battery is not. Be sure to get the polarity of the charger and battery connectors correct. Be sure to get the polarity of the switch box to tail light correct.
 |
 |
|
Three Switch Schematic |
Two Switch Schematic |
 |
 |
|
Three Switch Schematic
with switches and |
Single Pull Switch (check
current rating on pull switch) |
 |
|
Two Batteries with Switch |
|
|
Return to Table of Contents |
|
e-mail webmaster |
|
Back-Up
Lighting
It is a good idea to carry back-up lighting in case your battery
is exhausted, bulbs burn out, wiring gets screwed up, etc.. However I've got to
admit that I've never had my primary system fail since I am religious about
keeping the batteries charged. I've never had a lamp burn out since I began
using sealed beam quartz-halogen lamps (I do not over-voltage).
It is important to remember that these are strictly emergency back-ups. These flashlight headlights will not light up the road like a high power rechargeable headlight, and the rear strobe, while of sufficient intensity, flashes only about once per second, which is less than the optimal 120 fps. Be extra careful when limping home with low power lighting; go slower and don't assume that vehicles will notice you.
Here are a couple of suggestions for
emergency back-up lighting.
Front Back-Up
Experienced bicycle commuters carry a small flashlight for
repairs; the proper flashlight can also serve as back-up lighting with the use
of an inexpensive mounting system.
The $22 Streamlight 51013 TT-3AA Twin-Task Flashlight (3 AA batteries) and a
TwoFish Lockblock. This flashlight combines a Xenon bulb with three Luxeon LEDs,
and you can switch between the two light sources. A less expensive option is the
$10-11 2-AA cell Maglite, which lacks the Luxeon LEDs and is not quite as bright
because the Xenon bulb operates at a lower voltage. Both of these flashlights
offer an adjustable spot/flood beam for the Xenon bulb, which is very useful in
cycling applications.
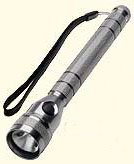 |
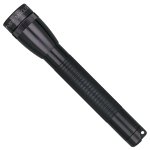 |
 |
| Streamlight 51013 TT-3AA | Maglite M2A016 | TwoFish Lockblock/Cyclopblock (shown with a non-recommended flashlight) |
| $22 | $11 | $6-11 (one for $6, three for $11) |
Rear Back-Up
The $14 Coghlan 0220 Emergency Strobe Light is the best back-up
to your 12 volt xenon strobe (assuming that you're using the Velleman strobe).
However you will have to figure a way to attach it to your bicycle or your
person. I suggest a Velcro strap through the wide eyelets. The Coghlan strobe
flashes at a slower rate than the Velleman strobe and hence is not suitable for
your regular rear strobe.
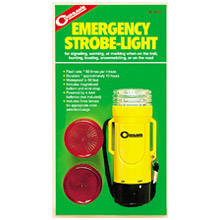 |
| Coghlan 0220 |
| $14 |
|
|
Return to Table of Contents |
|
e-mail webmaster |
|
Dynamo Powered Lights
The purpose of this web site is to explain
how to construct a high performance battery powered lighting system. I’ve gotten
some not-so-nice e-mails, and seen some bizarre-logic Usenet posts, that promote
dynamo powered bicycle lighting systems. These e-mails and posts also dispute
the need for the greater illumination provided by higher power lights. I decided
to create this section on dynamo powered lights that explains the pros and cons
of dynamo powered lights.
What’s Wrong With Dynamo Powered Lights
In my view, and in the view of many bicycle safety experts, dynamos are
usually not an attractive option. This is for reasons of both cost and
performance. Decent dynamo light sets are much more costly than decent battery
powered lights, and the battery powered lights have vastly superior illumination
than even the most expensive dynamo powered system.
What’s the Attraction to Dynamo Powered
Lights?
The attraction of dynamo powered lights is obvious; you are self-sufficient
and there is no limit to the duration that the lights can be used. Some
individuals believe that having to rely on mains power for bicycle lighting is
somehow cheating. Purists may be willing to spend the additional money for a
high end, 6 watt dynamo system, or live with the lower performance and lower
safety provided by a 3 watt dynamo powered system. Of course a few of these
people will hotly dispute the contention that a 3 watt system is less safe than
a higher power system, but the bicycle safety experts do not agree with this
contention.
Types of Dynamos
There are three types of dynamos available, each with different attributes.
Bottle Dynamos
Dynamos that rub against the tire rim have a few undesirable properties.
They are noisy, they can slip when wet, and they wear the sidewall of the tire.
The problem of slippage was solved on the higher end dynamos by the optional use
of a material that provides more friction with the tire (which increases the
wear even more). On a tire with thick sidewalls the wear is not such a big deal.
On a lightweight tire with thin sidewalls, the wear will require more frequent
tire changes. Bottle dynamos remain the most popular type.
Bottom Bracket or “Roller” Dynamos
This dynamo is mounted near the bottom bracket and contacts the tread of
rear wheel. This dynamo does not wear the tire sidewall, but the location near
the ground subjects it to dirt and moisture. Some touring bicycles have wiring
through the frame, from the bottom bracket area up to the headset, for bottom
bracket dynamos (I have an old touring bicycle with this feature). These dynamos
are no longer popular, but they are still available from Union and a light set
with this dynamo is $70 and includes a 2.4W headlight, and 0.6W tail light. see:
http://www.bicycletires.com/tek9.asp?pg=products&specific=jqhoeri0. There
are 6W bottle dynamos available, but they are very expensive.
Hub Dynamos
Dynamos encased in the hub of the wheel have made a resurgence recently.
These work in any weather and they do not wear the sides of the tire. They
produce some extra drag even when they are not engaged, but the additional drag
is minimal. Retrofitting a hub dynamo means building a new front wheel with your
existing rim and a new hub and new spokes.
Where did 3 Watts Come From?
How did 3W dynamo systems become so pervasive? In 1950, the German
government decreed that 3 watts was the amount of lighting required on bicycles,
and mandated a minimum of 3 watt generator powered lights. In fact they actually
required that the bicycle have a generator, though approved battery powered
lights could also be used.
In the past 53 years, much has changed in the world. Vehicle lights have increased significantly in brightness, culminating with the popular HID systems on luxury cars. Bicycle lighting has kept pace, with better and better lighting options, but increased brightness has come at a price. Dynamos are no longer able to provide sufficient power for bicycle lighting. In a way, this is sad, since self-sufficiency in terms of production of power for bicycle lights is gone.
Why can’t someone make a dynamo that produces
more power?
They can, but it would create so much drag that it would be impractical. A
human can produce about 125 watts of power by pedaling (one-sixth horsepower).
Most of the power input on a moving bicycle is used to overcome road resistance
and wind resistance. Even a 3W generator adds a noticeable amount of drag. A 20W
generator would be very heavy and create an undesirable amount of drag. If you
really want to experiment with this, a good starting place are the small 12V
generators (DC) which were used on older Volkswagen vehicles. These are
available for about $70 from JC Whitney. You’ll have to fabricate a way to drive
the shaft of the generator at the proper speed.
“Being Seen” Lights to Supplement a Dynamo
Powered Lighting System
If you choose to use a dynamo powered lighting system then it should be
supplemented with additional front and rear "being seen" lights, because dynamo
lights are particularly unsuited for “being seen.”
Front and rear xenon strobes are available at http://www.lightmanstrobes.com/hp_kit.htm. The batteries in these strobes should not be used once the strobe frequency begins to decrease. Using rechargeable NiMH AA cells is a good idea. Another option is an LED blinker, but most of these blinkers have undesirable characteristics that render them unsuitable for bicycle commuting. The best option for an LED blinker is the $40 Real Lite, described above.
Of course, once you add strobes and LED blinkers, you're back to batteries anyway, and have spent far more money than necessary.
What the Experts Say about
Dynamos versus Battery Powered Lights
Here are some statements
regarding low wattage and generator lights from bicycle advocacy organizations:
"One of the oldest lighting systems is the generator. This type of lighting works off a generator (or dynamo) that is powered when it makes contact with the bicycle's tire. A generator system is often set up to power a headlight and a taillight. These systems are reliable, but often lack the power to really light up the road. Generators are more popular in Europe than in the United States." Bicycle Federation of Wisconsin
"If you want to cycle at low speeds in areas with street lights, other ambient lighting, or when there's a full moon on a cloudless night, a low wattage light is OK. If you actually want to see obstacles in darker areas, you need a more powerful light, from 10 to 30 watts or more. With the added power come a couple of penalties, much higher costs and more weight. These lights can run from $70 to well over $200. Their weights, mostly from the batteries (often rechargeable NiCads) can go from 2 to 3 pounds." Sacramento Area Bicycle Advocates
"If you are doing city riding, you need more light than country riding. 6 watts is adequate on a dark country road, but would be totally overpowered in a city environment." Ice Bike This article does go on to say, (regarding generator lights): "They attempt to compensate for this small output by having a much more sophisticated light bulb technology, producing a very focused beam just where you need it." The problem with this statement is that you'd be hard pressed to find a more focused beam than an MR16 spot beam.
...a cyclist operating at 15 mph can see well enough with less than 600 candlepower (e.g. 12 watt halogen), and a cyclist operating at 7.5 mph can see far enough in with less than 150 candlepower (e.g. 3 watt halogen). The light provided by a bicycle headlamp may be focused into a narrow beam for maximum range, or may be spread out for better peripheral vision. A three watt lamp can be focused into a beam suitable for high speed cycling on the darkest roads, but will not give much illumination of turns. North Carolina Bicycle Coalition
"For commuters, the best front light is the very bright rechargeable lamp. For the day tourer, it's important to carry a small, battery-powered lamp for the trip that ends up finishing after daylight has ended. Unfortunately, many of the lights sold for this purpose are inadequate. For long-distance travelers, those who ride long distances in the country at night, or those whose habits are sporadic, a generator front light is bright and always available for use." From Ken Kifer's bike pages.
"There are several types of bicycle lights available. In the U.S., most commuters choose to use high power halogen lights, which operate from a rechargeable battery. In parts of Europe, low power lights that operate from a dynamo are still popular, but are slowly being replaced by safer, higher power, battery operated halogen lights. Front LED lights are useful for being seen, but do not project a good beam for illuminating the road. For rear lights, LED flashers are popular in the U.S., but illegal in most other countries. A better choice for a rear lamp, where flashing lamps are legal, is a xenon strobe, because it is less directional. Many cycle commuters build their own lighting systems with commonly available lamps, batteries, and chargers." From Wikipedia.
What’s the Bottom Line?I am normally very much the purist and try to be self-contained. I tour with panniers, carrying everything. I stay away from aluminum frame bicycles, non-lugged frames, and threadless headsets. I wish that it were possible for inexpensive, dynamo powered lights to provide adequate illumination for commuting, but it isn't. I recognize that few people can afford nearly $400 for a 5W dynamo light. If I were going on a long tour and expected to do extensive night riding then I would splurge and buy the 12 volt, 6 watt dynamo, because it would not be practical to charge batteries. For commuting, where there is no problem charging batteries every night, a high power quartz-halogen set-up is more economical.
Best Dynamo--Busch-Muller Dymotec
S12
The
best quality bicycle generator light set is based on the
Busch-Muller Dymotec S12 12 volt dynamo. This dynamo can power a 5W headlight
and a 1W tail light. The price for this system is quite high. The dynamo sells
for $247, the headlight is $64, and the tail light is $54, for a total of $366.
Available in the U.S. from Peter
White Cycles. This dynamo works even with wet tires (a big problem with
dynamos is slippage when wet) due to its clever friction wire material
(replaceable). There is also a 6 volt version of this dynamo, but it only
produces 3 watts which is really not sufficient for road riding in urban
environments.
3 Watt Dynamos
The less expensive 3W generators are
used to power a 2.4W headlight and 0.6W tail light. However you can eliminate
the taillight and increase the headlight to 3W. Then add a battery powered rear
xenon strobe or Real Lite LED flasher. You should also add a front xenon strobe
if using a 2.4-3W headlight; this will solve the "being seen" problem inherent
to the very low power headlamps, a 2.4-3W light is not bright enough to stand
out in a sea of bright lights.
A 6 volt, 2.4W spot beam headlamp, as typically used with lower cost generator lights, is certainly better than no lighting at all. It is not as nearly as good as a system that provides both wide angle and spot beam coverage at higher candlepower. The 2.4W spot beam is especially good for illuminating the road directly in front of the bicycle (for a short distance, suitable for slow riding), but is especially poor in terms of being seen, where a wider beam pattern is necessary, and is not good for high speed riding. As stated above, if using a 2.4-3W dynamo powered headlamp then consider adding at least a battery powered clear xenon strobe to the front of your bicycle as well.
Click Images for Details
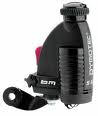 |
|
| Busch-Muller Dymotec S12, 12 volt 6W dynamo. Available from Peter White Cycles. Very expensive. | Note the low power headlamp
powered by the dynamo on the front wheel. Also, this bicycle has a skirt
guard, which is common on Dutch Roadsters, but darn near impossible to
find in the U.S.. While generator lights are widely used on Dutch
cyclepaths, this does not necessarily make them a viable choice in the
U.S..
While riding without clothes is common in rural areas of the Netherlands (in warm weather), it is not recommended that you try this in the U.S.. |
A selection of mid-quality generator lights based on Sanyo and Sanden generators are available for $40-60 from International Bike Lights, http://www.bikelite.com/ Several of these models feature adjustable beams which is a very good feature.
Harris Cyclery sells the Shimano-Nexus generator hub, the 6 volt Busch & Müller generators, as well as a selection of lights that can be used with these generators.
The mid-quality Union 6 volt generator light set is available at: http://store.bicyclerevolution.com/unbicliggens.html for $50, and for $33.25 from Third Hand.
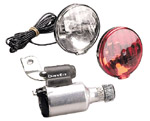
A low end 12 volt generator is available for $16 at: http://doityourself.com/store/6825749.htm. This comes with low quality lights, and the dynamo isn't so great either. No voltage regulator. Also sold at many hardware stores and toy stores.
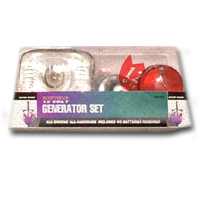
Bottom Bracket Union Generator Light Set
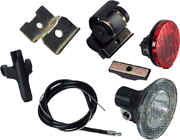
Flashlights
Maglight flashlights can be an
alternative to a dedicated bicycle light. The adjustable beam pattern (spot to
flood) is
particularly useful for bicycling. I would not advice going any larger than a two C cell flashlight
because you don't want a lot of extra weight on your handlebars. On the other
hand, I would not advise going any smaller than a two C cell flashlight either
because a two AA cell flashlight is not bright enough. A Maglight can be a good
light to use on cycling paths where it is impolite to use higher power lights.
Click Images for Details
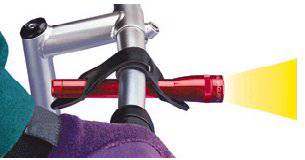 |
|
|

|
|
Nite Ize Lite Ride. Holds an AA Maglight |
TwoFish Cyclop Block flashlight holder, holds up to a C cell flashlight, Model LT2000 |
This
Japanese cycle commuter (left) uses a Maglight flashlight on her handlebars.
She also
has a bell on her handlebars which is much nicer than yelling "on your
left" (or "on your right" in Japan) at other cyclists or at pedestrians walking on multi-use paths.
At home (right), this woman uses the same bicycle indoors, as an exercise bike, by placing it on a magnetic resistance track stand. Nude exercising (indoors) is the norm in Japan. Note that one of these photos is reversed. |
|
Adjustable
Focus Headlights
The adjustable beam pattern (spot to
flood) of a Maglight is very nice, but it is impractical to mount a big 5 D cell
Maglight on your handlebars for reasons of both size and weight. I searched for
an adjustable beam lamp where the lamp head is separate from the battery. The
solution is the Rheohead from NLC products. You can buy just the lamp head for
$38, but it is also available with a battery, charger, lantern mount, and cap
mount for $65 (Nite Sport II). It is primarily intended for hunters, but it
would make a good bicycle light as well. It uses a 4AH, 6V SLA battery. I
believe that the headlamp is about 4 watts, not great but better than most
dynamo lights.
Click Image for Details
Handlebar Mount
Lights with Integrated NiMH Batteries
You’ll pay big bucks for a decent handlebar
mount light with integrated batteries, but there are two available, the
Performance ViewPoint Lazer, $70, 6 watts,
NiMH batteries, and the Specialized Astro 5.0, $50, 5 watts, NiMH batteries.
Bicycles
with Built-In Lights
Commute bicycles often come equipped
with a generator and lights. The best generator is the one that is inside the
hub of the front wheel, as is available on one of the Breezer models, and on the
Specialized Globe. There are
also some retro cruiser type bicycles which come with useless battery powered
lights. You can see a selection of commute bicycles at http://commutebikes.com
(one of my sites).
Click Images for Details
 |
 |
|
|
|
Breezer Uptown has a Shimano front hub dynamo with front and rear lights. |
Specialized Globe has a Shimano front hub dynamo with front and rear lights. | Roadmaster Luxury Liner reproduction has a built-in battery powered light, but it's just a toy-like light. | This cyclist, riding a reproduction of a classic cruiser, is not serious about riding at night despite the battery powered light on the front fender and her cycling cap hanging on the handlebars. It almost looks like she's posing. |
|
|
Return to Table of Contents |
|
e-mail webmaster |
|
HID Lights
Unquestionably, HID (High Intensity
Discharge) lights, based on Metal Halide technology, provide the greatest
efficiency. Unfortunately, it is quite complicated to construct a homebrew HID
lighting system, hence I have not included the plans for one. CatEye makes a
very fine HID lighting system. If you can afford such a system then go for it.
As Marty Goodman wrote: "With vastly more light available, night bicycling is qualitatively far safer. The road can be lit both further ahead and, even more important, far more brightly to the sides of the bicycle."
LED Lights
LEDs are very efficient, but you require a large quantity of them to equal
the intensity of a conventional filament based bulb. Some LED headlamps to use a
number of LEDs, but the problem with this approach is that it is difficult to
focus multiple light sources into a single beam. In the future, there may be a
very high intensity white LED available, but this is not the case at this time.
|
|
Return to Table of Contents |
|
e-mail webmaster |
|
Flags
One very good safety device, widely used all
over the world except the U.S., is the flexible shaft reflector that extends out
to the side of the bicycle. It has been proven very effective at encouraging
vehicles to not come too close to the bicycle, but if a vehicle hits the
shaft it will simply bend or break. These can be ordered on-line from Canada, or
in the U.S. from http://www.velomobiles.net,
or from me. I have added some better photos of the flash flag, including a
close-up of the mounting clamp, and a scan of the instruction sheet (click
here). Flash Flags can be mounted to the seat stay, or to a rear rack
(with a rubber insert).
Note: You can order a Flash Flag from me for $5 each, plus $4 flat rate shipping (same shipping charge for up to 5 flags). California residents add appropriate sales tax for your county. I'm not making money on these as they cost me $4 each wholesale. E-mail me for details.
The response to my sale of Flash Flags has been overwhelming. Please be patient as I get re-supplied from the manufacturer. I only ship these out once a week as this is not my full time job!
Cl ick Images for Details
|
|
|
Flash Flag |
|
|
Return to Table of Contents |
|
e-mail webmaster |
|
Sound
Okay,
we've discussed lighting, now what about sound? The prepared and properly
equipped bicyclist has both a
polite bell and an obnoxiously loud horn.
Bells
A
bell is much nicer than yelling "on your left at pedestrians
walking on multi-use paths. Yelling "on your left" often causes
pedestrians to move to their left, directly into your path (which is actually more dangerous than just silently
weaving around them before they have a chance to do anything stupid). I'm partial
to the classic Chinese spinning bell. Riding nude is not advisable in the U.S..
Click Images for Details
|
|
|
|
Classic Chinese spinning bicycle bell. $4 |
This lovely cyclist just rented a bicycle at the bicycle rental shop in the background of this picture. The shop wisely includes a bell so its customers can avoid collisions with pedestrians and other cyclists. During the summer, nude cycling is common in European beach towns; helmet use is not. |
Horns
A loud horn can come in handy on a bicycle to wake up clueless motorists
chatting on their mobile phones as they cruise through red lights, exit shopping
centers without looking for bicycles, and back out of driveways into the bike
lane without
carefully looking for bicycles. Always be prepared to stop or take evasive
action if the motorist doesn't respond to the horn, but I find a loud horn very
effective.
Air Horns
The Airzound
II is designed for bicycles (be sure not to get the older Airzound model), and
you refill the air bottle with a bicycle pump. The downside of the Airzound II
is that it is yet one more accessory that uses a water bottle cage, and you have
to run the tubing from the air bottle to the handlebars. You might consider one
of the Minoura handlebar water bottle cage mounts for the Airzound II (a bottle
of air does not weigh much).
Boat supply stores will sell the small air-powered horns. You can fasten it to your handlebars with two hose clamps (one around the can, one around the handlebars. Refills are available, but they are not much less than a complete new horn. As a pedestrian these horns are useful as well, especially in areas where red light and stop sign running is rampant. These horns are not very rugged and the plastic horn often snaps of the air nozzle of the can.
Click Images for Details
|
|
 |
|
|
115 dB |
Minoura Handlebar Cage Mount |
Mini
Air Horn
dB not specified |
| $21 | $7 | $8 |
12 Volt
Horns
12 volt electric horns are available for
about $11, and if you already have a 12 volt lighting system then they are a
viable option (but you'll have to carry your battery around even in the daytime
so consider a second, smaller battery for daytime rides). You will also need a horn button that can be mounted to the handlebars
(can be purchased at an auto parts store, Walmart, or on-line). You could also add another switch
to your lighting switch box for the horn (momentary action, normally open,
sufficient amperage rating), but the switch box needs to be mounted on the
handlebars.
Small 12 volt sirens also can function as a horn. Does anyone remember those
mechanical tire-driven sirens for bicycles where you pulled on a chain to engage
the siren? How about Vroom motors?
Click Images for Details
 |
 |
 |
 |
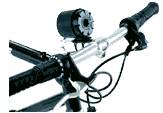
|
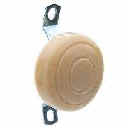 |
|
12
volt Horn
130 dB, 3.625" diameter |
12
volt Horn
125 dB, 3-1/2"H x 4"L x 2-1/2"D |
12
Volt Compact Horn
100 dB Wolo Model 260-2T (black) Sounds like the horns on small cars |
12
Volt Siren
dB not specified, but newer model is 125dB. Extremely loud, and a short blast sounds like a high tone horn. I installed one of these on my commute bicycle and I have to disconnect the battery at work for fear of people coming into my office and pushing the horn button. |
Night
Sun Commuter Horn
115dB |
Horn Button |
| $13 | $13 | $11 | $9.50 | $40 | $2 |
|
|
Return to Table of Contents |
|
e-mail webmaster |
|
Cell Phone
Charging
Attach a 12V cigarette lighter socket to your 12-14.4 volt
battery, in parallel with the connector(s) for your lights (after the fuse). Now
you can use a standard cigarette lighter charger for your cell phone.
 |
| Philmore TC600 |
| $2 |
|
|
Return to Table of Contents |
|
e-mail webmaster |
|
Wear a
Helmet
While I am not a helmet zealot,
wearing a helmet is a very good idea. This is one area where I take exception
with the views of the late Ken Kifer.
|
|
|
This Swedish poster encourages the use of a helmet. Translation: "As a cyclist you belong to the naked, unprotected group in the traffic. You don't have a metal shield or a safety belt to protect you. The most important thing you've got to protect is what you have inside your helmet." Personally I think that the guy in this picture should be watching where he's going rather than gazing lovingly at his companion's breasts. Note the generator lights on the front wheels and the skirt guards on the rear wheels. |
![]()
|
|
Return to Table of Contents |
|
e-mail webmaster |
|
Caffeineation
While proper lighting is important
for commuters, proper caffeineation is also
crucial. Please visit Bicycle
Coffee Systems for information on how to keep properly caffeineated
during your ride.
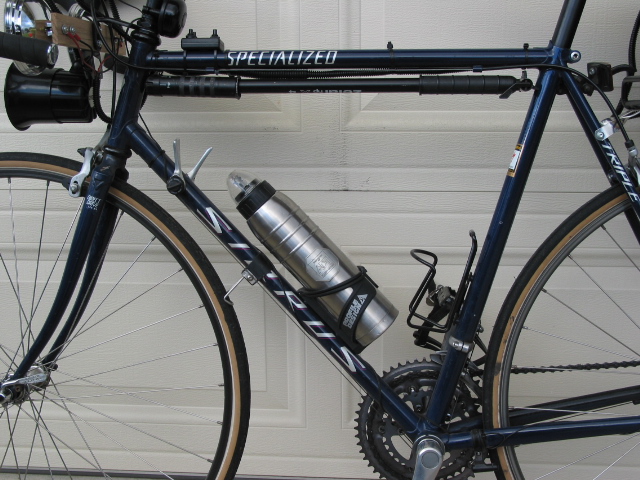 |
| My commute bicycle with a Jung-Won JSB-700 Stainless Steel Vacuum Bottle inserted into a Profile Cage |
|
|
Return to Table of Contents |
|
e-mail webmaster |
|
Commute Bicycles
If you are looking for the proper
bicycle on which to commute, please visit Commutebike.com.
Don't depend on the generator lighting systems used on these bicycles.
|
|
Return to Table of Contents |
|
e-mail webmaster |
|
Conclusion
It is not difficult to construct
a high performance bicycle lighting system, and it's much cheaper to build your
own as long as you are reasonably mechanically inclined.
|
|
Return to Table of Contents |
|
e-mail webmaster |
|
Links to other Bicycle Lighting Sites
There are a tremendous number of bicycle lighting web sites. I have listed the ones which I consider to be the best and there are links to others on the first one I listed.
Mike Bentley's Bicycle Headlight Links
History of Electric Lighting Technology
Bicycle Lights, One Cyclist's Approach to Being Seen at Night (from the Bicycle Helmet Safety Institute)
Be Visible, Night and Day (from Ken Kifer's Bike Pages)
Audax Bicycle Lighting Resource Page (a lot of good information, but a lot of incorrect information as well)
|
|
Return to Table of Contents |
|
e-mail webmaster |
|
About the Author
Steven M. Scharf is Earth's leading expert on bicycle lighting. An electrical engineer by trade, he enjoys cycling and
designing lighting systems. He lives in Silicon Valley and works for a small semiconductor company. He has bicycled all over the world, including Canada, Germany, Korea, Russia, Thailand, Japan, Taiwan, and China. See a list of his bicycle related web sites at
http://www.nordicgroup.us/hosted.htm.
|
|
Return to Table of Contents |
|
e-mail webmaster |
|
![]()
![]()

![]()

|
|
Return to Table of Contents |
|
e-mail webmaster |
|
If you found this
site useful and were going to order from one of these merchants anyway,
then it would be greatly appreciated if you use these links to enter the
merchant's site:
Click Images for Details


|
|
Return to Table of Contents |
|
e-mail webmaster |
|