|
|
|
| Mini-Blade Fuse Holder with Cover | Mini-Blade 10 Amp Fuse |
| $0.85 | 3/$1 |
Electrical & Mechanical Construction
The
system will be subjected to a lot of bumps, weather conditions, and stresses on
wires. Solder and crimp all connections for good electrical and mechanical connections.
Cover connections with heat shrink tubing when appropriate; no electrical tape
and no wire nuts! Stress relief all wiring, especially the thin wires
coming out of the strobe. Use lock nuts, lock washers, or Loctite, on bolts.
Tools
Some basic tools are
needed to construct a lighting system. A heat gun is best for shrinking heat
shrinkable tubing, but if you are careful you can use a butane lighter held a
safe distance from the tubing (don't set it on fire!).
| Soldering Iron |
| Electric Drill and bits |
| Screwdrivers & nut drivers |
| Heat gun |
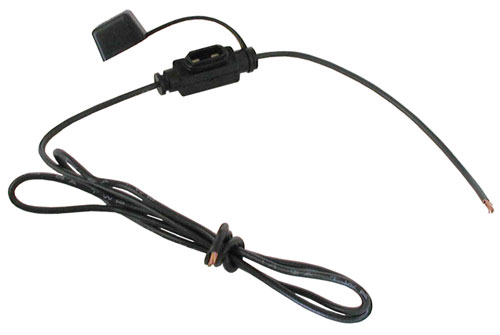
Fuses
Sealed lead acid and NiMH batteries
are capable of supplying large amounts of current. A short from + to - could
result in a fire as the wire insulation melts. You need to have a fuse as close
to the battery terminals as possible. Use a mini-blade fuse with a weatherproof
holder. The old spring loaded, inline, 3AG fuse holders are very troublesome and
in fact were a major point of failure in lighting systems that I used to
manufacture (the plastic tabs would break off one side and the two sides could
no longer be locked together). A 10 amp fuse is a good choice. Carry spare
fuses, but of course figure out the cause of the fuse blowing before replacing
it.
Click Images for Details
Wiring
Buy multi-conductor wire in a sheath. This is
available by the foot at Home Depot. Sheathed wire looks much neater than using
multiple single conductor wires and twisting them or cable tying them together.
For the headlights buy four conductor 18 gauge stranded wire. For the tail light
buy two conductor 22 gauge stranded wire. For the battery to the switch box buy 2
conductor 18 gauge stranded wire. For headlamps greater than 25W use 16 gauge
wire. If the headlamp wattage total is greater than 25W use 16 gauge wire from
the battery to the switch box; but for two 20W lamps you can run 18 gauge to
each from the switch box. These wire gauges apply to 12 volt systems. For a 6
volt system you will need larger gauge (smaller number) wire because you will be
drawing more current for the same wattage. If you use individual wires then
consider using black plastic wire loom over the wires.
Attach one connector to the battery with the male side fused.
Attach a connector to each lamp, the polarity on the battery, charger, and tail light matters. There is no polarity on the headlamps.
The three connectors for the lights are switched, the one for the battery is not. Be sure to get the polarity of the charger and battery connectors correct. Be sure to get the polarity of the switch box to tail light correct.
 |
 |
|
Three Switch Schematic |
Two Switch Schematic |
 |
 |
|
Three Switch Schematic
with switches and |
Single Pull Switch (check
current rating on pull switch) |
 |
|
Two Batteries with Switch |