 |
 |
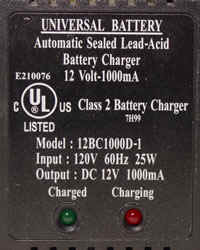 |
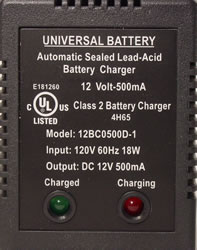
| Yuasa 12V900, $42 | 12BC0500 Dual Rate Charger, $13.45 | 12BC1000 Dual Rate Charger, $13.45 |
Different battery types use different types of
chargers. There actually is a charger that can do both Lead-Acid and NiMH
batteries (as well as nearly every other type of rechargeable battery), but it
is very expensive.
Lead Acid
For lead acid batteries the best choice is the Yuasa 12V900, though
the dual rate charger is also fine, and 1/3 the price. Do not use a charger with
too high of a charging current for your battery as it will damage the battery.
You can choose a lower charging current but it will take longer than necessary
to charge the battery. Usually you want to be able to charge your battery
overnight, i.e. in eight to ten hours. It would take ten hours to charge a 5AH
battery with a 500mA charger, five hours with a 1000mA charger.
Sealed Lead Acid Charging Rate Table
| AH Range | Maximum Charging Current |
| 2.0-10AH | 500mA |
| 4.0-11AH | 900mA |
| 4.5-12AH | 1000mA |
| 10-20AH | 2000mA |
Click Images for Details
NiMH
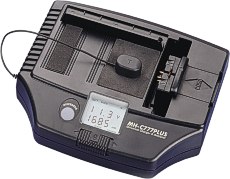
NiMH chargers that can charge ten batteries at
once are the Maha
MH-C777 PLUS, and the Maha
MH-C777. The MH-C777 PLUS will charge up to twelve NiMH or NiCad
batteries, as well as Li-Ion batteries. These chargers do not charge lead acid
batteries.
Click Images for Details
|
|
 |
|
No Photo Available |
|
MH-C777,
$45 This is the cheapest "smart" charger. It will charge up to 13.2 volt battery packs. If you're planning to use 12 NiMH batteries (14.4V) then don't use this charger. |
MH-C777
Plus, $83 This smart charger is probably the best choice since it will charge up to 14.4V NiMH packs, plus it will charge most every battery type in your home except lead-acid. |
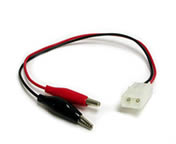
Used with both Maha chargers to connect to battery holders (included by many resellers, extras available). Cut off the alligator clips and attach the mating connecter for your battery. |
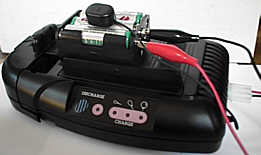
TurboCat 13.2 Volt Ni-Cad/NiMH Battery Charger. $18. This is a "dumb" charger, and will damage the batteries if left connected for a long time after the batteries are fully charged. Use with a timer if you want to charge the batteries while you're sleeping. |
Charger to End All Chargers (charges all kinds
of batteries)
The ultimate charger is the GPMM 3150
Electrifly Triton DC Computerized, Charger, Discharger, and Cycler.
Designed primarily for radio-controlled toys, this
unit will charge 1-24 NiCad or NiMH batteries, 1-4 Li-Ion or Li-Po batteries,
and 6V, 12V, and 24V lead acid batteries. It requires connection to a car
battery, or to a hefty DC power supply (13 amps). $128 without a DC power
supply. You'll be at over $150 by the time you buy a power supply and pay for
shipping. You actually can use a much lower amperage power supply if you are not
trying to charge a lot of batteries at a fast charge rate. This charger is
capable of charging at 28.8 volts, 5 amps, which would be 144 watts, which would
require an input current of 12 amps at 12 volts if there were no losses, hence
the 13 amp input requirement (156 watts). If you are charging a 14.4 volt pack at a 3AH
rate, then a 5 amp 12 volt (60 watt) power supply is sufficient. The charger will accept
10.5-15 volts input.
Click Images for Details
 |
 |
|
|
Electrifly Triton $128 |
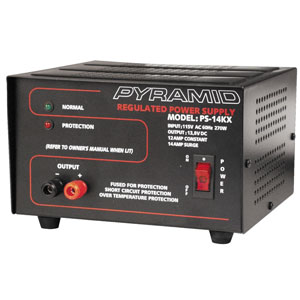
Pyramid PS-14KX 13.8 volt 12 amp power supply (153 watts) |
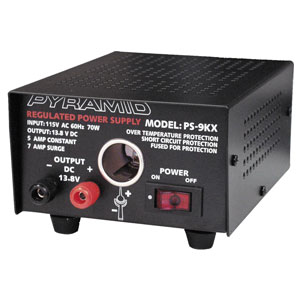
Pyramid PS-9KX 13.8 volt 5 amp power supply (69 watts) |
Build Your Own Charger
You can build your own smart charger with the Maxim MAX712 or MAX713integrated
circuit. They have evaluation kits, the MAX712EVKIT, and MAX713EVKIT, but I have
not found a way to buy one, and I think that they are quite expensive. The
MAX712 is a linear-mode charger and requires less external components. The
MAX713 is a switching-mode charger and generates less heat, but is a more
complex design. I only found this device since we are looking at this device for
a reference design for something I'm doing at work, that the newer higher
capacity NiMH cells make possible (previously we only looked at Li-Ion
batteries, but Li-Ion batteries are very costly and are temperamental.
http://pdfserv.maxim-ic.com/en/ds/MAX712EVKIT.pdf
http://pdfserv.maxim-ic.com/en/ds/MAX713SWEVKIT.pdf
These chargers will charge up to 16 NiMH cells.
Unattended Sequential Charging of Multiple NiMH Battery Packs with a Single Charger
Since NiMH chargers are so expensive it is not practical to buy a seperate
charger for each battery pack used in a parallel battery configuration. Yet many
people want to charger multiple NiMH packs overnight without human intervention.
To do this you need to be able to automatically switch the charger from one
battery pack to another at a programmable interval. You won't actually be able
to switch when a pack is fully charged, you'll only be able to switch at
a specified time interval.
Sprinkler Timer
Use a multi-zone sprinkler timer that activates relays (one at a time) that connect each battery pack to the charger.
The Lawn Genie LD6 timer can be used. This timer drives 24VAC solenoid valves but can also
drive 24VAC relays. The manual is at: http://www.lawngenie.com/PDF/LD4-LD6.pdf.
The LD6 is available for $29 from http://www.easycart.net/ecarts/dripsupply/ELECTRIC_TIMERS.html.
The timer will drive 24VAC relay coils, up to 250mA.
For 24VAC relays, go to http://www.minute-man.com/acatalog/ and search for R10-11A10-24.
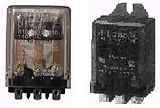
You'll need to buy one relay for each battery pack, i.e. if you're sequentially charging
three battery packs over night then you'll need three relays. Unfortunately, 24VAC relays
are not cheap; $9.50 each from Minuteman. You could add a bridge rectifier and a
filter capacitor to each channel and use 24VDC relays which are very cheap. You
don't really need double pole relays, connect the - side of all the battery
packs together and to the - side of the charger, and just switch the + side.
24VDC relays are available for as little as $0.50 each from All Electronics. Add
an LED with a 1.2K ohm dropping resistor to the output of each bridge rectifier
so you know which relay is energized. Using DC relays means more work
constructing the system, but a big savings in cost. Be sure to wire the bridge
rectifiers properly. I have not tested this circuit.
Program the timer to only have one zone on at a time, sequentially, for the number of hours
you need. I.e. if charging three battery packs over a 12 hour period, program each zone to be on
for four hours (four hours is the maximum time per zone, but each zone can be programmed to come
on twice per day so you could go up to eight hours). Be sure not to overlap zone times, there
is nothing that prevents multiple zones from being programmed to be on at the same time; you
have to program things correctly.
The diagram below shows the sprinkler timer hooked up to three relays and three battery packs. This can be expanded to up to six battery packs.
Mechanical Cam Timer
A cruder solution can be constructed with an old fashioned mechanical cam timer,
but these are very difficult to find. Each cam drives a micro-switch. You set
the cams to turn the switch on and off at specific times in the cycles. For
example, on a 12 hour timer with four battery packs to charge, you would set the
cams for three hours on, nine hours off, and stagger the turn-on times by three
hours. You do not need any relays, simply connect the negative side of all the
battery packs to the negative side of the charger, and switch only the positive
side.
Battery Holders
If you want to make up battery packs with standard button-top NiMH cells,
you will need to obtain battery holders for the cells. These are available from Minute-Man
Electronics. You can also buy solder-tab type of NiMH batteries and make
up backs by soldering the batteries together (as is done in commercial battery
packs). Soldering batteries together is more reliable, but consumer button-top
batteries now cost less than solder-tab batteries.
Warning! Soldering wires to the tabs on the battery holders is tricky because if you heat the tabs too much they will melt the plastic of the battery holder and the battery holder will be ruined. The holes in the tabs of the battery holder are too small for the wires from the connector harness or the fuse holder. Bend the tabs up and carefully enlarge the holes with a high speed drill using a 1/16" bit. Tightly twist the wire, remove strands if you must, until it will fit through the enlarged hole. Then remove the wire from the hole and tin it with solder. Insert the tinned wire through the hole and solder onto the tab. Don't hold the soldering iron on the tab for more than a few seconds.
Strain relief the wires onto the battery pack somehow; I drilled two holes in the side of the battery pack and ran a thin wire through the holes and ties the thicker wires against the body of the battery pack. You could also simply run a big cable tie all the way around the battery pack.
You also might be able to attach ring lugs to the wires and attach them to the rivets in the tabs, using 2-56 nuts, bolts, and washers, but I have not tried this method.
Click Images for Details
|
 |
|
10
AA Battery Holder Also available from Thomas Distributing but unclear if it has snaps or wires. |
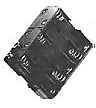
10
D Cell Holder |